JMRI: OperationsPro™
The JMRI Operations program allows you to create computer generated train Manifests for your
railroad. A train
Manifest details the work that a crew will
perform during an operations session. The Manifest provides a list of car pick up and set outs
and shows where the cars are located and where they should be eventually positioned on the
railroad. The program allows you to enter a roster of
cars and
locomotives, define
locations (stations) on
the railroad, and
routes for
trains to travel. The
car roster includes information about the car, including road, number, type of car, color,
length, weight, load, date built, and owner. Trains are assigned routes that define locations
or stations where cars can be picked up or set out. Features include the ability to control
what car types, roads, and car loads a train, location or industry can service, the available
track space for a location, and the maximum length the train can be between any two locations
in the train's route.
Locations can have spurs, yards, staging and classification/interchange
tracks. Spurs are used to service industries, and can optionally have schedules
assigned to them which allows for very fine and realistic control over car movement and
loads. Trains can be configured to require a caboose or car with Flashing Rear End Device
(FRED). The program generates Manifests for each train and switch lists for any location. A
switch list for a location shows the work for all of the trains
that will visit that location. The program can also place icons
representing trains on a JMRI panel. The icon can be taught to move in the panel along with
the train from location to location.
OperationsPro™ lets you create realistic prototypical car movements through the
optional use of railroad divisions. Cars are returned to
their home division when their loads are removed, or when a new
load is provided by an industry in a foreign division.
OperationsPro™ is included in the JMRI suite of Tools and can be found under the
main menu heading "Tools⇒OperationsPro".

Table of Contents
[Click to go back to TOC]
New User Advice
OperationsPro™ has been designed to create car movements that make sense to you and your
crew. There are many options and features that the program provides and it can be a bit
overwhelming, but you can get started by simply following the steps in the
Quick Start Help. If you've never used a computer program to
generate a train Manifest or switch list, we recommend that you load and use the
demo files provided. Please read the
build
reports for the demo trains in very detailed mode, even if they build which they should
since they are demo files. You should make changes to the demo database and see what the
results are. This is your chance to experiment with the program before you enter your own
data. You might want to print and save a demo train Manifest and build report for later
reference.
After playing with the demo files, you can reset the database
and begin entering your own data. We strongly recommend that you get your trains to build to
your liking without the use of staging tracks, classification/interchange tracks, and
especially schedules and custom loads. We find that users
attempting to use the advanced features before they understand how the program works tend to
need a lot of help getting the car movement they desire. So start off small and get your
trains to build correctly, read the build reports in the very
detailed mode for your trains, even if they build to your liking. You need to get proficient
with the build reports before you begin using the more advanced features of the
OperationsPro™. Once you get your trains to build correctly, you can add staging
tracks if you've designed staging into your layout. The other three advanced features are
completely optional and aren't needed for good car movement. The next track type to
experiment with could be Classification/Interchange Tracks. Once
you get classification/interchange tracks to work correctly, you could then introduce Schedules for your industries and custom loads for your cars. If you
do decide to use schedules, the first thing to understand is that you don't need schedules
for all of your industries. So again start off small and only do a couple of industries and
see what the results are. Adding schedules can not increase car movement, and in most cases
will reduce car movement! So our advice is start off using the basic features of the program
and later once you get good car movement, try the more advanced features.
One question that comes up often, is whether to enter the arrival and departure tracks into
the operations program, and the simple answer is that you don't need to enter them into the
program. Although it is possible to specify the A/D tracks in the program, it complicates
the car movement by requiring an "extra" session to move the car from arrival track to the
car's destination, and from the car's origin track to the departure track. Most find that
allowing the program to pull a car directly from a train sitting on the "arrival" track and
eventually spot the car to its destination, is the best method when using the program. Same
goes when building a train using the "departure" track, car pulls directly into the train
rather than to a specific departure track makes the operations run more smoothly. By not
specifying the A/D tracks, you're letting your crew,
and not the program, decide which tracks to use when servicing a train.
Display and Help
To adjust the display font size or appearance of the JMRI windows, select "Preferences..."
found under "Edit" (on Windows/Linux) or PanelPro (on macOS) in the main window menu bar. The
JMRI: Preferences Pane will appear with
options to make
Layout
Connections, change the window
Display
appearance and font size, and many other settings including the
Railroad Name. You can also
configure JMRI to automatically open any of the operation windows on
Start Up by adding a "Perform
action".
Most JMRI windows have as part of the menu bar the "Help" option. Select "Window Help.." to
get information about the window you're using. Detailed step by step JMRI Operations How-To
Instructions are available on the JMRI.org site.
British Railways
OperationsPro™ supports an alternate set of railway terminology for our British
modelers. To use British terminologies, change the JMRI Display Locale to English (United
Kingdom). With British terminology, trains travel Up/Down and East/West, and some British
railway names and wagon types are provided to get you started.
Multiple Layout Support
You can create and manage multiple layouts using OperationsPro™. From the main menu bar
under "Edit" select "Preferences..." then "Config Profiles". Create a new
Configuration Profile for each
layout that you want to manage. The database for each layout is unique and not shared with the
other layouts. You can find each set of operation files under JMRI⇒ "profile name" ⇒
operations.
Operations Files
OperationsPro™ uses up to six XML files to store the operations database. You can find
these files by selecting from the main menu bar, Help⇒File Locations, a new window should
appear showing where your JMRI user files are. The operation files are stored in a directory
called "operations" located inside a directory that uses the name of your profile. Once you
start entering your data into OperationsPro™, you can find up to six operation files,
and six identically named backup files. The operation files use the .xml extension, and the
backup files have the .bak extension appended to them. These files are created when needed,
for example the "OperationsEngineRoster.xml" file is created when you enter your first
locomotive into OperationsPro™. The .bak back-up files are created when you make a
change to one of the operation files.
The program automatically loads the necessary files when you open one of the six major
operations windows found under the menu bar "OperationsPro".
| File Name |
Contains |
| Operations.xml |
Settings |
| OperationsCarRoster.xml |
Car database |
| OperationsEngineRoster.xml |
Locomotive database |
| OperationsLocationRoster.xml |
Location database |
| OperationsRouteRoster.xml |
Route database |
| OperationsTrainRoster.xml |
Train database |
Operations Demo Files
The operations program provides a set of demo files to help introduce you to the some of the
features and capabilities of this program. To load the demo files, first open the Operations
Settings window "Tools⇒Operations⇒Settings", and in the upper
left corner of the Setting window is the "Tools" menu, select "Load Demo Files". The program
will create a
backup of your current configuration if you have
one, and then loads the demo files. Restart JMRI to complete the demo load process.
The demo program also supplies a simple panel to show how the train icons work. Load
the panel before building the trains by selecting from the main JMRI menu, "File⇒Load
table content and panels..." a window should appear and open the "operations" directory and
then select the "Operations Demo Panel.xml" file.
Quick Start Help
From the main menu bar for JMRI find the "Tools⇒Operations" menu. There are six items in
this menu. We recommend that you start with
Settings and work your way
down to
Trains.
So let's begin with the Settings window. Enter a name for your
railroad, the scale that you're modeling, and decide of you're are going to use descriptive names or AAR codes for your rolling stock. You can also
optionally select which directions your railroad
travels. You also have the option to add the OperationsPro™ menu to the main window.
Select "Add Operations Menu to Main Menu" if you want this option. The next time you start
PanelPro the OperationsPro™ menu will appear. Leave the rest of the fields in the Settings window alone for now, you can always come back and change
them later. Now press the "Save" button in the lower right corner and close the window by
pressing the "X" in the upper right corner.
Now open the locations window. This window will allow you to enter
the locations or stations that your trains will visit. If this is your first time using a
computer generated car forwarding program, it is best to start off small and gradually work
your way through the various options and features available. Start by entering only three or
four locations with each location having only two or three
tracks. You only need to specify tracks that will be worked by your crew. For example you
might start with tracks that service your industries, this type of track is called a spur. The spur's length determines how many cars can be spotted there.
For example a 44 foot long spur can hold one 40 foot car. Keep things simple and don't
modify the location and track defaults by making them restrictive with regards to the type
of cars or locomotives that they will service. Also, the track and location default is to
allow a train to service the location and track by trains traveling in any direction. Don't
change the defaults until you can successfully build trains to your liking. We also
recommend that when creating your locations that you first use spur and
yard tracks, and try staging and classification/interchange tracks when you're more comfortable
with how the program operates.
The next window to try is the cars window. This is where you enter or import from a file the non-powered rolling stock for your
railroad. Press the "Add" button at the bottom of the cars window and
the add car window will allow you to enter cars into your operations
database. Be sure to place the cars on a track using the "Location and Track" field found in
either the add / edit car or set car window.
The program works best if you keep at least 20% of your tracks empty, so don't place too
many cars on tracks until you understand how the program builds trains.
The locomotives window is similar to the cars
window and allows you to enter or import locomotives for
your trains. Entering and requiring locomotives for your
trains is completely optional, and locomotives are not needed for the program to operate
correctly. So if you want to manually assign your locomotives to your trains, don't bother
entering the locomotive data into the program.
Now create a simple route for your first train to follow by pressing
the "Add" button in the Routes window. Enter each of your locations in
the route by selecting them from the menu and pressing the "Add Location" button in the Add Route window. Try and keep it simple by only entering each of
your locations once in the route. For now don't modify the route in any way, later you can
come back and modify how many cars are serviced at each location by adjusting the move count.
Now you're ready to create your first train by pressing the Add
button at the bottom left of the Trains window. Be sure to select the
route you created for your first train. Leave all of the train checkboxes alone which means
the train will service all car and locomotive types. Leave the Optional
locomotive requirements and Optional last car in train
requirements for locomotives and caboose area alone for now. Save the train, close the
window, and return to the Trains window. Press the Build
button for the train. It should build. Now pressing the "Print" or "Preview" button will
produce a Manifest for your train depending on the state of
"Preview" checkbox at the bottom of the Trains window. Review the
Manifest and you should see that the train serviced all car types. If you examine the Cars window you can see that cars are now assigned to your train. Once
cars are assigned to a train, they are no longer available to other trains until the cars
are delivered to their new location.
OperationsPro™ when building a train also produces a Build
Report. The build report provides details on how the program built the train. It shows the
available locomotives and cars found along the train's route, and how the program attempted
to find destinations for them. When the program fails to build a train due to requirements
requested by you, the build report can help determine what the issue was and how to correct.
Now try limiting the car types that the train will service by modifying some of the car
types checkboxes in the Edit Train window. Use the train reset to release the cars that were assigned to the train so you
can build it again without moving the train. With the new car types restriction in place,
you should see that the train will only pick up and set out car types that are selected in
the Edit Train window.
Now try restricting your tracks to only certain types of cars by
modifying the car types serviced for a track. Now when you build the train, the train will
only set out cars to tracks that are willing to accept them.
Press the Move button located in the Trains
window and you will see that the train's location will change to the next in the route. You
will also see that the Cars window will update to show the cars serviced
by the train moving to their new location as the trains moves from location to location.
Now enter some locomotives into the operations database if you
want the program to assign locomotives to your trains. Place some of your locomotives on a
track located at the start of the route. Note that if you want two or more locomotives
servicing your train, that the locomotives must be in a consist.
Note that the last location in your route must have a track that will service the locomotive
type or the build will fail. Now change the train requirements to require one or more locomotives.
If you want a caboose or car with FRED for your train, first configure some of the cars to
be the last car in the train by selecting the "Caboose" or "FRED" checkbox in the Edit Car window.
Now change the Optional last car in train requirements radio
button to "Caboose" or "FRED" in the Edit Train window. Place the
caboose on a track at the first location in your train's route. Be sure that the last
location in your train's route has a track that will accept the caboose or the train will
not build properly.
If you keep building your first train and moving it, eventually all of your cars will end up
at the last location in your route! Create another route that is the inverse of your first
train. Go to the Routes window and under the "Tools" menu select Copy Route. Select your original route, check the "Invert" checkbox,
enter a name for this route, and then the "Copy" button. Now create a second train that uses
this route to move cars in the opposite direction of your first train.
The OperationsPro™ default mode for building trains is to pick up and set out cars to
empty tracks. If you want to perform car swaps, pull cars from a track and replacing them
with new ones, you need to change the Build Options to
aggressive.
You should now be well on your way with regards to JMRI operations. Each window in
OperationsPro™ has a "Help" item on the menu bar which will direct you to the section
in this document that covers that window's capabilities. Many of the OperationsPro™
buttons and controls have popup tool tips, just hover your mouse pointer over the button to
see the tool tip. Detailed step by step JMRI Operations How-To
Instructions are available on the JMRI.org site. There's also OperationsPro Wiki that contains some useful
information and insight into how the program works.
Help is also available at the JMRI users which
is part of the Groups.io. Another good source for help is a series of articles written by
David Haynes http://rcairgallery.com/stuff/Using-JMRI-Operations-A-Worked-Example.pdf.
You can also view two excellent NMRA YouTube videos by Robert J Thomas Introduction to
JMRI OPs For A Small Layout and Steve
Todd - JMRI Operations with No Paper. There's also an excellent set of videos https://www.youtube.com/@dhtrainz4798
produced by David Hall using the Trainz Simulator and
OperationsPro.
If you want to know more on how OperationsPro™ builds trains see the section on Build Reports.
And finally under the "Tools" item on the menu bar, you will find many useful
functions, like the ability to print the contents of the window.
Trouble Shooting and Diagnostic Tools
The best tool for trouble shooting train build problems is the
Train
Build Report.
If you want to determine which trains can service a location or track, use the the Show Trains Servicing this Location or Show Trains Servicing this track tools. The "Show
trains Serving this track" tool can be found under "Tools" in the edit track menu bar. The
tool also allows you to see how a specific car type will be serviced.
To understand which car types a train can service, and which tracks will accept those car
types, use the Show Car Types Serviced tool.
If you wish to see or modify which trains can service a car type, use the Modify Trains by Car Type tool found under "Tools" in
the Trains window. Select the car type and you can quickly see and
modify which trains can service that car type.
To review and modify which routes can service a location, you can use the Show Routes Servicing Location tool found
under "Tools" in the Locations window.
You can see or modify which locations or tracks can service a car type, use the Modify Locations by Car Type tool found under "Tools"
in the Locations window.
There are several Print or Preview options under Location Tools that can be very useful. The first is "Print
Location Details". This option will list each track for a location, and then details which
car types, loads, roads, and trains can service that track. The "Track Analysis" option
lists each car type, and then shows which tracks can service that car type. The analysis
includes the total length of each car type, and then the percentage of track that can be
consumed by that car type. To check for track configuration issues, select "Track Error
Analysis" option. This option will check each track and determine if there's a train that
will service the car types selected for that track.
If you decide to use schedules, the Show
Schedules by Car Type and Load tool can show you which car types and loads will be
serviced by your spurs. You can also see which loads will be generated out of staging to
your spurs by using the Show Staging
and Schedules by Car Type and Load tool.
To determine why a car isn't being routed correctly, you can use a train build report with the router set to "Detailed" or
"Very Detailed". You can also use the Set Car tool found in the Cars window. You'll need to set the car's final destination to get a mini-build routing report.
If you restrict your classification/interchange tracks to
specific destinations, there's a Check Destinations button
that will confirm that your setup will not strand cars.
OperationsPro™ will send messages to the system console when there are errors or
problems with the program. You can access the system console from any menu bar under "Help".
[Click to go back to TOC]
Settings
The Settings window contains general parameters for the Operations application. Select from
the JMRI main window "Tools⇒Operations⇒Settings" to open the Settings window. The
Settings window has fields and buttons to allow you to enter your railroad name, the
directions your train's travel, the scale that you are using, printer and icon controls, and
the ability to create backups and restore files for operations.

Railroad Name
Enter your railroad name in the field across from "Railroad Name". This name will show up on
your Manifests. You can also have a different railroad name for every train in your roster,
see
Train Manifest Options for details.
When you close the "Settings" window you will be prompted to make whatever railroad name
you've entered to be the JMRI railroad name. You should answer "Yes" to the dialog window,
this way all of the other applications in JMRI will reference the same railroad name. You
can also change the railroad name by going to the JMRI: Preferences Pane found under
"Edit⇒Preferences..." from the main menu bar.
Train Directions
If your railroad depicts trains traveling north and south select the "North/South" box, if
your trains travel east and west select the "East/West" box. You must select at least one
direction, and can if desired select both.
Scale
Next select the scale you are modeling. This is useful when you enter the length of cars and
tracks. You can enter the number of actual inches and the program will convert to scale feet.
Append a double quote to the length when entering actual inches. The program will also
automatically assign the proper NMRA weight for a car based on scale and length.
Maximum Train Length
Enter the "Maximum Train Length" in feet or meters you desire for your trains. See "Unit of
Length" below to select feet or meters. This field provides the maximum scale train length
between stations. Later you can override this length if you wish a shorter train between any
two locations. A 1000 foot train can carry approximately 20 cars, and is of course dependent
on the car lengths assigned to the train.
Note that if you increase the "Maximum Train Length" that it doesn't affect train routes
that you've already created. Once you increase the maximum train length, you can manually
increase the departure length of a train by editing the train's route. See Edit Route for more details.
If you decrease the "Maximum Train Length" the program will prompt you to modify your
existing routes, and you can optionally have the program reduce all of your train's routes
to the new shorter train length.
Maximum Number of Locomotives
Now set the maximum number of locomotives that you want the program to assign to a train. If
you don't want the program assigning locomotives, set this value to 0.
Horsepower per Ton
Enter the minimum horsepower per ton (HPT) that want for your trains when
dynamically building a locomotive consist. Enter 0 if you don't
want the program to consider the HPT or the train's route grades when building a consist.
Switch and Travel Times
OperationsPro™ when generating switch lists for the various locations on your railroad,
will estimate the arrival times for your trains based on the train's departure time and the
switch and travel times. Enter the average number of minutes it takes to set out or pick up a
car on your railroad. Then enter the average amount of time in minutes it takes to travel from
one location to the another. Later when you create a
route you will
be able to increase or decrease the train's travel time between any two locations.
Car Types
OperationsPro™ has two sets of car types for you to use. Descriptive provides type names
like "Boxcar" and "Tank car", and AAR Codes provides type names like "XM" and "T" for boxcars
and tank cars respectively. Select the one that you prefer. You can add or delete car types by
using the
car type edit window.
Unit of Length
You can use scale feet or meters when entering the length of your rolling stock and tracks.
The program can convert actual inches into scale feet when entering car, locomotive, or track
lengths. Just append a double quote (") to any length. The program can also convert from
actual centimeters to scale meters, just append "cm" to any length.
Optional Year Modeled
You can optionally enter the year you want printed on your train Manifests.
Add Operations Menu to Main Menu
When selected, add the operations menu to the main menu bar. The operations menu will appear
the next time you restart JMRI.
You can also automatically open any of the six operations windows when you start JMRI. From
the main menu, under "Edit⇒Preferences..." select Start Up, and add a "Perform
action" startup item for the desired window.
Close on Save
When selected, close operation windows when the "Save" button is pressed.
Auto Save
When selected, the program will automatically save the operation files after they have been
changed. When a change occurs the program will after 1 to 2 minutes automatically save the
operations files. The program will also automatically save the operation files if you close
the
Trains window or shutdown JMRI.
Auto Backup
When selected, the program will create a set of operation backup files each time the program
is started. This is very useful when experimenting with the program, if you don't like what
you've done, just restore one of the previous backups. See
Backup and
Restore for more information.
Panel Options (Train Icons)
If you want the OperationsPro™ to place an icon representing the train on a panel, enter
the panel's name (NOT the panel's file path name!), otherwise leave the name blank to disable.
Load the panel using the main menu "File⇒Load table content and panels..." or use the
Load table content and panels...
option available in JMRI: Preferences Pane to load the panel at startup.
The "Enable Icon SetX&Y" when selected allows you to teach the OperationsPro™
where to place the train icon on your panel when moving your train from location to
location. Deselect this feature after your done teaching the program to prevent accidentally
changing the train icon's position on your panel. If you also want the lead locomotive
number as part of your train icon text and switch lists, select the "Append Loco Number"
box. You can select the background color of your train icon depending on the train's
direction. Select the color desired for each direction using the pull down menus. A switcher is a train with only one location in its route.
You can quickly set the train icon coordinates for
your panel using "Tools" in the Routes and Edit Route windows.

The train icon menu allows you to "Move" a train to the next location in the train's route.
You can also quickly move a train to any location in the train's route by selecting "Route"
followed by any location in the route. The text for the move action becomes "Terminate" when
the train arrives at the last location in the train's route. You would Terminate the train when all of the cars have been spotted to
their specified tracks.
Comment
You can enter a comment for this set of OperationPro files. Useful when doing backups and
restores allowing you to confirm that you have the correct set. The comment also appears on
the train build reports.
Save
When you're finished with the settings window, press the save button to store your settings in
a file named "Operations.xml". You can find this file in JMRI⇒ "profile name" ⇒
operations. OperationsPro™ will also create a backup file "Operations.xml.bak" each time
you press the save button.
Backup
Copies of the operations files can be made to provide backups for both error recovery and for
archiving. The data files used for operations is a set of six files and they are referred to
as a "Backup Set". OperationsPro™ has two places that it uses to store these backup
sets, referred to as the "Automatic Backup Store" and the "Manual Backup Store". These are
stored under the JMRI "operations" directory in your home directory as "autobackups" and
"backups". The purpose of the automatic backups is to make a copy of the files for "safe
keeping" before changes are made to the main operations files. This way, if anything gets
messed up, there is a copy of the last known good data that can easily be restored to undo the
damage. In normal operation, an automatic backup is made each time OperationsPro™ starts
(if the "Auto Backup" option is checked on the
Settings window), and
right before a Restore, Reset Database, or Load Demo Files operation is done.
Manual backups are done only when the user requests it by either clicking the "Backup"
button on the Settings window, or by selecting the "Backup" option
from the "Tools" menu of the Operations Settings window. The Backup button will copy the
files to the Manual Backup Store under the user's JMRI home directory as described above,
while the Backup menu option will allow the user to specify any directory. This can be
useful when making an archive copy that you want to move somewhere else for safekeeping.
All backup sets have a default name based on the date the backup was done, plus a
sequence number, but this name can be changed to anything the user wants for Manual Backups.
It is recommended that the names of backup sets made for archive purposes be given a
meaningful name, especially if you are managing data for more than one railroad. For
example, if today is August 29, 2012, the program will create a backup directory named
"2012_08_29_00".
You can also select which directory to use for backups by selecting "Backup" from the
"Tools" Menu.
What isn't backed up by OperationsPro™
There are many OperationPro directories and files that aren't backed up using the
methods described above. You can find all of the directories and files not backed up inside
the "operations" directory. Here's the list with the file types and directory names:
| File Type |
Directory |
| Train Build Reports |
buildstatus |
| Old Train Build Reports |
buildStatusBackups |
| CSV Manifests |
csvManifests |
| CSV SwitchLists |
csvSwitchLists |
| json Manifests |
jsonManifests |
| Log Files |
logger |
| Train Manifests |
manifests |
| Old Train Manifests |
manifestBackups |
| SwitchLists |
switchLists |
| Old SwitchLists |
switchListsBackups |
Restore
The program will automatically load the necessary operations files when one of the six major
windows under OperationsPro is selected. If you wish to override the latest files use the
Settings "Restore" button, or under "Tools"
Restore.
Note that restoring a Backup Set will overwrite the current operations files, therefore
an Automatic Backup is done just before the restore copies the files, "just in case".
Backup Sets can be restored from either the Automatic Store or the Manual Store using the
"Restore" button on the Settings window. Alternatively, the
"Restore" menu option in the "Tools" menu of the Operations Settings window allows you to
navigate to any directory, and would be used to restore an archived Backup Set.

The date and time that the Backup Set was made is displayed along with the set name to
help distinguish the correct Backup Set.
You must quit and restart JMRI to complete the restoration of the operation files.
Options
OperationsPro™ has several options that can be modified by selecting
Operations⇒Settings⇒Tools⇒Options.

Build Options
There are two build train options, normal and aggressive. It is recommended that you select
normal when you first begin using OperationsPro™. Normal builds guarantee that when a
car is delivered (set out) by a train that there will be track space available for the car.
Normal mode will not fill every track to capacity which is more prototypical. However, normal
mode won't swap a set of cars, cars are picked up or set out based on the available track
space. Normal mode prevents track overloading. In aggressive mode you can "accidentally"
create track overloading by the order you build and run your trains or by using the
Train Reset function.
Aggressive builds makes the car's track space available as soon as a car is scheduled
for a pick up. Therefore there can be instances where a train was to pick up a car to vacate
the track, but a "later" train arrives early with a set out to that track and the car hasn't
been picked up. However, more often than not the same train will perform the pick up and set
out thus minimizing the number of conflicts. Aggressive also performs a multiple pass
determination of car movements. The net effect is that more cars are moved within a given
train, and complete car swaps can occur. Aggressive also tends to deliver cars to all of the
available spurs. The smaller the spur, yard, or interchange the more likely that the program
will assign cars to that track.
One serious consideration when using aggressive mode is that you can cause your tracks
to be overloaded by selectively resetting your trains or building them and running them in a
different order. Here's a simple example showing how it's possible to overload a track using
the aggressive mode. Say you have two trains that will service the same track. The track has
several cars on it, you build the first train and the Manifest shows to pull all of the cars
from the track. You now build a second train, the program finds that the track will be
vacated by the first train, so it schedules new cars to be spotted on to track by the second
train. You later decide that you don't want to run the first train, and reset the train. Now
the original cars on still sitting on the track, and you now run and terminate the second
train. The program will deliver the new cars, while the old cars are still sitting there,
which unfortunately will overload the track. You could also overload the track if you ran
the second train before the first, the second train would try and deliver cars to the track
that still has cars sitting on it.
To avoid overloading in aggressive mode, you also need to build, run, and terminate
your trains in the same order. And do not use the train reset after you've built or
terminated other trains! However, if you need to reset a train, you should also reset all of
the trains built after the train that you want to reset, or live with possible track
overloading. And never reset a train built before a train that you've already terminated.
Normal mode will never overload a track, so you might consider using this mode if you find
yourself having to reset trains or you want to build and run your trains in any order. The
recommendation is not to use train reset in aggressive mode once you've built or terminated
additional trains. And if you do reset a train, there isn't a guarantee that building the
train again will pull the same cars, each train build can be different depending on the car
movements created by the other trains.
Note that once you've built a train, the build option can not be changed until all
trains are terminated or reset.
Number of Passes During Build
When building trains in aggressive mode, you can control the number of passes the program
performs. Two passes is the default, and for most users is the correct value. The program
works best when there's space for cars on the layout, and two passes should provide good car
movement. If your layout is more towards the full side of the equation, increasing the number
of passes could increase car movement. In most cases, three passes is more than adequate, and
if your layout is jammed with cars, four passes might provide you with good car movement. The
one major drawback to increasing the number of passes, is that your train build reports will
be longer since each pass by the program is documented.
Switcher Service Options (Local Car Movement with Default
Loads)
The next three "Allow Local ..." options control car movements when using a
switcher to service a location. A switcher only services one
location. The three options only apply to cars with the default "E" or "L"
load.
Normally it is better not to allow a car to move from one spur directly to another spur at the
same location when using a switcher. This type of move can be very unrealistic, picture moving
a boxcar from a shoe manufacture directly to an auto manufacture. Also moving a car from one
yard track to another can have your crew wondering what kind of busy work is being generated!
We recommend that you leave all of the checkboxes unselected, but if you need these types of
moves for cars without a final destination or custom load, select the appropriate checkbox.
You should note that schedules and custom loads can override the switcher options. So if you
need certain car movements for a switcher, it's best to use schedules
to define them. Also see Allow local moves when a car
has a custom load or FD.
Staging Options
Enable Type, Road and Load Restrictions into
Staging
This option restricts trains to staging tracks that only accept the train's rolling stock
type, road and load names. When "Enable Type, Road and Load Restrictions into Staging" is
selected, the program will only deliver a train to a staging track has the same rolling stock,
road and load name restrictions. This is useful when you want trains delivered to staging
tracks based on the train's rolling stock preferences. However, if you want certain car types,
car roads, or load names to be transported by a train, but not delivered to staging, deselect
this option.
If you specify a certain train or route to be accepted by a staging track, this option
is ignored, and you can then control which car types, loads, and road are to be accepted by
the staging track.
Make departure track available after train is built
This option when selected makes the departure track in staging available for other trains
immediately after the departing train is built. For trains that return to the same staging
location, this option allows the train to use the same track it departed on. This option is
only available when using the
aggressive mode for building trains.
Allow cars to return to staging
When a train departs and returns to the same staging location, it is regarded as a turn by the
program. A turn normally takes cars from staging, sets them out on the layout, picks up new
cars and returns to staging with those cars. Normally the program doesn't allow the same cars
to depart and return to staging. However, it may be desirable to allow the train carry the
cars rather than having the program report that cars in staging couldn't be delivered to
destinations on the layout. Selecting this option allows a turn to transport cars to and from
the same staging location. Note that when this options is selected, that the program will only
return cars to staging when destinations are not available on the layout.
It is recommended that you leave this option disabled, as it's also available on a per train
basis. See Train Build Options. Note that when this option
is enabled, the program may have difficulties swapping cars from staging and the layout as
the program must assume that all cars in staging could return to staging.
Prompt for Departure Track from Staging
If you would like the program to ask you which track a train should depart from staging during
the train build, select this option. Normally during the train build the program would select
the track with the least amount of use when determining which track to depart from. Note that
the program will only prompt you if there are two or more trains available in staging that
meet the train's requirements.
Prompt for Arrival Track into Staging
If you would like the program to ask you which track a train should use when arriving into
staging during the train build, select this option. Normally during the train build the
program would select the track with the least amount of use when determining the track to
arrive on. Note that the program will only prompt you if there are two or more tracks
available in staging that meet the train's requirements.
Try Normal Mode if Build Failure from Staging
When using
aggressive mode to build a train, the program will
first try and pull cars from all of the train's locations to free up space for cars departing
staging. Sometimes this causes the length of the train to exceed the maximum length
requirements of the
route, causing a build failure. If this option is
selected, and the build fails, the program will automatically try to build the train in
normal mode. In Normal mode cars from staging are placed along the
train's route before pulling cars from location, the exact opposite of aggressive mode.
You can also request to build a specific train in normal mode, see Train Build Options.
Car Routing Options
Enable Car Routing
When car routing is enabled, the program will use multiple trains to deliver a car to its
final destination. It is recommended that you leave this option enabled. The
railroad division feature,
RWE,
RWL, and schedules use
routing to move cars. With car routing enabled, you can use a
Schedule to deliver a car to a specific location using the car's
final destination fields. The car routing algorithm will search for the most efficient route
for the car to travel. The router will attempt to use classification/interchange tracks and
then optionally by yards to move cars. If you don't want to use yards when routing, you can
deselect the
Enable Car Routing via Yards checkbox. The program will try
and find a route using a maximum of seven trains to complete the car move. Note that the
program never gives up trying to route a car. If a car has been assigned a
Final Destination or
custom load the
program will try and route the car during every train build that has access to the car.
Enable Car Routing via Yards
The program when routing a car will first try to find classification/interchange tracks to
move the car to its final destination. If you want the program to also consider using yard
tracks when routing, select this option.
Enable Car Routing through Staging
Routing through staging is disabled by default. This is considered to be an advanced feature
and shouldn't be used until you've become very familiar with the program. When enabled the
program will try to route cars through staging if it couldn't find a route using C/I and yard
tracks. Enabling this feature can significantly increase train build times. The router will
only use staging tracks that don't modify a car's load. See
Staging
and Car loads. You must deselect all six car load controls for staging.
You would allow routing through staging to create a virtual world outside of your layout.
Now when you create a schedule, you can ship a car to a location and spur that exists
outside of your layout. Staging is this case is the gateway to the virtual world. You can
create one or several virtual trains to service the virtual world and the program will route
cars to the industries you've created outside of your layout. You also have the option to only allow cars that are being routed to use the
staging track.
Use all Trains when Routing
The option "Use all Trains when Routing" when selected instructs the program to use all of
your trains to route a car. If you only want the router to use the trains that you've selected
in the "Build" column of the
Trains window, then deselect this option.
Enable EXTREME Track Destination Restrictions when Routing
The last routing option "Enable EXTREME Track Destination Restrictions when Routing" is
disabled by default, and is recommended that you leave it disabled. This option makes the
track destination feature of a classification/interchange track more restrictive. When
selected it tells the router to only use
classification/interchange
tracks that match a car's final destination AND the car's very next destination. Again, it is
recommended that you leave this feature disabled, even if you've placed destination
restrictions on your C/I tracks. When this feature is enabled, you must enter the destination
AND the next destination needed to route a car to its final destination. For example, say the
route for a car looks something like this: New York to Springfield to Worcester to Boston with
each city hop requiring a separate train. In this case three trains are need to move the car
from NY to Boston. With the "Enable EXTREME Track Destination Restrictions when Routing"
disabled, which is the default, you only have to enter "Boston" as the destination for the
departure C/I track in New York. The program when routing a car to Boston from New York, will
determine that sending the car first to Springfield and then Worcester is okay because that's
the route to get the car to Boston. However, if you enable this option, you must add
Springfield in addition to Boston as valid destinations out of NY for the C/I track. The C/I
track out of Springfield would need to allow destinations of Worcester and Boston. You would
only use this feature if you needed to hard sort your cars by the car's next destination and
final destination to specific C/I tracks.
Logging Options
If you want the OperationsPro™ to log your locomotive, car, or train movements to a
file, select the appropriate checkboxes. The program will create a new directory called
"logger" in the operations directory. For each day's session the program will create a new
file (.csv) using the day's date and the file will include all of the rolling stock movements
for that day. Use a program like Microsoft Excel to view the file. The program will also
create and maintain a separate file for each car's history and it can be also found in the
"logger" directory in a second directory called "rollingStock".
Custom Manifests and Switch Lists
Generate CSV Manifests
If you want to create your own
Custom Manifest using a comma
separated values (.csv) file, select this option. You can use a program like Excel to create a
Manifest to your liking. Dan Foltz who is a JMRI user/programmer wrote the Excel based
"Manifest Creator" and "Switch List Creator". You can find a copies of the programs at
Manifest Creator - Add on to JMRI. There's
also a Java based program written by Tim Mann called
Model
Railroad Switch List and Manifest Formatter that will create custom Manifests and switch
lists for you using the CSV files.
You can find the CSV Manifest files created by OperationsPro™ in the operations
directory in a directory called "csvManifests". Each line of the file starts with a two to
five letter code, followed by the code's description, and then any parameters associated
with the code. Here's a list of the current codes and descriptions:
| Code |
Description |
Parameters |
| AH |
Add Helpers |
|
| AT |
Arrival Time |
Time |
| CC |
Change Caboose |
|
| CL |
Change Locos |
|
| DT |
Departure Time |
Time |
| DTR |
Departure Time Route |
Time |
| EDT |
Estimated Departure Time |
Time |
| HOLD |
Hold Car |
See PC or SC below, and note below |
| LC |
Location Comment |
Comment |
| LN |
Location Name |
Name |
| LOGO |
Path name to logo |
URL |
| NW |
No Work |
|
| PC |
Pick up car |
See below |
| PL |
Pick up loco |
See below |
| PRNTR |
Printer Name |
Name |
| RC |
Route Comment |
Comment |
| RLC |
Route Location Comment |
Comment |
| RH |
Remove Helpers |
|
| RN |
Railroad Name |
Name |
| SC |
Set out car |
See below |
| SL |
Set out loco |
See below |
| SMC |
Search for Missing Car |
See below |
| SMCM |
Missing Car Message |
Message |
| TKCB |
Track Comment |
Comment |
| TKCP |
Track Comment Pick Up |
Comment |
| TKCS |
Track Comment Set Out |
Comment |
| TC |
Train Comment |
Comment |
| TD |
Train Departs |
Name |
| TL |
Train Length |
Length, Empties, Number of cars |
| TM |
Train Manifest Description |
Description |
| TN |
Train Name |
Name |
| TRUN |
Truncate |
Appears if there's a switch list for the location and
the "Truncate" checkbox is selected in the Manifest Print
Options
|
| TT |
Train Terminates |
Name |
| TW |
Train Weight |
Weight |
| VT |
Valid |
Month/Day/Year Time |
Time uses the format Hour:Minute.
The car parameters for pick up car (PC) and set out car (SC) are: road, number, type,
length, load, color, location name, track name, destination name, destination track name,
owner name, kernel name, car comment, pick up comment, set out comment, C, F, H, IDTag, RWE
location name, RWE track name, U, utility car count, final destination name, final
destination track name, load type, RWL location name, RWL track name, route path.
Where C = Caboose, F = FRED, H = Hazardous, and U = Utility.
The Search for Missing Car (SMC) parameters are identical to the above for (PC) or
(SC).
The loco parameters for pick up loco (PL) and set out loco (SL) are: road, number,
model, length, type, hp, location name, track name, destination name, destination track
name, owner name, consist name, is lead loco in consist, loco comment, IDTag, DCC address.
The program will include "Hold Car" for spurs and C/I tracks that are only serviced by one
train. Configure the spur or C/I track option Select
trains or routes for car pick ups to "Trains" and only select one train.
Generate CSV Switch Lists
You can also generate custom switch lists using a comma separated values (.csv) files. You can
find the switch list files in the operations directory in a directory called "csvSwitchLists".
The CSV switch lists use the same codes and descriptions as the CSV manifests, plus the
following:
| Code |
Description |
Parameters |
| SWL |
Switch List |
|
| DL |
Departure Location Name |
Name |
| ETA |
Expected Time Arrival |
Time |
| ETE |
Estimated Time En route |
Time |
| HOLD |
Hold Car |
See PC or SC above |
| NCPU |
No Car Pick Up |
|
| NCSO |
No Car Set Out |
|
| TA |
Train Arrives |
Direction |
| TDC |
Train changes direction, departs |
Direction |
| TIR |
Train En Route |
|
| TDONE |
Train has already serviced this location |
|
| VN |
Visit Number |
Number |
| END |
End Switch List |
|
Options
Save Train Manifests, Build Reports, and Switch Lists
When the option "Save Train Manifests, Build Reports, and Switch Lists" is selected,
OperationsPro™ will save the current train Manifest before creating a new one. The
program will store the old Manifests in a directory called "manifestBackups" located in the
"operations" directory. You can review your old Manifest using the
Print or Preview Saved Train Manifests under "Tools" in
the
Trains or
Edit Train windows.
The program will also store a copy of each train's build report in a directory called
"buildStatusBackups" also located in the "operations" directory. You can access old build
reports from the Edit Train window under "Tools" Print or Preview Saved Build Report.
This option also makes backup copies of any switch list that you create. They are
stored in a directory called "switchListBackups" located in the "operations" directory. A
separate directory is created for each location's switch list that you create.
Enable Value Fields
You can use the value field to enter the value or cost of your rolling stock. You can rename
the value field if you wish and use it for other purposes.
Enable Identification Tag Fields [Settings⇒Tools⇒Options⇒[scroll
to the bottom]
You can enable the assignment of reporters and tags for your locations and rolling stock.
Reporters can be assigned to locations and tracks. When this option is enabled, the Cars and
Locomotives windows will display the last location and time the rolling stock was detected.
The Edit car and locomotive windows allow you to select an
ID tag that has been entered into JMRI
(scroll to bottom of "Optional" window frame). The Edit location and track windows allow you
to select
Reporters that you want to
associate with them. You can rename the RFID field if you wish and use it for other purposes
by changing the value on the Identification Tag Fields line.
Enable physical locations for Virtual Sound Decoder
If you're using Virtual Sound Decoder, you can enter the physical coordinates of your
locations by enabling this option.
[Click to go back to TOC]
Manifest Print Options
You can modify the how OperationsPro™ prints the train
Manifests
and the location switch lists. From the "Operations⇒Settings⇒Tools" menu select
"Manifest Print Options" to open the window. Press the "Save" button located at the bottom of
the window to enable your changes. The "Save" button will also cause the program to update the
Manifests for all trains that are built. This allows you to modify your Manifests without
having to rebuild your trains.

Manifest Printer Font
OperationsPro™ supports several types of fonts for printing. Select the desired font and
size using the pull down menus. You can also select which printer to use when printing out a
Manifest or switch list. See
Switch Lists for more details.
Format
If you would like your Manifest and switch lists printed in a tabular (columns) format select
the "Tabular" checkbox. The program uses the longest character length for each of the
attribute's names (Road, Number, Type, Load, Hazardous, Color, Kernel, Owner, Division, Track,
Location, Comment, Set Out and Pick Up Messages) to set the width of each column. Location
names and track names can be up to 25 characters, so you might want to consider shorter length
names when using the "Tabular" feature. FYI, the program reports the longest attribute names
to the system console when creating Manifests. You can access the system console from any menu
bar under "Help".
There are three options with regards to how your Manifests and switch lists are formated.
"Standard" provides one line for each car pick up or set out. The "Two Column" format
creates Manifests with two major columns, the left column shows the car pick ups for a
location, and the right column shows the set outs. The "Two Column" only uses half the page
for the car information, so you might have to limit the number of car attributes (see Message Formats below) in order get the data to fit. The next
format available is "Two Column (Track)". This format prints the track name in both columns
in a header format.
The "Tabular" and "Two Column" formats use equally spaced fonts like "Courier New" or
"Monospaced" so only equally spaced fonts are shown in the font selection box when either
option is selected.
After selecting "Tabular" and pressing the "Save" button, you will find three additional
"Tab" options at the end of the Message Format drop down
menus. Use these three tabs to space out the Manifest or switch list to your liking. You can
change the length of the tab characters if you wish, see Tools. Go to Printing
Manifests to see examples of Manifests and switch lists using the described options.
Orientation and Paper Size
There are four options, Portrait, Landscape, 4.25 x 11 and 3.25 x 11. Paper size ("Letter" or
"A4") is determined by the JMRI locale in use. To access the JMRI locale, from the main menu
bar under "Edit" select "Preferences..." then "Display" and then select the "Locale" tab. Some
printers require the English (United States) locale in order to print out a Manifest or switch
list with the correct number of lines for paper size "Letter".
Print on One or Two Sides
You have the option of printing your Manifest or switch lists on one side of the paper or
both. Select "two sided long edge" or "two sided short edge" if you wish to print using both
sides of your paper. Short edge means the pages are bound along the short edge of the page.
Long edge means the pages are bound along the long edge of the page.
Pick Up Locomotive Text Color
You can select the text color of your Manifest when the operation is to pick up a locomotive.
Select the desired color from the drop down box.
Set Out Locomotive Text Color
You can select the text color of your Manifest when the operation is to set out a locomotive.
Select the desired color from the drop down box.
Pick Up Car Text Color
You can select the text color of your Manifest when the operation is to pick up a car. Select
the desired color from the drop down box.
Set Out Car Text Color
You can select the text color of your Manifest when the operation is to set out a car. Select
the desired color from the drop down box.
Local Move Text Color
You can select the text color of your Manifest when the operation is to move a car from one
track to another at the same location. The car in this case is not added to the train. Select
the desired color from the drop down box.
You can customize the pick up, set out, and local move messages for your Manifests and switch
lists by selecting the appropriate drop down menus. To remove a loco or car attribute (Road,
Number, Type, Length, Color, Load, etc.) select blank. You can also edit and or replace the "[
] Set out", "[ ] Pick up" and "[ ] Move" prefixes. Two popular prefixes are "Spot" and "Pull"
for set outs and pick ups respectively.
For locomotive or car pick ups, the "Location" or "Track" attribute provides the track
name where the rolling stock is currently residing. For set outs, the "Destination" or
"Track" attribute specifies the track name where the rolling stock is to be eventually
placed. The "Local Move Message Format" requires both the "Location" (where the car is) and
"Destination" (where to spot the car) attributes. For local moves, you can substitute the
"Track" attribute for the "Destination" attribute.
The program allows you to optionally display a pick up (PickUp Msg) or set out (SetOut Msg)
message based on the car type and load. See Edit Car Loads
"Optional Load Messages" for more info.
Switch List Format
You can use the same format for Manifest and switch lists, or you can customize the switch
lists to your liking. Deselect the "Same as Manifest" if you want a different format for your
switch lists.
OperationsPro™ allows you to customize the text used in the train Manifest and switch
lists to your liking. You can modify the Manifest or switch list text by using the "Edit
Manifest Text" or "Edit Switch List Text" windows found under the
Tools menu.
Switch List Options
There are three checkboxes that allow you to modify the content of your switch lists. They are
labeled "By Track Summary", "Route Location", and "Departure Time".
The first option "By Track Summary" when selected, lists all car pick ups, set outs, and
holds at a location by track and train. This summary is appended to the end of the switch
list. This option is only available when you operate the switch list in Real Time.
You can include in your switch lists the train's route location
comments by selecting the "Route Location" checkbox.
A switch list normally shows the estimated arrival time for a train. Selecting the
"Departure Time" checkbox changes the format to showing the departure time.
Manifests Options
There are four checkboxes that allow you to modify the content of your Manifests. They are
labeled "Location", "Route", "Departure Time", and "Truncate".
Each location and the train's route can have an optional comment. The program will
print these comments on your Manifest if the "Location" and "Route" checkboxes are selected
respectively.
The Manifest normally shows the estimated arrival time for the train at each location worked
by the train, selecting the "Departure Time" checkbox changes the format to showing the
departure time. You can if you wish, print your Manifest without departure and arrival
times. See Train Manifest Options for details.
The next option is "Truncate" and when selected will cause the program to reduce the
amount of information printed when setting out or picking up a car at a location that also
has a switch list. The idea here is that you have a location that is staffed by a crew
member with a switch list and he or she will be doing the actual car pick up and set out for
the train. Since the switch list contains all of the needed information with regards to
where the cars are and eventually where they need to be, the train Manifest only shows which
cars are being removed and added to the train.
Manifests and Switch List Options
There are eleven checkboxes that modify both Manifests and switch lists and are as follows:
The "Print Valid" checkbox causes the program to print date and time the train was
built, which isn't the same as when the Manifest was printed. The print time is always shown
at the top right of the Manifest or switch list.
If you want the Manifest and switch list to show how many car loads and empties are in
the train, select the "Loads and Empties" checkbox.
If you want your local car moves to be grouped together for a location, select the "Group
Moves" checkbox. Otherwise the program will list and mix the car set outs and local moves by
the Track Blocking Order.
If you want your locomotive set outs to appear after your car set outs select the
option "Print Loco Set Outs Last".
The default is not to show load names for caboose or passenger cars on your Manifests
and switch lists, if however you want to see load names for those cars select the
appropriate "Print Caboose Load" or "Print Passenger Load" checkboxes.
You can decide to use a 12 hour AM/PM rather than a 24 hour clock format for your
Manifests and switch lists.
Selecting the "Show Train Schedule" prints which Train Train
Schedule you are using when building your trains.
The next option is "Sort by Track". The program when creating a train Manifest normally
lists the cars in the order they need to be placed into the train for proper blocking. The normal format is to list the cars in the
order they will be set out as determined by the train's route,
and then by the location's Track Blocking Order. If you
would rather have the cars listed by the track name rather than blocking order, select the
option "Sort by Track".
The next option is "Print Headers". When this option is selected, the train Manifests and
switch list will include a header showing all of the car attributes that you've selected in
the above message formats. You can customize all of the header
text by selecting "Edit Manifest Header Text" under the Tools
menu.
The last option is "Print Page Header". When this option is selected, the train
Manifests and switch list will have on the top of each page the train description, page
number, and date the page was printed.
Manifest and Switch List Preview
If you want to use a text editor to preview your Manifests and switch lists, select this
option. This option also allows you to make manual changes to your Manifests and switch lists
before you print them.
Add Logo
If you want a logo in the top right hand corner of your Manifests and switch lists, press the
"Add Logo" button and select a file with the image you want to display. The supported image
file extensions are .gif, .png, .jpg, plus others. You can also have a different logo for
every train in your roster, see
Train Manifest Options for
details. If the Manifest or switch list text intrudes on your logo, you can adjust the start
of the text by creating
train comments for Manifests, and
switch list comments for a location.
OperationsPro™ provides a comment for your crew to search for
misplaced
cars. You can modify the comment to your liking. Full scale railroads unfortunately misplace
cars as part of their operations, so having a few cars in the wrong place on your railroad is
very prototypical. Save time and effort and let your operators find those misplaced cars for
you.
The program will add the "Hazardous Comment" to the Manifests and switch lists when a car has
the
Hazardous checkbox selected in the "Car Edit" window
and the "Hazardous" message format is selected in the
Manifest
Print Options. The program will also add the "Hazardous Comment" if the car's
load has been classified as hazardous. You can change the comment
if desired, and press "Save" to keep the change.
The menu bar of the "Manifest Print Options" provides additional features that can be found
under "Tools". The first "More Print Options" allows you to adjust the length of the tab
character when using the "Tabular" feature. The next three options "Edit Manifest Header
Text", "Edit Manifest Text" and "Edit Switch List Text" allows you to modify all of the text
found in a Manifest or switch list. Each text line used by the program is shown along with a
text box with the same message. Edit the text box to change the default message to your liking
and press "Save" to complete your change. You can always return the text to the original
settings by pressing the "Reset" button followed by "Save".
Some of the text messages allow substitutions using the format "{number}". The program
provides a tool tip when hovering over the text box which shows the available substitutions
for that particular message.
You can also modify the color of the text by adding the color control text <FONT
color="red"> at the start of the line, where "red" is the color text you want. Complete
the color change by placing </FONT> at the end of the line.
Build Report Options
From the "Operations⇒Settings⇒Tools" or "Operations⇒Trains⇒Tools" menu
select "Build Report Options" to open the build report options window.
The program when building a train produces a build report for
that train. The report contains details with regards to how the train was built and the
various choices the program made when assigning cars to the train.
You can adjust the amount of information that the build report
will show. Select one of the four levels using the radio buttons in the Build Report Options
window. The program when generating the build reports stores the "Very Detailed" information
to a file. The radio buttons control how much of that data is actually printed. The
"Minimal" radio button provides the least amount of information and "Very Detailed" provides
the most. If you're only interested why a train won't build, the "Minimal" setting might
provide you with this information. The "Normal" setting shows the train's route and
requirements, along with the choices the program makes for setting out locomotives and cars.
The "Detailed" provides additional comments about the build and shows which cars were added
to the train. The "Very Detailed" setting produces the most pages, and will show why cars
are excluded from the train, and why they are not picked up or set out. Be sure and press
"Save" after changing the build report selection.
For most users, the "Very Detailed" setting is the most appropriate when reading a train's
build report and "Normal" for the router detail level. For information on the content of the
build report please see Build Reports.
You also have the option of using a text editor to view your build report. A text
editor can make trouble shooting a problem much easier for you. For example, say you have a
car that isn't moving. Using the editor's find feature, you could search the build report
using the car's road number and quickly find why the car isn't being picked up by the train.
One of the tricks when using a text editor is to increase the number of characters per line
by reducing the font size specified in the Build Report Options window.
The build report options window can also control the amount of information provided with
regards to routing a car with a custom load or final
destination. If you're not using schedules, leave the "Router Detail Level" option set to
"Normal". You can change this option from "Normal" to "Detailed" or "Very Detailed" when you
want to understand why a certain train or trains won't route a
car. This set of radio buttons works differently than the "Detail Level" radio buttons in
that it controls the amount of information created during the train build process. You will
quickly find that the "Detailed" and "Very Detailed" modes can create many extra lines of
text in the build report, and unless you have a routing issue, it is best to keep the
"Router Detail Level" set to "Normal".
Backup
From the "Tools" menu in the
Settings window, the backup option allows
you to select any directory to save the operations files. See
Backup for
more information.
Restore
From the "Tools" menu in the
Settings window, the restore option
allows you to navigate to any directory to restore the operations files. See
Restore for more information.
Load Demo files
See
Operations Demo Files.
Reset Database
To reset the operation database and remove all operation files, use the "Reset Database"
option on the "Tools" menu of the Operations
Settings window. An
automatic backup copy of the current operation files will be made before deleting the main
files. The results will be that the settings, cars, locomotives, locations, and trains files
will be purged. Note that after this is done and JMRI restarts, the "Operations" menu item on
the main menu will no longer be visible, as there are no operations files to load. If you want
to once again use the operations feature, you can either load the demo files or restore a
previous backup. To do this, open the Operations Settings page by selecting the "Settings"
option in the Tools⇒Operations menu of the main page. From there you can do either a
restore or a load of the demo files in the usual way.
Manage Auto Backups
When "Auto Backup" in the
Settings window is enabled,
OperationsPro™ will create a backup of the operations files each time the program is
started. To delete older obsolete files, use this tool.
[Click to go back to TOC]
Locations
Locations are places on your railroad that trains visit to pick up or set out cars and
locomotives. Locations can be cities, towns, stations, or just places where trains need to
work cars. Select "Tools⇒Operations⇒Locations" to add or edit the locations on your
railroad.

The "Locations" window shows all of the places that your trains can work. For each location
the window shows the type of tracks at that location, the number of tracks, the total length
of all tracks at that location, the amount of track used by your rolling stock, the quantity
of rolling stock, and the number of pick ups and set outs of your rolling stock that are
scheduled for that location. The Yardmaster button produces a
window (Switch List) that allows you to see the scheduled pick ups
and set outs by train. Only trains that have work for the location are available.
If the Enable ID Tag option has been selected,
an additional column for "Reporters" will be displayed.
Add or Edit Location
To add a location, press the "Add" button located at the bottom of the "Locations" window. A
new window should appear. To edit an existing location, press the "Edit" button for the
location.

In the "Add Location" window, enter the name of the location in the field labeled
"Name". The location name must be unique; the program will not allow two locations with
identical names. However, if you want more than one location to have the "same" name for
your Manifests and switch lists, add a hyphen and a number to the locations name, or a
hyphen and a left parenthesis. For example, "Boston-1", "Boston-2" and "Boston-(example)"
will print as "Boston". The program will remove the hyphen and number, and hyphen and text
when there's a left parenthesis when printing Manifests and switch lists. Note that the
"hyphen" feature also works for track names.
Now press the "Add Location" button at the bottom of the window. The various fields
that were disabled should now appear.
Each location can have several yard, spur, classification/interchange or staging
tracks. Yards are where cars and locomotives are placed for temporary storage. A spur can be
an industry or any place where a car is loaded or unloaded. A classification/interchange
track is used to exchange cars between trains, or to create a classification yard which is
used to build trains. Staging tracks represent distant locations where trains can travel
between to service the layout.
For a train to service a location, there must be at least one track for that location. See
below for more information on how to add tracks to your location. Once
you've created a track for a location, you can use the "Edit" button in the table to modify
the track.
The tables show the length of the tracks, the amount of track that is occupied (Used)
by cars and locomotives, the amount of track that is reserved, the total number of cars and
locomotives (Rolling Stock) at each location, the number of cars and locomotives that will
be picked up (Pick ups) by trains, and the number of cars and locomotives that will be
delivered (Set outs) by trains. When the program is building a train, the reserved value
shows the amount of track that is going to be consumed by set outs. In aggressive mode, the
reserved value also shows the amount of track that is going to be released by pick ups.
Therefore a positive value means that track space is going to be consumed by set outs, and a
negative number means that track space is going to be freed up by pick ups.
Train Direction Serviced
You can decide which train directions the location can service. For example, if only east
bound trains can access the location select "East" and deselect the other directions. This can
be useful if you want to only support trailing point switching for a given location. If a
location can support multiple directions then select the ones that are appropriate. You can
also control the
train service direction for each track
at a location.
Railroad Division
The railroad divisions feature allows you to create prototypical car movements for your
railroad. Cars with a
home division are
routed
to their destinations and move with "purpose". To use this feature first create and then
select at least one division for your railroad by using the "Add" button in the "Division"
section of the "Edit Location" window. You can assign multiple locations to the same division,
and you can create several divisions for your railroad. Cars that are assigned a
home division will return to the
yard or
staging at their home division when their load state becomes empty. If
the program can't find a home division yard or staging for the empty car, it will try to send
the car directly to an industry (
spur) at the car's home division. Cars
with a home division will also return to an industry (
spur) or
staging at their home division when loaded from an industry or staging
outside of their home division. Cars loaded at their home division can travel to any industry
or staging on the railroad. The program will use
interchange tracks
and
optionally intermediate yards to route the cars to
yards, industries or staging that require multiple trains. When using the railroad division
feature, it isn't necessary to create schedules for your spurs,
schedules
are optional unless your cars are using custom loads.
When setting up railroad divisions, it is best if there's at least one division yard for
empty cars to migrate to, and at least one industry (spur) to service cars loaded outside of
the division. Staging can be used as a substitute for industries. Cars that have been
assigned a division are routed and this allows them to perform local moves, for example
empty cars from a yard to a spur at the same location. Spur to spur moves are also allowed
if the car's load is accepted by the receiving spur. The switcher control for local moves does not apply to cars with a
division. However the train build option to allow local
moves for cars with a custom load or final destination (FD) does apply. It is recommended
that you leave this option for a train enabled when dealing with cars that have been
assigned a division.
Adding divisions to locations and home divisions to cars creates prototypical movement,
but it can also reduce car movement since the rules for car movement have to be enforced by
the program. It is recommended that you start off by only providing a home division to a
limited number of cars and then determine if the restricted car movements meet your
expectations. Prototypical car movement doesn't necessarily mean better for model railroads.
Rolling Stock Serviced
You can control the rolling stock a location can service. Press the "Clear All" button to
deselect all types, or "Select All" to select all types, then select or deselect the rolling
stock you wish the location to accept. After configuring the tracks for a location, you can
use the "Auto Select" button to have the location reflect the rolling stock serviced by the
various tracks. See
Edit Car Attributes to add or delete car
type names that a location can service. You can also access the "Edit Car Attributes" window
from the edit location "Tools" menu by selecting
Edit Car Type.
Location Comment
You can enter an optional comment for your location. If you want the comment to print on your
Manifests you must select the print location comments
option.
Delete Location
Use the delete location button to remove a location from your roster. Before deleting a
location you should do the following:
- Terminate or reset all trains
- Remove the location from all train routes
- Remove all rolling stock from the location's tracks (optional)
You can quickly determine which routes are using a location by using the location tool Show Routes Servicing Location
Yardmaster
The Yardmaster window provides the real time version of a
switch
list. To see the work for all trains visiting a location, press the "Yardmaster" button in
the
locations window. The Yardmaster window also allows you to modify
a
built train.
The Yardmaster "Tools" provides another window called "Yardmaster by Track". This window
lists the work for each track at the location. The other two tools are "Print" and "Preview"
which provide switch lists for the location but are only available when running in Real Time.
From the "Tools" menu found in "Edit Location" window you can access several useful functions.
The first is "Copy Track".
Copy Track
The copy track tool allows you to select an existing track and create a new track with the
same attributes as the original. You can also transfer all of the rolling stock from the
original track to the new track, and if you wish, delete the copied track. Select the
operations you want and then press the "Copy" button to create a new track, move cars and
locos, and delete the original track. If you're pleased with the results, press the "Save"
button to make your copy permanent.
When using the copy track feature, it is recommended that you reset
or terminate any built trains as the copy track will not
transfer rolling stock from a track that has a scheduled pick up or set out from a built
train. This restriction also applies to deleting the original track.
Change Track Type
The next tool is "Change Track Type". This tool allows you to change all of the tracks at this
location to the same type. Available track types are spur, yard, classification/interchange or
staging. You can also change the track type for a specific track, see
Change Track Type for a track.
Track Blocking Order
The program when creating
Manifest and switch lists will
block the cars in the train by destination (
route blocking
order) and then alphabetically by the track names at the destination. If you want to change
the order tracks are serviced at a location for car set outs, use the location tool "Track
Blocking Order" to adjust the order tracks are presented on Manifests and switch lists. The
"Order" number controls how tracks are presented, lower numbered tracks are printed first for
Westbound and Northbound trains, and higher numbered tracks are printed first for Eastbound
and Southbound trains. Use any blocking order number greater than zero when using this
feature.
Note that this feature controls the set outs for a location. Car pick ups at a location
are blocked by their next destination and then alphabetically by track name or by the track
blocking order at the destination if one was created for that destination.
The "Reset" button returns the blocking order to the original defaults which is an
alphabetical listing of tracks at a location. The "Set Order" button gives each track a
unique order number, and will also reorder existing order numbers if there are any that
aren't unique. The "Up" and "Down" buttons in the table require unique track blocking
numbers for them to work.
This feature is disabled if the Manifest Print Option Sort by Track is enabled.
Show Track Moves
The "Show Track Moves" tool adds a column called "Moves" to the "Edit Location" table. The
"Moves" column displays the number of times a car or engine was given the destination of this
track during a train build. Tracks with lower move counts are checked first by the program
when determining which track to select during the train build process. You can modify the
"Moves" count for a track by double clicking on the cell in the table and entering a new
value. Note that the program will reset all track move counts for a location when a new track
is added to that location, and will reset track move counts for all locations when a schedule
is added to a spur. To remove the "Moves" column from the table, simply select the "Show Track
Moves" tool a second time.
Edit Car Type
This tool opens the car attribute window for car types. This allows you the add, delete, or
replace a car type name. See
Edit Car Attribute Names for
more info.
Modify Location by Car Type
The tool "Modify Location by Car Type" allows you to select a car type and decide which tracks
will service the car type for a location. See
Modify
Locations by Car Type for more info.
Modify Location by Car Load
The tool "Modify Location by Car Load" allows you to quickly select a car type and decide
which tracks will service the car's load. Only tracks that can service the car's type are
enabled.
Show Cars
If you only want to see cars for a location or track, select "Show Cars" from the "Tools"
menu. This tool is also useful when you want to print out cars for a specific location or
track. Note that the Export Cars tool will only export cars for a location or track, and the
delete cars tool, when showing cars at a location or track, will only delete those cars. The
"Reset car move count" tool also behaves the same way.
Id Tag Reader at this Location [only if Enable
ID Tag option has been selected]
The "Id Tag Reader at this Location" dropdown allows you to add a Reporter that returns IdTags that may be
associated with a car or locomotive. See Options to enable this
feature.
Show Trains Servicing this Location
This tool can show you which trains can service a location or track. If you only want to see
trains that can can actually work the location or track, deselect the "Show all Trains"
checkbox. You can also determine if a certain car type will be serviced by the trains visiting
the location. Use the "Type" drop down menu to select a car type.
Show Routes Servicing Location
This tool will show all of the routes that can service a location. You can also edit a route
directly with this tool.
Yards
A yard is used to store cars and locomotives. A car's load status does not change when
delivered to a yard track. To add a yard, select the "Yards" radio button and then press the
"Add Yard Track" button in the
Edit Location window.

Now enter the name of the yard along with the length of the track in scale feet or in
actual inches. Append a double quote (") to the length when entering actual inches and the
program will convert the length into scale feet. Append cm if you want to convert from
centimeters to scale meters. If you don't want the program to load your yard to capacity
with cars or locomotives, enter a smaller value for the track length. This can be useful for
large yards where track space for switching cars is needed. Press the "Add Yard Track"
button at the bottom of the window and the disabled fields should now appear.
Train Direction Serviced
You can decide which train directions the track can service. For example, if only east bound
trains can access the track select "East" and deselect the other directions. This can be
useful if you want to only support trailing point switching for a specific track. If a track
can support multiple directions then select the ones that are appropriate.
Rolling Stock Serviced
You can control what type of rolling stock the yard can service. Note that the yard rolling
stock is restricted to the ones that the location can
service.
If the rolling stock that you wish doesn't appear for a yard, confirm that the location's
rolling stock types are properly selected. If the rolling stock type you want doesn't exist
for a location, you will have to create the type using the
Edit
Car Attribute Names window which is also available from the edit location "Tools" menu
Edit Car Type.
Road and Load Options
You can control which car roads and loads your yard can service from the "Tools" menu, or by
pressing the "Road Option" or "Load Option" buttons. See
Road
Options and
Load Options for more info.
Pick Up Car Order
There are three options for picking up cars from the yard. "Normal" uses the car's move count
to determine the order cars are removed from the yard, "FIFO" (First In First Out), and "LIFO"
(Last In First Out). FIFO would be appropriate for a double ended track where cars are spotted
at one end, and pulled from the other. LIFO is useful if you have a single ended yard that you
use to service cars. For example storing empty coal cars, it would make more sense to pull an
empty coal car from the front of the line rather than digging one out from the middle of the
yard.
When using FIFO or LIFO modes, the program uses the car's date and time when delivered to
the track to determine order. You can review the date and time for a car in the Cars window by selecting the "Last" radio button. If you would like to
see the order cars would be pulled from a track, you can go the Locations,
edit the track you want to review, and under tools in the edit track window, select "Show
Cars". Again select the "Last" radio button to see the pull order.
Comment
You can enter an optional comment for the yard. This comment doesn't appear on your Manifests
or switch lists.
Save Yard Track
Press the "Save Yard Track" to save your work. The program will create a file
"OperationsLocationRoster.xml" in your JMRI directory in a folder called "operations". The
program will also create a backup file "OperationsLocationRoster.xml.bak" containing the last
settings for all of your locations.
Spurs
A spur is used to service an industry. Most use the industy's name as the spur's name. To add
a spur, select the "Spurs" radio button and then press the "Add Spur Track" button in the
Edit Location window. Spurs are very similar to
Yards
, so see above for more information. When entering the length of the spur, enter the length of
the cars that will service the industry plus the coupler lengths. For example, let's say you
have an industry that can service two 50' boxcars, the track length in this case is 100' plus
8' for the couplers (4' for each car), for a total of 108'. You could optionally round up the
length to 110' or more.

A car's load status is modified when delivered to a spur by the program. The program
provides two load names for all cars, the default empty or "E", and the default load or "L".
If a car has one of these loads when it arrives at a spur, the load name will change to the
other, i.e. "E" becomes "L" and "L" becomes "E". If a car has a custom
load of type "Load", it too will be replaced by the default empty "E" when the program
sets a car out to a spur. A car with a custom load of type "Empty" will be replaced by the
default "L" load. You can also configure your car to return to a specific location or track
when the car's load is changed, and optionally change the car's default "E" and "L" loads to
a custom loads. See Return When Empty and Return When Loaded for more details.
You can control which loads a spur can receive and disable
the load change for a spur. See Load Options for more
information.
A spur needs a schedule to receive a car with a custom load, unless the car is shipped from another spur that has
a schedule. A schedule also allows you to the order the car types that will be delivered to
a spur, or demand cars with certain loads. See Schedules below for
more information.
Restricting Track to Certain Trains or Routes
If you wish to limit which trains or train routes are allowed to service to your track, change
the "Select trains or routes for set outs" or "Select trains or routes for pick up" from "Any"
to one of the four options in the edit spur, interchange, or staging windows. The "Trains"
option allows you build a list of trains can set out or pick up from the track. The "Routes"
option allows you to build a list of train routes that can service the track. If you only want
to prevent certain trains or routes from serving the track select the "Exclude Trains" or
"Exclude Routes" options. The "Auto" checkbox when selected will only allow you to select
trains or routes that service this track.
Note that if you do restrict which trains or routes can pull cars from a track, you
must also restrict the track's car types, loads, and roads to the same ones that your trains
can service, otherwise you can have cars stranded on the track.
If you restrict a track to certain trains or train routes, the table in the Edit Location window for that track will have an additional column
called "Restrictions". If you've built a list of trains or routes that can only set out
rolling stock to the track, you will see "SO" followed by the number of trains or routes
that are allowed to place rolling stock onto that track. For rolling stock pickup
restrictions, you will see "PU" followed by the number of trains or routes that are allowed
to pull rolling stock from that track. A small "x" appears before the number if you built of
list of train or route exclusions for that track.
Schedules
If you would like to see cars delivered in a particular sequence, or with a specific load for
delivery or shipping, the program allows you to apply a schedule to a spur. This is an
optional feature and shouldn't be used until you become very familiar with how the program
generates Manifests and switch lists. A schedule provides very fine control on the order types
of cars will be delivered to a spur. You can specify the car type, when it can be delivered,
the car's road and load. You can also decide the car's new load, destination, and when the car
is to be picked up. For example, if you wanted two SP boxcars to be delivered followed by a
tank car loaded with "Oil", you can create a schedule that will do exactly that.
You should note that adding schedules and custom loads is an optional feature and isn't
needed for good car movement, and in most cases will reduce car movement. So if you want the
most car movement don't use schedules or custom loads. This feature is here for those that
want specific car movement and custom loads. You also don't have to have schedules for all
of your spurs / industries, you can be selective and only add them to the spurs that you
believe need them.
You can also control how cars with custom loads move to your spurs with schedules, see Hold cars with custom loads when spurs are full under "Spur Option"
for more information. The "Hold" checkbox in the "Edit Location" for spurs shows selected
when the option to hold cars is enabled.
To create a schedule press the "Add" button next to "Optional Schedule" pull down menu in
the Edit Spur Track window. Pressing the "Add" button should create the
"Add Schedule" window.

Enter a name for your schedule and press the "Add Schedule" button at the bottom of the
window. Now add your first delivery for this spur by selecting a car type in the menu box
found in the lower left corner of the window and pressing the "Add car type" button. A new
item should appear in your schedule containing the type of car, pull down menus for random,
delivery, road, loads, destinations, and pickup. The schedule item also includes "Count" of
1 in sequential mode, and a wait of 0. Leave the pull down menu item blank for any field you
don't care about.
Repeat selecting the car types and pressing to "Add car type" until your have a delivery
schedule you like. Press "Save Schedule" and close the schedule window when you are done.
Note only car types that are serviced by this spur are available. If a car type isn't shown,
check the car types serviced for the spur and location.
Schedule Sequential or Match Mode
Schedules can operate in one of two modes, "Sequential" where the order in which car types and
loads arrive is important, or in "Match" mode where car type and load order isn't needed or
desired. When you select sequential mode for a schedule, the program will attempt to deliver
cars in the order you entered in the schedule table. Car types at the top of the table are
requested first and once the last car type is delivered, the schedule resumes from the top. A
pointer shows the next car type to be delivered. Select the "Sequential" radio button in the
top left corner and press "Save" if car type and load delivery order is as desired.
Match mode eliminates the sequential aspects of a schedule. In match mode, the program
when building a train will search the entire schedule to find a car type, delivery day, and
receive load that matches the car that the program is trying to place. In match mode the
pointer shows the last car type that the program found acceptable for the spur. To change
the schedule to match mode, select "Match" in the edit schedule window and press "Save".
Match mode is useful when the order cars arrive isn't important, but you still want to
receive or ship cars with a specific load, provide the car's final destination, or have the
car wait for a specific number of trains or pickup day. In match mode the schedule item
"Count" is ignored as it isn't used. Instead, a "Hit" count is provided. The program
increments the hit count for a schedule item each time it finds a match, and plans on
sending the car to that spur because of the match. In match mode, all of the schedule item
fields are available, and you can have the same type of car several times, with each item in
the schedule looking for a specific receive load or delivery date. Also in match mode the
car type selection box advances automatically to the next car type when adding a car type.
This makes it easy to quickly add car types to the table.
Schedule Line Items
Each car type entered in a schedule has optional line items controlled by the various pull
down menus. You can leave all of the line items blank if you want to keep things simple and
have the program only consider the car types being delivered. All line items are optional and
you can selectively choose the one's you want to use.
Random
The first option is the "Random" value, which allows you to create some randomness to the
schedule. If you select a value of 15, it means that the item has a 15 percent chance of being
used if all of the other criteria for the schedule item was met, and there was track space
available for the car. This feature is useful for a RIP track where you would want cars to be
randomly sent to the repair facility. For example, a random value of 2 would mean that a car
of a given type would have 1 in 50 chance of being sent the to RIP track. Note that if there
are several cars of a given type available to the train during the build process, that the
odds of a car being sent to the spur improve. For example if there were 10 boxcars available
to go the spur with a random value of 2, the odds of one of the boxcars being sent to the spur
would improve to roughly 1 in 5 if all 10 boxcars were tried by the program.
Delivery
Select from the "Delivery" pull down menu the train schedule (day) when you want the car
delivered, or leave it blank if a car can be delivered at any time. When a train schedule
(day) is selected for either delivery or pickup, a car will only be serviced when that train
schedule (day) is active. See Trains ⇒ Tools ⇒
Train
Schedules to select the train schedule (day) for your session.
Road
You can if you wish specify a particular "Road" for the type of car you entered, or leave it
blank if you don't care about the road name. Note only car roads that are accepted by this
spur are shown. To review which car roads are available see the
road
options for this spur.
Receive
You can optionally specify the car load received. Leaving the "Receive" field blank allows all
loads to be received by the spur/industry. The "Receive" pull down menu will only show the
loads that the spur can service for that particular car type. To review which car loads are
available see the
load options for this spur.
Ship
You can optionally specify the car load shipped. When the "Ship" field is blank, the program
will place the car's
Return When Empty or
Return When Loaded if specified, otherwise the program will use
the default empty "E" or default load "L". See
Spurs for how the program
deals with the default loads.
Destination and Track
You can decide where a car is to be sent after being serviced by the spur/industry. Use the
"Destination" field to tell the program where the car is to be delivered. If you want to car
delivered to a specific track at the destination, select the track you want under the "Track"
field. Only destination tracks that can accept the car type are shown in the track pull down
menu. The destination loaded by a schedule is shown as the car's
Final
Destination in the various car windows.
Pickup
Select under "Pickup" when you want the car pulled from the spur. When a train schedule (day)
is selected for either delivery or pickup, a car will only be serviced when that train
schedule (day) is active. See Trains ⇒ Tools ⇒
Train
Schedules to select the train schedule (day) for your session.
Count
If you wanted the same car type to be delivered consecutively in sequential mode, increase the
"Count" to the number that you wish. The maximum count is 100 and the minimum is 1. For
example, a count of 3 is equal to entering the exact same schedule item three times in a row.
Wait
The "Wait" field allows you determine how many trains will try to service the spur before
picking up the car. Useful if you want a car to remain still for several operating sessions.
Note that the car's load won't change immediately if there's a wait count. Once the wait count
reaches zero, the program will switch the car load to the schedule item's ship load, or
whatever is appropriate if a ship load wasn't specified. Each time a train is built that could
service the car, the car's wait count is decremented.
Schedule Example
In the schedule shown above, the schedule is operating in sequential mode and is requesting
two SP boxcars in a row with any load, then a tank car with with a load of "Oil".
Reading the entire schedule line for the two SP boxcars, it also states that there isn't a
random delivery for the cars, the cars can be delivered any day of the week. The load
received selection is blank meaning all loads are accepted, including the default "E" and "L"
loads, and all boxcar custom loads. The load shipped is also blank, therefore the ship load
for the boxcars can be the default empty "E" or default load "L", or the car's Return When Empty or Return
When Loaded load if specified. There isn't a destination for the cars, so the program can
send them anywhere that is willing to accept the boxcars with their new load. And finally
the cars can be picked up at any time.
The next line in the schedule is requesting a tank car with a custom load of "Oil". Reading
the entire schedule line for the tank car, there isn't an random value, the car is only
delivered on Mondays, the tank car's road name doesn't matter, only tank cars with "Oil" are
allowed, and the new load will be the default empty or "E" or the car's Return When Empty load since the car arrived with a custom load. And finally the car is to be sent to "Susanville",
but only on Fridays.
After the tank car is delivered the schedule starts from the beginning, again
requesting two SP boxcars followed by a tank car with oil.
The schedule controls when and what cars will be delivered and the car order. It makes
the spur more restrictive, only cars demanded by the schedule will be delivered to the spur.
Looking at the schedule you will see a pointer in the table under the heading "Current", the
pointer shows the next car type that the program wants to place at the spur in sequential
mode. When the program finds that car and sets the car's destination to this spur, the
pointer will move the next item in the schedule. After servicing the last item in the
schedule, the pointer will return to the first item in the schedule.
If you want custom loads for your cars, you can create them using the
Edit Car Loads. Each new load name is associated with the car
type. For example you can have "Freight" for a boxcar, and "Oil" for a tank car. The program
will deliver cars with a custom load to a spur that has a schedule that also requests that
particular load. However, cars with a custom load can still be placed at yards, staging, and
interchanges.
You can optionally use your staging tracks to empty cars
with a custom load, and you can also optionally have the program place custom loads into
cars departing staging tracks. If you want to specify staging as the car's destination, you
can't select a track, the program will determine which is the appropriate track in staging
to use. To prevent overloading a spur with cars with custom loads from staging, the program
will normally limit the number of cars "en route" to a track with a schedule to the
available track space. So if you have space for three cars, the most the program would
normally generate for you from staging is three cars.
Controlling Cars to the Spur / Industry
If you need to adjust the number of cars "en route" to a spur with a schedule, select in the
edit schedule window "Tools⇒Options". A new window should appear with two options, the
ability to control how many car loads the program will generate from staging, and if the spur
has an alternate track. The first option, "Percentage of custom loads generated by staging",
has a default value of 100% which means only generate enough cars to fill 100% of the spur's
available track space. If your spur can handle two or more cars, and you only want half of
your car loads to come from staging, set the value to 50%, and if you want staging to never
generate a custom load car for the spur, set the value to 0%. Sometimes it is appropriate to
overload a spur with cars or have cars "en route" to the spur, if you want this, increase the
value up to 1000%. BTW 1000% means send 10 times the available space in cars to this spur. If
you enter this value, you hopefully have 10 times the spur's available track space in a
storage yard that is near by!
Alternate Track (Off Spot)
The second option under "Tools⇒Options" in the schedule window is the ability to specify
an alternate track. The program when it finds a spur full will try to send cars to the
alternate track. If you don't specify an alternate, the program will try to send cars with a
custom load or final destination to a yard at that location. The alternate track feature can
be used to create an "Off Spot" track for your cars. See
Alternate
Track or "Off Spot" below for more details.
Using the Same Schedule for Several Spurs
Multiple spurs can use the same schedule to perform the identical function, i.e. the spurs
request exactly the same car types, roads, loads, and shipments. You can also access your
schedules from the Locations "Tools" menu. The Schedules table
provides status for each schedule. Since you can assign a schedule to several spurs, the table
also provides additional status for each of the spurs that use that particular schedule. The
table also allows you the edit a schedule once its been assigned to a spur.
A very useful tool is the show schedules by car
type and load which can be found under "Tools" in the Schedules window. This tool allows
you to select a car type and the car's load to quickly see which spurs with schedules will
ship and receive cars with those loads.
Purposely Moving Cars Using Schedules and Loads
You've entered all of your cars, tracks, and trains and have been playing with the program for
awhile. You're happy with where the cars end up, but watching the car movements generated by
the program over several sessions has you thinking that it would be nice if the car movements
had a "purpose". What you would like to see is a series of car moves that mimic the prototype
railroad that your modeling, or maybe you just want the cars to move in a certain sequence.
Schedules and custom car loads is the trick to getting the program to do what you want.
OperationsPro™ provides every car with two loads, an "L" and "E". These are called the
default load and empty respectively. You can't delete them, but you can rename them if you
wish. For every car type, you can create additional loads. For example, let's say you have
an industry that needs paper loaded in boxcars. You could create this custom load for your boxcars and name it "L(paper)" or just
"paper". Now at the spur that serves your paper industry, you need to create a schedule. In
this schedule, the first item you enter is a boxcar, and then select as the receive load,
L(paper). If the train that services this industry departs from staging, you're basically
done. The program when building a train from staging, will
search for an empty boxcar, and if found, will create the load L(paper) for you. Once the
car's load is created for that industry, the program will set the car's destination to that
industry. When the car gets delivered, the program will remove the paper load, and the car's
load status will become empty or "E".
That was easy, so let's make things more interesting and have the industry ship some
printed materials. We'll create and call this load "L(print)". Now in the first schedule
item, instead of leaving the menu under "Ship" blank, select L(print). Next to the ship menu
are destination and track menus. We could select a destination that is staging. No need to
select the track, just the staging location. Now when a train returns to pick up the boxcar,
its load will be L(print) and when the car gets to staging, the load will be removed and the
car's load status will return to empty or "E".
We could have instead of sending the car with print to staging, decided to send the car to a
spur servicing a paper industry. Just select the destination and the spur/industry that you
want the car go to. Even if it takes several trains to get the car there, the program will
figure out the best route. Note that when the schedule specifies
the ship to destination and spur, that the spur doesn't need a schedule to accept the car
with the custom load "L(print)".
Now, if you created another schedule at the destination spur, you could forward the car
again. By stringing a series of schedules and loads together you can create any car sequence
you want.
Another interesting way to move cars is to ship a custom load, but not specify a
destination. The program when it finds a car with a custom load, but no destination, will
check every spur to see if there's a schedule demanding that car type with that specific
load. And if there is a spur that meets the requirements, the program will route the car to that industry. But once a schedule sets up a car
with a custom load without a ship to destination, that car can only move to yards,
classification/interchanges, staging, and spurs with schedules. Spurs are only considered if
the spur has a schedule demanding the car's type and custom load.
Another variation is to create a schedule that provides a custom load for the car, and
a destination, but without the track assignment. The car will be accepted by yards,
classification/interchange tracks, staging, and spurs at the destination that have a
schedule that is demanding that car type and custom load. Spurs without a schedule can not
service a car with a custom load, unless the car is sent directly to that spur.
One more consideration is empty cars. The program doesn't route
cars with the default loads "E" or "L". So if your schedule is requesting an car with the
empty default "E", it can take awhile before that car shows up. An alternative is to handle
empty cars like cars with custom loads. You could create the custom load "E(mpty)" and use
this load to signify an empty car. Now cars with this load will be routed and will have the
same characteristics as cars with the "other" custom loads. One other option is to ask the
program use a custom "Empty" load instead of the default "E" load when removing a car's load.
See Return When Empty for more information.
The examples above used custom loads to help understand car movement, you could if you
wish just forward cars using schedules without the use of custom loads. Custom loads are
optional and not necessary if you want to create a simple car sequence.
Show Schedules by Car Type and Load

You can access this useful tool from the Schedules window. The Schedules window can be
found under "Tools" in the Locations window. It allows you to select a car type, and then
any load that you've created for the that type of car. The window then shows which schedules
by location are receiving or shipping that specific car load. Selecting the "All Loads"
checkbox will show you every schedule for the car type selected. Selecting the "All Types"
checkbox allows you to see which loads are being serviced by your schedules. And selecting
both checkboxes will list all of the schedules by car types, along with the loads received
and shipped.
If you want a list of custom car loads for each of your car types, you can use the
"Print Car Loads" or "Preview Car Loads" found under the "Tools" menu in the "Show Schedules
by Car Type and Load" window. You can create or edit any car load using the "Edit Car Loads"
tool.
Show Staging and Schedules by Car Type
and Load

This tool allows you to see which loads your staging tracks will generate for a type of
car, and which spurs with schedules will receive them. You can access this tool from the
Schedules and schedule windows. The Schedules window can be found under "Tools" in the
Locations window. The tool allows you to select a car type, and then any load that you've
created for the that type of car. The window then shows which spurs and schedules are
receiving that specific car load from staging. The "Generated Loads" checkbox will only list
spurs and schedules that will cause the program to generate a custom load out of staging.
The program will route a car with a custom load to spurs with schedules demanding the car
type with the receive load specified. The program will not create a custom load out of
staging to a schedule with the receive load blank (any load accepted). When the "Generated
Loads" is unselected, the window will show which schedules will receive the default loads.
Note that the program doesn't route the default empty or load out of staging. Selecting the
"All Loads" checkbox will show you every schedule for the car type selected.
The tool also show which car load options have been
selected for the staging tracks. The abbreviations are listed below:
| SWP |
Swap default loads and empties |
| EDL |
Empty cars with default loads |
| ECL |
Empty cars with custom loads |
| GEN |
Generate custom loads for spurs serviced by this train |
| ANY |
Generate custom loads for any spur (multiple trains) |
| STG |
Generate custom loads for any staging track |
If you want a list of custom car loads for each of your car types, you can use the
"Print Car Loads" or "Preview Car Loads" found under the "Tools" menu. You can create or
edit any car load using the "Edit Car Loads" tool.
Classification/Interchange Tracks
The easiest way to create the exchange of cars between trains is to use a
classification/interchange track. A classification/interchange (C/I) track can be used for
classification, the movement of cars within the same railroad, and an interchange, the
movement of cars between railroads. Cars dropped off to a C/I track by a train on a given
route will not be picked up by any train using that same route. Another train with a different
route is required to pick up the cars. This includes transferring cars from a through freight
to a local switcher. For example, you might have a branch line that picks up and set out cars
from a terminal. By defining the track as a classification/interchange track, once the branch
line train delivers the cars, they will remain there until the main line train stops to
service the classification/interchange track. Same goes for a
local
switcher, cars dropped off at a location with a C/I track will remain there until the local
moves them to the spur tracks. When the local pulls cars for the spur and places them on the
C/I track, they will remain there until the main line train pulls them.

OperationsPro allows you sort cars to C/I tracks by any combination of destination, train,
route, road, type, load, and arrival order. In the above
image, only two road names are accepted by the C/I track, and only train BB is allowed to
spot cars onto the interchange track, and train BLX is the only train allowed to pull cars
off the interchange.
The car's load status does not change when placed at a classification/interchange
track.
You can if you wish control which destinations your C/I track can service. You can access Track Destinations from the "Tools" menu. The track
destinations tool also allows you to restrict the C/I track to cars that are being routed. The "Routed" checkbox when selected in the "Edit Location"
window means only cars that are being routed can use the C/I track.
You can optionally specify which trains or
train routes can pick up or set out cars. If you restrict which trains or routes can pull
cars from a classification/interchange track, you must also restrict the track's car types,
loads, and roads to the same ones that the train services, otherwise you can have cars
stranded on the classification/interchange track. Once you specify which trains or routes
can pull cars, all cars that the train can service are available to the train, even cars
that were delivered by the same train or route.
Since you can specify that a train can set out and pull cars from a C/I track, it can
be used to capture a set of cars for a specific train. For example if you had a set of cars
that you only wanted a "turn" to use, you could create a C/I track that can only be accessed
by the turn.
The build report will provide a list of rolling stock on the C/I
track that were previously set out by a train using the same route, or aren't allowed to be
pulled due to restrictions that you've added. The build report uses the term "Excluded" when
detailing which rolling stock can't be pulled from the C/I track.
Given the complexity of this type of track, it is strongly recommended that you not use
classification/interchange tracks until you get comfortable with how the program builds
trains and you've read and can understand the train build reports.
How to Create a Classification Yard
A classification yard is used to sort cars into various destinations or trains. Normally a
yard track is assigned to a specific destination or train and cars are delivered to that track
until a train comes along to pull the cars. To create a working classification yard, you don't
need schedules or custom loads for your cars.
To create a classification yard sorted by trains, you need to assign a classification/interchange track to each of the trains that will
depart your yard. For each track, allow any
train to set out cars, but assign only one
train to pick them up. You should configure the classification track to service the same
car types, loads and roads that the train services, otherwise you could end up with stranded
cars. When sorting cars in a yard by train, some use the label "Cars for train XYZ" as the
track name.
You can also create a classification yard that sorts cars by destinations. Again using the
C/I track type, there's an option under "Tools" in the edit track window to set Track Destinations. So for example if your classification
yard serviced four destinations, you could create four tracks, one for each destination, and
the program would sort cars in your yard to each of those destinations for you. With regards
to the track name, some folks would use a track name similar to "Cars to Boston" for cars
going to Boston. You can if you wish break down any destination to trains that serve that
destination, really up to you how you want to sort your cars.
Note that it is okay to create more classification tracks or "virtual tracks" then there are
physical tracks in your classification yard. The cars can share common tracks until it's
time to finally sort them into their various destinations or trains. You can also use the Track Pools feature to share the track space in your yard.
How to Exchange Cars Between Through Freight and
Local Switcher
If you would like your through freight to set out and pull cars to a track and have a local
move them to and from the various industries at that location, you would use an
classification/interchange (C/I) track to make the exchange. Create a C/I track that only
services the type of cars that the local industries can use when delivering cars to the spur
tracks. Deselect all the track direction controls for the tracks that will only be serviced by
the
local switcher. Now when you build the through freight, you
should see that the manifest only shows cars being pulled or set out to the C/I track for that
location. One issue if you not using schedules and customs loads, is that cars are randomly
placed on the C/I track, meaning that if an industry need a certain type of car it might not
be delivered to the C/I track. One way to fix this problem is to create multiple C/I tracks
for that location, and restrict them to certain types of cars. For example, say a location's
industries could use two boxcars, and one tank car. You would create two C/I tracks, one would
be the length of two boxcars, and only allow boxcars, the other would only allow tank cars,
and would be the length of one tank car. Each C/I track could have the "same" name using the
hyphen feature, for example you could name the C/I boxcar track "Yard-(boxcars)", and the tank
car track "Yard-(tank cars)". Both tracks would print as "Yard" on Manifests and switch lists.
And finally to facilitate the exchange of cars from the spur tracks to the through freight,
create another C/I track that only accepts set outs from the local switcher. The other
solution is to use the
Planned Pick Ups feature for both spur
tracks.
Staging Tracks
Staging tracks are normally used to represent locations that generate traffic to and from your
layout. Many times physical access to staging tracks is limited, therefore the program places
significant restrictions on how staging tracks are used. A "staging track" holds one complete
train. Once a train arrives on a staging track, the cars and locomotives remain together until
the train departs the staging track. The program never modifies a train sitting on a staging
track. In order for a train to depart staging, the program must find new locations for all of
the locomotives and cars sitting on the staging track. No locos or cars can be left behind.
Due to the complexity of staging tracks, it is strongly recommended that you not use staging
tracks until you become comfortable with how the program builds trains including the ability
to read the train's build report.
If this is your first time using a computer program to create car movements, it is
recommended that you enter a minimum of two staging locations for your operations, and have
your train depart from one and terminate into the other. For example, say your trains run
east and west. It is best if you create "East Staging" and "West Staging" and have your
trains travel from say west staging, on to your layout, do some work, and then terminate
into east staging, and vice versa. It is also better to name your staging after real
locations. So for example, you might want to model the cities of Springfield and Worcester
and have trains come from New York and Boston to service your layout. In this case, New York
and Boston are west and east staging respectively. Note that the staging tracks for New York
and Boston can be the same physical location on your layout, we just need the two staging
names so our train Manifests look more prototypical. Note that if you use only one staging
location that the program doesn't normally allow cars to travel from staging and return to
the same staging location. If you want the program to allow this type of operation, see
Settings⇒Tools⇒Options

A staging track allows you to have all cars and locomotives in a train delivered to one track.
When terminating a train into staging, the program will search for a completely empty track,
one with no locomotives or cars. The staging track by
default must also service all of the train's car
and locomotive types and roads. Trains can not share staging tracks; the program will only
place one train per track. When departing a location with a staging track, all cars and
locomotives on one track will be assigned to the train. A location can have multiple staging
tracks, but can't have any other types of tracks, spurs, yards, etc. Staging tracks can be at
the start of a route, the end of the route, or both. Staging tracks in the middle of a route
are ignored by the program, and are regarded as pass-through tracks.
Note if you are running a train to and from the same staging location using the normal build mode, you must define two staging tracks for the
program, one to depart on and one to return on. Physically the two staging tracks can be the
same one. If you want to use the same name for your staging tracks, the program allows you
to name the staging tracks using a hyphen and a number as a suffix. The hyphen and number
are not printed on the switch lists or Manifests. If you're using aggressive
mode for building trains, you can configure the
program to allow the train to return to the same staging track that the train departed on.
If you require a train leaving staging to have a certain number of locomotives, locomotive
model, or road; the program will search all staging tracks at the departure location for a
train meeting those requirements. If you set the locomotive requirements to 0, the program
will select the next available train from staging; and will ignore the number of locomotives
leaving that staging track. See Optional locomotive
requirements for more info.
You can also control the number of cars and the train's length when departing staging. You
can also request an empty track when departing staging. See Departing
Staging Route for more info.
You can if you wish, optionally control which staging
tracks a train will arrive on and depart. Note that the default "Any" allows any train to
arrive or depart on the staging track, so if you want to restrict a train to a specific
track or tracks, you must configure all of the staging tracks at that location.
You can as an option, have the program ask you which
track you want to use when departing from, or arriving into staging.
Staging Multiple Trains per Physical Track
The program only allows one train per track in staging, but if you built a large staging track
that can fit two or more trains, the program allows you to
pool several
staging tracks together so multiple trains can reside on one physical track. The program will
pull trains off the staging track in the order the trains arrived. If your staging tracks are
"double ended", meaning that your trains enter from one side of staging and depart from the
other, you would select FIFO (First In First Out) mode in the pool window. In FIFO mode the
first train to arrive into staging will be the first to depart. If your staging is "single
ended", meaning your trains arrive and depart from the same end, you would select LIFO (Last
In First Out) mode in the pool window. In LIFO mode the last train to arrive will be the first
to depart.
When naming the tracks in the pool, it is best to use "same" names using the "hyphen"
feature. For example if you had one large staging track and wanted three trains in staging,
you might name the staging tracks, Track 1-1, Track 1-2, Track 1-3, and pool the three
tracks together. The train Manifest paperwork would show the departure track name as "Track
1" by dropping the hyphen and number. If you wanted all three tracks to hold the same length
of trains, you would set the minimum track lengths in the pool window the same for all three
tracks. For example if the staging track was 900 scale feet long, you would set the minimums
to 900 divided by 3 or 300 scale feet.
Note that when using this feature you need to correctly terminate trains in the order
they arrive into staging. The program uses the car's last moved date and time to determine
the order trains arrived into staging.
Staging and Car loads
Staging tracks can optionally swap the car default loads from empty to loaded, and loaded to
empty. Select the "Swap default loads and empties" if you want your cars loads to change when
arriving at the staging track. You can if you want, ask the program to empty cars as they
enter staging. Select the "Empty cars with default loads" to change a car's load status to
empty. If you're using custom loads, you can remove the custom load when the cars arrive at
the staging track. Select the "Empty cars with custom loads" box if you want to replace your
custom loads with the default empty.
OperationsPro™ provides three options for placing custom loads into empty cars when
they depart staging. The first option is called "Generate custom loads for spurs serviced by
this train". If this option is selected, the program will only check spurs with schedules
along the departure train's route. If the second option is selected, "Generate custom loads
for any spur (multiple trains)", the program will check all spurs with a schedule for a
request, and try to route the car with a custom load to that spur.
For a spur to request a custom load, the spur must have a schedule.
The program when determining how many car loads to generate, will consider the value in the
Percentage of custom loads generated by staging. Also,
if the spur is full or becomes full, the program will send cars to the spur's Alternate Track if there's one specified, and then to any yard
tracks at the spur's location.
Both spur options work the same with regards to placing custom car loads into empty
cars, only the number of spurs considered by the program changes. If a schedule demands a
certain car type and custom load, and that car type is departing staging, and the car's load
is default empty, the program will place the custom load into that car if one of the two
options is selected. Note that the program will not create a custom load out of staging to a
spur / schedule with the receive load blank (any load accepted).
The third option "Generate custom loads for any staging track" will try and place
custom loads into your empty cars by searching for destinations that are staging tracks. The
program will randomly search for a staging track that isn't located at the train's departure
location. If the program does find a staging track, it will then randomly assign a custom
load that is serviced by the train, the train's staging departure track, and the car's
destination staging track. Next the program will determine if the car can be routed to
destination staging track using the assigned custom load. If the staging track is reachable,
the program will in addition to placing the custom load in the car, set the car's final
destination to the location where the staging track resides.
To restrict which car loads the program will generate for you when departing staging, use
the Load Options under "Tools" in the "Edit Staging Track"
window, and adjust the "Select loads shipped from this track" to your liking. You can also
control which types of loads the program will place in your cars by restricting the types of
loads the train departing from staging is allowed to service. To control which loads a train
will service, select under the "Edit Train" window menu "Tools" then Train Load Options.
You can also control which loads your staging tracks will accept. Again use the Load Options for a staging track, and adjust the "Select loads
serviced by this track" to control which car loads are allowed into staging.
You can control which destinations are valid out of staging by using the Track Destinations window found under "Tools".
There's also a tool Show Staging and
Schedules by Car Type and Load that allows you to review your staging load generation
selections and which spurs and schedules will receive the car loads.
Blocking Cars from Staging
OperationsPro™ provides a very simplistic algorithm to block cars from staging. Since
cars that have been sent to staging can reside anywhere in the train, the program uses the
last location where the cars where picked up to block an outgoing train from staging. So for
example, if a train that terminated into staging had three stops, A, B, and C, the cars from A
would be blocked together when the next train departed staging. The same goes for previous
pick ups from B and C, those cars would remain together. The program when attempting to find
destinations for the cars departing staging, starts with the largest block of cars, and then
checks the departure train's route, and attempts to send the largest block to the location
requesting the most moves. After doing that, the program does the same with the next block of
cars, it finds the second location in the route and sends the cars there. This is a very
simplistic approach to blocking cars, it assumes that cars previously picked up at a location
were placed into the train as a group. This blocking feature doesn't consider where in the
train the cars are, as some crew members when picking up cars, will add the cars to any part
of the train. So the first stop in the departure train's route may not have the cars at the
head of the train, but they should be in a group, somewhere in the train. To enable this
feature, see Edit Staging Track, "Optional Car Blocking" in the lower right corner of the
window. There are many reasons why this option will not block cars correctly. See the train's
build report for more details.
This feature is disabled if you've decided to generate
custom loads for your cars out of staging.
Looping Trains through Staging
Sometimes for operations a train enters staging at one location (call it A) and then later
departs at another location (call it B). From an operations perspective locations A and B are
locations not directly connected by trains. So we need to relocate locomotives and cars from
location A to B so the train's Manifest can make sense. One way to do this is to terminate the
train into staging at location A. Then create a "virtual" train that simply moves the cars
from location A staging to location B staging. Doing this causes the program to "move" the
train and its cars from A to B which is really the same physical track. Later you can build a
train that departs location B, and the Manifest will show that the train originated from B and
not A.
You can automate the restaging of a train by creating a script
that is activated when the train is terminated into staging. You can also create an automation.
Off Layout Storage / Staging
Some lucky folks have more locomotives and cars than track on their layout and want the
program to gather rolling stock from storage boxes to build trains from staging. One way to do
this is to create a "five finger" route for a train that will visit your storage boxes, and
pull cars from each of the boxes to create a train. This train's route can depart and
terminate to one of your existing staging locations, this way the train also returns rolling
stock to your storage boxes. Some storage boxes only fit a certain number of cars, you can
control how many cars a box can hold by creating the right number of tracks of a certain
length for the box. The "copy" location and track features make the creation of storage boxes
a bit easier.
Arrival and Departure Tracks
To create several arrival or departure (A/D) tracks for a location, the correct track type to
use is staging. The staging track option will force the locomotives and cars to one track. If
you only need one arrival and one departure track, you could with proper configuration use
classification/interchange tracks.
When using staging tracks for A/D you need to consider the following. To prevent any changes
to a car's load, deselect all of the load options for the staging track. If you want
additional track types for the "same staging" location to break down or build trains on your
arrival or departure tracks, you will need to create a second location using the hyphen feature. Normally you would also create a local switcher to
break down or build your arrival or departure trains. For the local switcher, you would
combine the "same" locations in the switcher's route. You would
only allow the switcher to pull cars from the
arrival track, and only allow the switcher to
set out cars on the departure track. If breaking down the arrival track, the first location
in the switcher's route has to be the location with the arrival staging track. And if the
switcher is also building the departure train, the staging departure track location has to
be the last location in the switcher's route. If you're using custom loads or final
destinations when placing cars on your "staging" departure track, you'll need to Enable Car Routing through Staging. If you only want cars
that are being routed by the program to use your arrival track, select the option to only
allow cars with final destination in the Track Destinations
tool.
You can access some very useful tools for your tracks from the "Tools" menu when editing a
track.
Load Options
You can restrict which car loads a track can service. Under "Tools" in the menu, Select "Load
Options". In the "Edit Track Load Options" window select "Accept only" if you want to build a
list of car load names that the track will accept. Select "Exclude" if you want to build a
list of car load names that you want to exclude from the track. There's also an option to
associate the loads to a particular type of car that the track will service. Select the "Use
car type and load" if you want this feature. To add a load name or car type and load name to
the load list, select the load name or combo you want, and then press the "Add Load" button.
To remove a load name from the list, select the load name you want to remove, and press
"Delete Load". "Delete All" will remove all load names from the load list.
If you decide to restrict a track to certain loads, the table in the Edit
Location window for that track will have an additional column called "Loads". If you've
built a list of loads that can be accepted by the track, you will see "A" followed by the
number of loads that are accepted by that track. If you've built a list of loads that the
track will not allow, you will see "E" and the number of loads that you want to exclude from
this track.
Note that load restrictions for a spur will not create demand for that type of car and load.
Other than the default car loads of "E" and "L", you'll need Schedules
for your spurs to create demand for cars with custom loads.
Spur Option (Hold cars with custom loads when spurs are full)
In the "Edit Track Load Options" window spurs have the additional option "Hold cars with
custom loads when spurs are full" and this option is used to restrict car movement. When this
option is selected, cars with custom loads are only
routed to spurs
with schedules demanding the car's custom load. When the program finds a car with a custom
load but without a final destination, it will search all spurs for a schedule that is
demanding that car's type and load, and if found will route the car there. If all spurs are
full and the option "Hold cars with custom loads when spurs are full" is selected for any spur
with an alternate track demanding that car's custom load, the program will only move the car
when one of the spurs can accept a new car, i.e. the spur is no longer full. If however the
option "Hold cars with custom loads when spurs are full" isn't selected for all of the
spur/schedules demanding the car's custom load, the program will attempt to move the car to
another location, which can be staging.
You can have the program ignore the "Hold cars with custom loads when spurs are full"
feature described above by selecting the Send cars with
custom load to staging option for a train.
Spur Option (Disable Load Change)
If you don't want a car's load to change when delivered to a spur, select the checkbox. Useful
for Repair In Place (RIP) tracks.
Road Options
You can also restrict which roads a track can service. Under "Tools" in the menu, Select "Road
Options". In the "Edit Track Road Options" window select "Accept only" if you want to build a
list of roads that the track will accept. Select "Exclude" if you want to build a list of
roads that you want to exclude from the track. To add a road to the road list, select the road
you want, and then press the "Add Road" button. To remove a road from the list, select the
road you want to remove, and press "Delete Road". "Delete All" will remove all roads from the
road list.
If you decide to restrict a track to certain roads, the table in the Edit
Location window for that track will have an additional column called "Roads". If you've
built a list of roads that can be accepted by the track, you will see "A" followed by the
number of roads that are accepted by that track. If you've built a list of roads that the
track will not service, you will see "E" and the number of roads that you want to exclude
from this track.
You can optionally add a comment to your Manifest or switch lists when a pick up, set out, or
pickup and set out occurs to a track. Only one of the three messages will be added to your
paperwork when there's work for the selected track. The checkboxes at the bottom of the window
allow you to decide which paperwork gets the comment.
You can also select the color of the text for each of the comments using the color
selector to the right of the text message.
Track Pools
OperationsPro™ allows you to "pool" a set of tracks at a location. Tracks in a pool
share their track lengths with each other. This is useful if you've divided a location into
track segments and you want each segment to adjust its length based on the program's demands.
To create and place a track into a pool, select Tools⇒Pools in one of the track edit
windows. Enter a name for your pool and press the "Add" button. You can also specify the
minimum length for the track. A minimum track length prevents the other tracks in the pool
from acquiring all of the track's length. Next select a pool name for the track and press
"Save". The bottom of the pool window will show the other tracks that are in the track's pool.
The program on restart, will automatically delete any pools that aren't assigned to a track.
A "pool" can be used to share track space with two or more industries. For example,
let's say you have a spur that services two industries, and it can hold four 50' cars, or is
roughly 220' feet long. Now you could enter into operations a track length of say 110' for
industry 1, and another 110' for industry 2. The program could set out up to two cars on
each of the tracks serving each industry.
But let's say you want to have up to four cars sent to either industry. If you "pool"
the two industry tracks, the program can borrow space from the other industry if needed. So
now the program could set out up to four cars at each industry, but no more than four cars
total.
If you don't set a minimum, then one industry could hog all of the track. By entering a
minimum of say 55' for each industry, it means that the most any one industry is going to
get is three cars. There will always be space available for at least one car at each
industry. Note that the maximum number of cars in all cases is four. It is only how the cars
are distributed that changes when entering a minimum.
Pooling staging tracks allows you to have multiple
trains per physical staging track. The program only allows one train per staging track,
but you can pool your staging tracks to have multiple trains residing on one physical track.
When pooling tracks in staging, the pool window provides three train departure modes,
Normal, FIFO, and LIFO. "Normal" selects a departure track based on usage, tracks with the
least use are selected first. You would not use "Normal" when there are two or more trains
on one physical track. "FIFO" selects the first train to arrive into staging for departure,
and "LIFO" selects the last train to arrive for departure. The program uses the car's last
moved date and time to determine the order trains arrived into staging, so the order you
terminate the trains is very important if you use FIFO or LIFO modes.
Note that the program normally selects a departure track out of staging by usage. If
you prefer to have your trains depart staging based on the order they've arrived, you would
use the staging pooling feature for your set of staging tracks. If you're only interested in
the order train depart staging (FIFO or LIFO) and not sharing track space, you would set the
minimums for each staging track to their actual length.
Another use of a "pool" is with regard to schedules. For the power user, you might find
that a single schedule assigned to a spur doesn't quite do what you want. But if the track
could have several schedules, it would do what is needed. By entering multiple spurs with
schedules shared via a pool, you can create any car sequence imaginable for your industry.
Track Pool Example
The following describes one way to use the track pool feature. Say you have an industry with
three loading doors that was originally designed to service 40' boxcars. You could tell the
program that each door is a spur with a length of 44'. This would force the program to only
place 40' or smaller boxcars at each door. But what if you wanted to also accept 50' cars. By
pooling the three tracks together, a larger boxcar could steal space from one of the other
doors. However, placing two 50' boxcars at adjacent doors doesn't work, but you could place
two 50' boxcars at the two end doors, but the center door can't be used when either end door
is serving a 50' boxcar. To do this you would pool all three "door" tracks, and set the
minimum track length for the two end doors to 44'. Now the program can only steal space from
the center door. Placing a 50' boxcar at either end door, prevents the program from placing a
car at the center door. If a 40' boxcar is first placed at the center door, only 40' cars are
then allowed at the end doors.
Alternate Track or "Off Spot"
You can add an alternate track to a spur from the "Tools" menu accessed from either the edit
spur or the edit schedule windows. The program when it finds a spur full will send cars to the
track you specify as the alternate track. The alternate track feature can be used to create an
"Off Spot" track for your cars. Once you specify a track as an alternate, only cars destined
for the spur will be placed on the alternate track. You can also use the same alternate track
for several spurs. Normally the alternate track is a
yard track type, but
you can also use an
interchange, or
spur type
track if you want more control over the car's movement or load.
During the train build process in aggressive mode, the program
will check the alternate track for cars after assigning cars from the spur to the train
being built. This way cars on the alternate are used to keep the spur full. Note that the Planned Pick Ups feature can defeat the movement of cars from
the alternate to the spur, so it is recommended that you don't use both features for a spur.
Adding an alternate track will normally increase the number of cars that the program
routes to a spur / schedule. The train build report refers to routed cars as "inbound" to
the spur/industry. The maximum number of inbound cars to a spur with an alternate track is
determined by the length of the spur and the alternate track. So if the spur could hold 6
cars, and the alternate track 5, then the program would allow a maximum of 11 cars to be
sent to the spur.
You can see all "inbound" cars by using the sort by "FD" or Final
Destination in the Cars window.
The program will also use the spur's alternate track as an outbound track when routing
a car from a spur involving three or more trains. The car in this case is being routed and
has a final destination assigned to it, and the program finds that all of the first hop
interchanges and yards are full, and the alternate track has room, the program will redirect
the car to the spur's alternate track. This is done to free up space at the spur, allowing
the program to move inbound cars from the alternate to the spur. Once the first hop
interchanges or yards get cleared, the program will assign the outbound car to the available
interchange or yard and the car will continue to its final destination.
Planned Pick Ups
The program when searching for tracks to set out cars, checks to see if there's space
available for new cars. Sometimes due to the order that you're building your trains, you know
better than the program that certain cars will be picked up during your session, say by a
train that will be built later. This feature can be useful for classification/interchange
tracks, especially if you want the classification/interchange tracks to be more to the full
side rather than empty side. Also if you are switching cars to and from tracks that are
basically full, using this option on one or more of the tracks in question can increase car
movement.
If you want the program to ignore some number of cars currently sitting on the track,
you can use this feature to specify how many cars to ignore. The choices are 25%, 50%, 75%
and 100%, which means you can tell the program to ignore 25 to 100 percent of the cars
sitting on the track. For example, if you chose 100%, the program will ignore all of the
cars sitting on the track, and will set out new cars up to the length of the track. This
also means that the program can overload the track up to 100%. So if the track could hold 10
cars, the program could send another 10 cars to the track. Now the track could be overloaded
until this train or a later train arrives and picks up the original 10 cars. Therefore you
might need some temporary track space available to hold the new cars. So if you don't have
"extra" space for cars, you might not want to use this feature! Note that it is your
responsibility when using planned pickups and not the programs to build and terminate a
train that eliminates the potential overloading.
The following is an example using planned pickups to get a desired set of car moves. Say you
only have two tracks at a location that can hold exactly three cars each. You place three
cars on each track for a total of six cars. You've configured the program to allow a local
switcher to swap the cars on each track. Without planned pickups, when you build the
switcher the program would find both tracks full and the build
report will state that there isn't any space available to move cars to either track. The
program needs to find an empty spot for a car before it can plan a move. With planned
pickups set to 100% for both tracks, it allows the program to plan three car set outs to the
full track, because with planned pickups the space consumed by the cars sitting there is
ignored. This allows for a complete car swap between the two tracks.
Now using the example above we'll show how easy it is to overload a track using planned
pickups. If we set the number of moves for the switcher to an odd number the program could
overload one of the two track. Let's try 5 moves for the switcher, with 5 moves the program
would pull three cars from one track and set them out to the other, and then pull two cars
from the other track and set them out to the other. Once the switching is complete, one
track will have two cars, and the other four! But there's only room for three! The track is
overloaded by one car. So in this example using even numbers for the switcher moves doesn't
overload the tracks, but odd number moves can.
Guaranteeing that cars will be picked up from a track can be a bit tricky, so it is
recommended that you not use this feature until you become an expert with regards to using
this program, otherwise you will most likely overload your tracks when using this feature.
Also recommended is that you not use the Alternate Track
feature and planned pickups at the same time for a spur. It can defeat car movement from the
alternate track to the spur.
Track Destinations
You can control which destinations a classification/interchange (C/I) or staging track will
service. Under "Tools" in the edit track window for a C/I or staging track, the menu item
"Track Destinations" allows you to select which destinations are valid for the track.
For both C/I and staging tracks there's an option to only accept cars with a final
destination. This prevents cars without a final destination from using the track. This is
useful when you only want routed cars to use the interchange or
staging. Tracks that only accept routed cars have the "Routed" checkbox selected in the
"Edit Location" window for C/I and staging tracks. Note that cars without a final
destination (placed randomly on the track) could be stranded on the track if there isn't a
train that directly services at least one of the track destinations.
After you've selected the destinations that you want the track to service, you can use
the "Check Destinations" button to verify that all of the destinations you've selected can
also service the same car types, roads, and loads as the track. The program will report each
problem it encounters, you can continue checking by pressing the "OK" button, or "Cancel" if
you want to abort the checking. The "Check Destinations" can take awhile to complete as it
will test all combinations of car types, roads, and loads that the track can service. The
program also checks to see if there's a train that can carry the car from the track to the
selected destinations.
You might find that the "Check Destinations" will report bogus issues when you've configured
your C/I track to service several car types, roads, and loads, but have destinations that
can only service a subset of these. In this case, it is best to break the C/I track into
several tracks each servicing the same car types, roads, and loads that the destinations can
service, and then pool the C/I tracks together if you want to use the
same track space.
Change Track Type
If you want to change the track type to a spur, interchange or yard, in the edit track window,
select Tools⇒Change Track Type. Select the desired track type and press "Save".
Show Cars
This will open a "Cars" window displaying only the cars for the track selected. Note that the
Export Cars tool will only export cars for the track selected, and the delete cars tool will
only delete the cars for the track selected.
Show Trains Servicing this Track
This tool will show which trains can service the track being editing. If you only want to see
trains that can can actually work the track, deselect the "Show all Trains" checkbox. You can
also determine if a certain car type will be serviced by the trains visiting the track. Use
the "Type" drop down menu to select a car type.
OperationsPro™ provides several tools that can be accessed from the "Locations" "Tools"
menu.
Copy Location
This tool allows you to make a copy of an existing location and all of the tracks at that
location. Enter a new location name, select the location to be copied, and then press the
"Copy" button. If you want to move all of the rolling stock at the location being copied to
your new location's tracks, select the checkbox "Move Rolling Stock to New Track". You can
also delete all of the tracks at the location being copied, but you must also select the "Move
Rolling Stock to New Track" option.
Copy Track
See
Copy Track under Location tools.
Schedules
You can access all of your schedules directly from the "Locations" Tools menu. The "Schedules"
window lists all of the available schedules by name. The table includes the status of the
schedule, the number of spurs the schedule is assigned to, a drop down
menu showing each spur that is using the schedule, the schedule's status and the mode for the
spur selected. If everything is fine you should only see "OK" as the statuses. If there's an
error, you should investigate and correct the problem.
Modify Locations by Car Type
This feature can be found under the "Tools" menu in the "Locations" and "Cars" windows. Use
this tool to quickly modify the type of cars your locations and tracks will service. Very
useful when adding a new car type to your roster.

First select the car type you wish to modify. The window will then show which locations
and tracks can service that car type. Select or deselect the locations and tracks you want
to service, and press the "Save" button to modify your locations and tracks. You can also
copy how an existing car is serviced by your locations and apply those rules to another car.
To make a car type behave like another, select the car type you would like to copy using the
right side "Copy Type" menu. Then select the "Copy" checkbox, and press "Save".
Modify Locations by Car Load
The tool "Modify Locations by Car Load" allows you to quickly select a car type and decide
which locations and tracks will service the car's load. Only tracks that can service the car's
type are enabled.
Show Cars
To only see cars that have a location assigned to them, select "Show Cars" from the "Tools"
menu.
Export Locations
Export locations provides a comma separated values (.csv) file with all of the information
concerning your locations. The export file "ExportOperationsLocationRoster.csv" can be found
in the "operations" directory.
Import Locations
Import locations allows you to populate your locations using a CSV file. First do an Export
Locations and examine the file to see the order the data has to be entered. The import
locations code hasn't implemented all of the exports fields. Columns 15 through 23, and
columns 27 though 37 are currently ignored during an import.
Print or Preview
This tool provides several options with regards to printing or previewing your locations.
- Print Locations
Prints the information found in the Locations window, plus a summary of track space
available and used.
- Print Schedules
Lists the schedules and the information found in the edit schedule window.
- Print Comments
Prints the location comments
- Print Location Details
This option will list each track for a location, and details which car types,
loads, roads, and trains can service that track.
- Print Track Analysis
Lists each car type, and shows which tracks can service that car type. The analysis
includes the total length of each car type, and then the percentage of track that can be
consumed by that car type.
- Print Track Error Analysis
This option will check each track and determine if there's a train that will
service the car types selected for that track.
[Click to go back to TOC]
Cars
The cars window allows you to edit your car roster. You can enter a car's road (reporting
mark), number, type, length, and location on the railroad. The program will automatically
calculate the car's maximum weight based on length and the scale your modeling. You can
optionally add the car's color, built date, load and owner. If you want a group of cars to be
switched as a unit, you can create a
kernel. Use the
Set
button for a car to optionally enter the car's status, Return When Empty (RWE), Return When
Loaded (RWL), and
Home Division.

If the Enable ID Tag option has been selected,
a check box for "RFID" will appear in the bottom box on this page. If that is checked,
additional columns for "Reported Location", "Reported Date", and "RFID" will be displayed.
Table Sort
To sort cars by a particular attribute, select any of the radio buttons in the "Sort by" list.
One of the more useful sorts is by location. You can under "Tools⇒Car Roster" print a
list of cars by their location and track when the radio button "Location" is selected. You can
also sort the table by clicking on any of the column headings. To perform a double sort,
select the first sort by selecting one of the "Sort by" radio buttons, then click on the final
sort by clicking on one of the column headings.
Final Destination or FD
A car when assigned to a train is given a destination or the location where the car is to be
delivered. When a car is to be
routed, it is given a final
destination, where the car going to be delivered using two or more trains. A
schedule is used to give a car a final destination, in addition to the
use of
Railroad Divisions and
custom
car loads. In the Cars table, a car's final destination has the prefix "->" in the
"Destination" or "Final Destination" columns.
Moves, Wait and Last Time Moved
You can edit the number of times a car has been moved by the program and the car's wait count
directly from the "Cars" window. Double click on the cell in the Cars window to change. The
built and owner fields can be found in the
Edit Car window. The last
time moved is set when the program delivers a car to a track.
Pick up
The "Pick up" column shows if a car has been scheduled for a pick up using a
schedule and
Train Schedules. After a
car is assigned to a train by the program, the car's estimated pick up time can be viewed in
the "Pick up" column.
Add, Find, Save Buttons
There are three buttons located at the bottom of the Cars window. The
Add
button allows you to add a car to your roster. The "Save" button stores the cars roster to a
file. The "Find" button and the adjacent text window can be used to find a car by its road
number. You can use the wild card "*" when entering a car number. For example if you want to
find all cars with numbers that end with 345, enter *345, and press find. Each time you press
find, the next car with a road number ending with "345" will be highlighted.
Importing Cars from a File
If you already have a list of cars in a database, you can import the cars into the program.
The import function requires an ACSII text file, with one line for each car. The car import
requires four attributes and the order is car number, road (reporting mark), type, and length.
Length is the car's full scale body length. Do not include
coupler length, the program does that automatically. All four car attributes are required for
the import to work correctly. The program requires each car to have a unique road and number.
Use the
hyphen feature if you have cars with the same road and
number. The following shows two examples of the correct format for two 40 foot cars:
336 GCR Flat 40
655578 UP Boxcar 40
Each line can start with a space and multiple spaces between fields is okay. Optionally you
can include additional attributes in the following order; weight,
color, owner name, date built, and location. The weight is the
car's weight in ounces which can be 0 if you want the program to automatically calculate it.
The location can have two fields, the location name followed by the location's spur or yard
name separated by a hyphen. The following shows two examples of the correct format:
336 GCR Flat 40 3.8 Black AT 1930 Home Town USA - George's Oil Terminal
655578 UP
Boxcar 40 3.8 Yellow DB 1934 York - York Freight
If you prefer to use comma delimiters (comma separated values) instead of spaces, use a file
with a .csv extension or place the word "comma" at the start of your import file and use
commas instead of spaces. You can also have the program create a comma separated values file
for you by selecting the Export to file under the "Tools⇒Car
Roster" menu in the "Cars" window. The following are two examples of importing cars with
comma delimiters.
comma
336,GCR,Flat Car,40,3.8,Black,AT,1930,Home Town USA,-,George's Oil Terminal
655578,UP,Tank Car,40,3.8,Yellow,DB,1934,York,-,York Freight
When importing a comma separated values (.csv), the program will delete leading and
trailing spaces if they exist between the commas.
A comma separated values file can also import a car's load and kernel name, just add
them after the track name field.
If you enter 0 for the car's weight, the program will automatically calculate the car weight
for you based on the car's length and the scale you've selected.
To import a file, use the "Tools" menu in the upper left hand corner of the Cars
window. Then select "Tools⇒Car Roster⇒Import from file". Note that the program
will only add cars that don't exist in the program's car roster. If the car already exists,
the import will be skipped by the program.
During the import, if a car's location or track doesn't exist in the program's database, the
program will prompt you to create them. This way not only are you importing your cars, but
also the car's locations and tracks. The program will set new track to a length of 1000',
and will set the track type to yard. After the import you can edit the track and set the
track's correct length and type.
To improve the speed of the car import, you can close the cars window. It takes
significantly more processor cycles to update the cars window than to actually import the
cars. The program will report to the system console information and warnings during the
import. You can access the system console from any menu bar under "Help"
After importing your cars, you must save them if you want to keep them as part of your
roster. Use the Cars "Save" button or select any car by pressing the edit button and then
press the "Save" button that can be found at the bottom right of the Edit
Car window.
Importing Kernel Names
To add kernel names to your cars you can import them by creating a file with the first line
starting with "kernel" and the following three attributes (number, road, and kernel name) for
each car in a kernel:
kernel
21455 UP kernel_name
Adding Cars to your Roster
To manually add a car to your roster, press the "Add" button located at the bottom of the
"Tools⇒Operations⇒Cars" window. Once a car has been created, you can use the "Edit"
button for a car in the "Cars" window to modify the car's attributes.

Road
Select the road (reporting mark) for the car. If the desired road doesn't exist, press the
"Edit" button to the right of the road select menu box. This will allow you to add a new road
or delete any that you don't need. You can use the "hyphen" feature to create unique road
names. The program will drop the hyphen and the following characters when printing a Manifest
or switch list.
Road Number
Enter the car's road number in the text box. The program requires a unique road and number for
each car. If you have cars with identical roads and numbers, simply add a -1, -2, etc. to each
of the car numbers. The program when printing out the Manifest or switch list will drop the
-1, -2, etc. from the car's road number.
Type, Length, Weight
Select the car's type and length from the menu boxes. Use the "Edit" button to the right of
the menu boxes to add or delete car types, or lengths that you want to add or remove. The
car's maximum weight is automatically calculated, but you can enter a different weight if
necessary. When entering the length of a car, enter the length of the body and not the total
length. For example, a forty foot boxcar has a length of 40 feet. The program when calculating
lengths will add two feet to each end of a car for the couplers. Therefore when you place a
forty foot car at a spur, it will consume 44 feet of track.
Car subType
OperationsPro™ supports the ability to add a subType to a car's type field using the
"hyphen" feature. Adding a "-subType" to your car type will create a new type of car. The
"-subType" is not printed on the Manifest or switch lists. For example you might have coal
cars with loads and coal cars that are empty. If you enter the car type as HopCoal-C for your
cars with coal, and HopCoal-E for the empties, the program can use this information to assign
and deliver cars to their appropriate trains and locations respectively.
Passenger, Caboose, FRED, Utility, and Hazardous checkboxes
Passenger checkbox
If the car is used in passenger service select the passenger checkbox. The program will place
passenger cars towards the rear of a mixed service (combination of passenger and freight cars)
train when the "Car Blocking Order" numbers are positive, and at the front of the train if the
blocking numbers are negative.
When the passenger checkbox is selected, a new field called "Car Blocking Order" will
appear. The text box allows you to enter a number between -100 and 100 and this gives you
control where in the train's Manifest a car will be placed. Lower numbers will place the car
at the front of the train, and higher numbers towards the rear. We recommend that you start
off using numbers cleanly divisible by 10. For example, you might what to place an
observation car at the end of the train, a value of "90" would be appropriate. If you wanted
a baggage car to be the first car in the passenger train, a value of "10" would be a good
value, cars in the middle of the train could use "50". Later you can fine tune your
passenger trains by using the other numbers that are available.
The passenger option is also useful for any car that needs to ride a train. For example
MOW, milk, and buffer cars can use the passenger option to ride and return to their original
track.
Caboose or FRED checkbox
If the car is a caboose or has a FRED (Flashing Rear End Device) select the respective
checkbox. The program uses the caboose and FRED options to place the car at the end of a train
when the train
requires a caboose or car with FRED. Note that
you can also select the passenger checkbox to use the blocking feature allowing you to place a
caboose or car with FRED anywhere needed in a train.
The program can optionally add, remove, or swap a caboose in a train's route. See Locomotive or Caboose Changes en Route for more
information.
The program allows passenger cars, cabooses, and cars with FRED to return to their
original location and track.
Utility checkbox
When the utility checkbox is selected, it instructions the program when printing Manifests and
switch lists to not show the individual car's road and number, but rather the quantity of cars
needed of that type. For example, prototype unit trains when shipping coal don't normally list
the cars in the train by the car's road number but instead it shows the number of cars, the
type of car, and the car's load on the train's Manifest. The color of utility cars isn't shown
on Manifests and switch lists.
If you use the utility feature, it is strongly recommended that you select the utility
feature for all cars of a given type. Since the car's road and number isn't displayed on the
Manifests and switch list, any car of that type can be placed into a train. Later if you try
and find a car by its road number, it could very well have been shipped out on an earlier
train. So you have to decide, use road numbers or not for a given type of car.
Hazardous checkbox
If a car is hazardous independent of the car's load, select the hazardous checkbox. The
hazardous option will cause the program to add a
Hazardous
Comment to the switch list that the car is transporting hazardous materials. You can also
classify a car's
load as hazardous. The program when blocking a
train will attempt to place non-hazardous cars in front of hazardous cars.
Location and Track
Now set the car's location on the layout. If the car is off the layout, set the location to
none (blank space). The "Auto" checkbox when selected, filters the track selection to only
show tracks that have enough space for the car, and are also configured to service the car's
type, load, and road.
Color
You have the option to set the car's color. Useful if you provide it on your Manifests or
switch lists. See
Message Formats to display the car's color.
Load
You can optionally set the load state of the car. Select "E" for empty or "L" for loaded. Use
the
Edit Car Loads tool to rename the default load names if you
wish. You can also create your own
custom loads, but there are
restrictions. Normally
spurs with
schedules are
used to load or unload cars with custom loads that you've created. You can also use
staging tracks to load or unload your car with a custom load.
Some operators don't want the default empty or "E" load for a car when the car's load flips
from the "L" load or when a car's custom load is removed. To set a custom "Empty" load for
car, see Set Car and the Return When
Empty fields. You can tell the program which custom "Empty" load you want each car to have.
The same goes the the car's default load or "L" load, you can use the Return When Loaded feature to set a custom load rather than
the "L" load when a car's load status changes from empty.
Kernel (Group of Cars)
A "Kernel" is a group of cars that move as a single unit. If you want this car to be part of a
kernel press "Edit" across from "Kernel" and create a kernel name. Then select the kernel name
from the menu box in the
Edit Car window. The first car you assign to
the kernel becomes the lead car. The lead car in a kernel will have an asterisk appended to
the kernel name in the
Cars window. The program when searching for a track
to set out the kernel will only use the lead car's attributes when determining if the track
can accept the kernel. However, the program does use the entire length of the kernel to
determine if the group of cars will fit on the destination track. Picking up or dropping off a
kernel is regarded as one "move" when defining the number of moves in a train's route.
Kernels are shown on Manifests and switch lists in the order they are entered, with the lead
car being the first one entered. You can modify the order the cars in a kernel are printed
by changing their blocking order in the Edit Car window. A negative
blocking number will place the car before positive numbers.
Built
An optional built date can be entered for the car. The built date can be entered as a two or
four digit year, or in the format of month-year (mm-yy). A two digit year will be converted to
a car built in the 1900s. Trains can be
configured to only
carry cars with a certain built date.
Owner
You can optionally enter the owner's name. Trains can be
configured
to only accept certain owner names.
Comment
You can enter a comment for this car. If you want to see the car's comment on the Train's
Manifest or switch lists, make an adjust to the
Message Formats.
Id Tag [only if Enable ID Tag option has been
selected]
The Id Tag dropdown allows you to associate a
IdTag
with this piece of rolling stock. If any of the locations have an associated
Id Tag Reader at Location and the Id Tag associated with this
car is read by that Reporter, then the location will be updated. See
Options
to enable this feature.
Add (Copy)
Press the "Add" button to enter a new car into your roster. You can also use the "Add" button
to make a copy of a car. Select an existing car using the "Edit" button in the "Cars" window,
and then modify the car's road number, and any other car attributes, then press the "Add"
button to create another car for your roster. Pressing the "Add" button also causes the new
car to be saved. See the "Save" button below.
Save
Press "Save" to store the car's attributes after you've made changes. The program will
create a file named "OperationsCarRoster.xml". You can find this file in JMRI⇒ "profile
name" ⇒ operations. A backup file "OperationsCarRoster.xml.bak" with the last settings
for all of your cars is also created each time the "Save" button is pressed.
Edit Car Attribute Names
To the right of each of the car attributes (Road, Type, Length, Color, Kernel, Load, Owner) in
the
Edit Car or
Add Car window is an "Edit"
button. Use this to add, delete, or replace the various attribute names for a car.

Add Button
To add a new car attribute name, enter the desired text in the text box and press the "Add"
button. FYI, the program when building a train will report to the system console the longest
name for each car attribute. This is important if you decide to use the tabular format for
your Manifests and switch lists, as the program will use the longest name to determine the
spacing required for each attribute.
You can also use the "hyphen" feature when creating new car type, road, and load names.
The program will drop the characters after the hyphen when printing a Manifest or switch
list.
Delete Button
To delete a car attribute name, select the name you want to delete in the menu box and press
the "Delete" button.
Replace Button
If you need to change a specific car attribute name (road, type, color, etc) in your entire
car roster, you can use the "Replace" button found at the bottom right of the edit car
attribute window. For example, if you wish to change the car road (reporting mark) attribute
name "UP" to "UPS" for all of your cars. Press the "Edit" button for any of your cars in the
Cars window, and then press the "Edit" button across from Road in the "Car Edit" window. Enter
the new road "UPS" in the text box, select "UP" in the menu box, and press "Replace". All cars
with "UP" as their road name will now have "UPS" as their road name.
Delete Unused Attribute Names
Under "Tools" in the "Edit Attribute Window" you will find two items, "Show the number of cars
with this attribute name" and "Delete unused attribute names". The first will show a count in
front of the menu box. The count is the number of cars that have this particular attribute
name. The delete option will prompt you to delete any attribute name that hasn't been assigned
to a car.
Edit Car Loads
To add a custom load or edit a car's load, press the Load "Edit" button in the
Edit Car or
Set Car windows. Each car type will
have its own set of custom loads. Select the car type to add, delete or replace a car's load.
The "All" checkbox allows you to create loads for all of your car types. For example you could
create a custom "Empty" load for all of your car types if needed.
Note that spurs normally require a schedule to
service cars with custom loads. See car Load and Purposely Moving Cars Using Schedules and Loads for more
information.

In addition to the Add, Delete, and Replace buttons and fields described above in the Car Edit Attributes section, the edit car loads window
allows you to set the load's type, priority, is hazardous, pick up and set out messages.
Add Car Load Name
Enter in the text box the custom load name you want to add, then press the "Add" button. After
creating the new custom load name you can change the load's type, priority, hazardous, and
optional messages. Press the "Save" button after making the changes.
Delete Car Load Name
Select the load name you want to delete, then press the "Delete" button.
Replace Car Load Name
Select the load name you want to replace. Enter in the text box the new load name, then press
the "Replace" button.
Load Type
A load type of "Load" means the program will consider the car as being loaded and the car's
maximum weight is used when calculating the train's total weight. A load type of "Empty" tells
the program that the car is empty and to only use 1/3 of the car's maximum weight when
calculating the train's total weight. If you use the
Loads and
Empties option when printing your Manifest, you will want to use the correct load type so
that the program prints out the correct number of loads and empties in the train.
Priority
The default load priority is low and you can change the priority to medium or high for a given
car type and load. Higher priority car loads are normally serviced before low priority. Useful
if you need to get your reefer loaded with fruit to the market ASAP!
Hazardous
If you want the
Hazardous Comment to be added to your Manifest
or switch lists, select "Yes" for your car's load.
Optional Load Messages
You can also provide optional messages for your crew based on the type of car and load. The
messages can be useful if you have visible car loads that need to be added or removed by your
crew. You must select the "PickUp Msg" and "SetOut Msg"
car
attributes if you want these messages on your Manifests and switch lists.
Save
Press the save button after making changes to a car load's type, priority, hazardous, or
messages. If the "All" checkbox is selected, all car types with the selected load name will be
updated.
After creating a car, you can set the car's location, status, Return When Empty (RWE), Return
When Loaded (RWL), home division, kernel, and optionally the car's destination and train by
using the "Set" button found for each car in the
Cars window. To modify
several cars at once use
Set Cars (Modify Multiple Cars).
Normally the car's destination and assigned train are generated by the program, but you
can use the optional fields to force a car to a specific destination using the specified
train.
You can remove a car that has been assigned to a train by simply pressing the "Save" button.
You can also add a car to an already built train that hasn't departed its first location.
Select a destination, track and train for the car, then
press the "Save" button.

Status
In the upper right hand corner of the set car window is a checkbox labeled "Location Unknown".
Selecting the location unknown checkbox does several things. First the program will ignore the
car when building new trains. Second, on Manifests and switch lists, the program will list all
of the misplaced cars. Now your crew can help you find cars that have been
misplaced. And finally, when this checkbox is selected, the
other fields in the set car window are disabled.
The "Out of Service" checkbox when selected instructs the program to ignore the car
when building new trains. Many operators have a RIP (Repair In Place) track and use this
feature to hold the car there until repairs have been made.
Location and Track
Use the "Location and Track" set of fields to place the car on the layout. Use the "Auto"
checkbox to show valid tracks for a given location.
Load
Use the "Load" menu to change the car's load, or create new ones by using the "Edit" button
located to the right of the load menu.
Return When Empty
You can optionally enter the location and track that you want the car to return to when the
car's load status becomes empty. Independent of the location and track fields, you can replace
the car's default empty "E" load with one from the return when empty (RWE) load menu. Only
custom loads that are type
Empty are shown in the combo box. When you
specify a custom RWE load for a car, the program will use the RWE load instead of the default
empty "E" load in all cases where the "E" load would normally occur. Note that the RWE load
also overrides the generation of custom loads out of staging since the "E" load isn't used by
the program for this car. However, if a car does arrive into staging with the RWE load name,
the program will set the load name to the default "E", and not use the RWE addresses.
RWE uses the Car Routing feature to return cars to the specified
location. The RWE fields are disabled if routing is disabled. Note that manually changing
the load name will not cause the Return When Empty (RWE) destination to become active, only
when the car is delivered by the program to a spur or staging will the RWE destination and RWE
load become active.
Return When Loaded
You can optionally enter the location and track that you want the car to return to when the
car's load status becomes loaded. Independent of the location and track fields, you can also
replace the car's default load "L" with one from the return when loaded (RWL) load menu. Only
custom loads that are type
Load are shown in the combo box. When you
specify a custom RWL load for a car, the program will use the RWL load instead of the default
"L" load in all cases where the "L" load would normally occur. When a car arrives into staging
and has the "E" load and the option to swap load names is enabled, the program will activate
the RWL load and addresses. Also when a car arrives into staging and has a custom load type of
empty and the option to remove custom load names is enabled, the program will activate the RWL
load and addresses.
RWL uses the Car Routing feature to return cars to the specified
location. The RWL fields are disabled if routing is disabled. Note that manually changing
the load name will not cause the Return When Loaded (RWL) destination to become active, only
when the car is delivered by the program to a spur or staging will the RWL destination and RWL
load name become active.
Home Division
You can optionally select the car's home division for more prototypical car movements. See
railroad divisions in the
Edit
Location help for more information. You can use the
Set Cars feature to quickly assign a home division to multiple cars.
Use the "Edit" button to modify an existing division or if a division isn't selected to
create a new one.
The division feature uses the Car Routing to assign destinations
to cars. The division fields are disabled if routing is disabled.
Kernel
You can also place the car into a
kernel which is a group of cars that
are moved as a single unit. Select the kernel you want the car to be in using the "Kernel"
menu, and use the "Edit" button to create new ones.
Optional -- Normally Set by Program
The next three set of fields are normally set by the program when building trains. We'll
explain how they work in case you're interested in how the program works or if you want to
manually override the program. The first is the "Destination and Track" set of pull down
menus. By default the destination and track fields are disabled. Under "Tools" there's an
option to enable the destination fields.
Destination and Track
The "Destination" is the next location that the car will be delivered to. The destination must
be reachable using one train from the car's current location or the car will not be serviced.
Normally we recommend that you don't use the "Destination and Track" pull down menus to
forward a car to a location, but use the "Final Destination and Track" as described below.
However, if you're manually adding a car to a built train, you must set the car's destination
and track. The destination and track fields are enabled when the program sets a destination
for the car, you've selected a built train for the car and pressed the "Save" button, or
you've enabled the destination and track fields by using the "Enable Destination and Track"
option found under the "Tools" menu.
Final Destination and Track
The next field is the "Final Destination and Track" set of pull down boxes. You can select any
destination, and optionally a track at that destination. The program will figure out the best
route to ship the car to this destination. The "route" can consist
of several trains, interchanges, and
optionally yards. When
a car is delivered to a spur with a schedule, and the schedule has a shipping destination that
requires more than one train, the program uses this set of fields to ship the car. If the
track that the final destination specifies happens to be full, the program will search for a
yard to place the car. When the track becomes available, the program will move the car from
the yard to the track specified.
When selecting a final destination, you don't have to specify a track. And when selecting a
destination that is staging, you shouldn't select a destination track, let the program do
that for you. The program will confirm after pressing "Save" that the program can route the
car from the car's current location to the final destination that you've specified. You can
review a "mini" build report for the car by using the Set Car tool "Preview or Print car
routing report". The program when creating the report uses the settings in the Build Report Options window. It is recommended that you set
the router level to "Detailed" or "Very Detailed" when trying to determine why a route
fails.
A car has with a final destination is routed, and requires Car
Routing to be enabled. Therefore the final destination fields are disabled if routing is
disabled.
Train
The last field is the train assignment. You can manually decide which train to use before or
after building your trains. The "Auto" checkbox when selected will only show trains that can
service this car.
The cars window "Tools" menu allows you to perform some useful functions to your car roster.
Car Roster
The "Car Roster" has a sub-menu that allows you to import and export cars, delete cars, reset
car move counts, and print or preview your car roster.
Car Roster⇒Import from file
See
Importing Cars from a File.
Car Roster⇒Export to file
In addition to
Import from file feature described earlier, you
can also export your cars to a comma separated values file. The "Export to file" function
creates a file named "ExportOperationsCarRoster.csv" in the operations directory. Note that
the export cars tool will only export the cars shown in the cars window for a location or
track.
Car Roster⇒Delete all cars
You can remove all of the cars in your roster by using the "Delete all cars" option. Note that
when only viewing cars for a track, the tool changes to "Delete cars on Track track name", and
will only delete the cars on the track being viewed.
Car Roster⇒Reset car move count
The "Reset car move count" will zero out the move counts for the cars displayed in the "Cars"
window. In normal use you should never reset the car move counts. The program uses the move
counts to determine which cars have difficulty finding valid destination tracks. Cars with low
move counts eventually get higher priority over cars with larger move counts. By servicing the
lower move count cars first, the difficult car moves eventually get made by the program.
Reseting car moves foils this algorithm. The only valid time for reseting the move counts is
when you add new cars to your roster and you don't want your new cars to have priority over
your old cars. However in most cases, folks do want to see the new cars riding the first train
out of town, so don't reset the car moves if you want to put your new additions immediately to
work!
Car Roster⇒Print and Preview
You can also preview and print your car roster. The preview and print features use the same
"Sort by" radio buttons as the cars window. One of the more useful sorts is by "Location",
this allows you to quickly verify your car locations before or after an operations session.
You can if you wish only preview or print cars for a specific location or track. In the
"Edit Location" and "Edit Track" windows the "Tools" menu provides a "Show Cars" selection
which will bring up the "Cars" window but only listing the cars for that location or track.
Use the roster print or preview features of the "Cars" window to print out a list of the
cars for that location or track. In addition to only printing the cars shown, the export
cars tool will only export the cars shown in the cars window for a location or track. When
viewing cars for a specific track, you can delete the cars on that track by selecting "Car
Roster ⇒ Delete Cars on Track track name".
Show Checkboxes
You can if wanted, add or remove a checkbox for each car in your roster by selecting "Show
Checkboxes" from the "Cars" Tools menu. The checkboxes are useful when performing an audit
using a PC or other electronic device. There's also a "Reset Checkboxes" tool to return all
checkboxes to their unselected state.
Modify Locations by Car Type
The tool "Modify Locations by Car Type" allows you to select a car type and decide which
locations and tracks will service a given car type. See
Modify
Locations by Car Type for more info.
Modify Trains by Car Type
The tool "Modify Trains by Car Type" allows you to modify the car types that your trains will
service can be found under Trains⇒Tools or Cars⇒Tools. Very useful when adding a new
car type to your roster. See
Modify Trains by Car Type
for more info.
Set Cars (Modify Multiple Cars)

If you want to change the status, location, return when empty, return when loaded, home
division, load, kernel, destinations or train assignment for a group of cars use the "Set
Cars" tool found under "Tools" in the
Cars window. The tool works the same
way as the
Set Car as described above, except that multiple cars are
modified. Select the cars you want to change in the table by highlighting them, and then
select "Set Cars". Note that you can use the "Control" or "Ctrl" key on your keyboard to
select individual cars in the table, and the "Shift" key allows you to select a range of cars.
Use "Ctrl A" to select all of the cars in the table. The first car in the table becomes the
default, and when you press the "Apply" button, all of the other selected cars will have the
same settings as the default car.
When using the "Set Cars" tool, all cars selected in the Cars window will have the same
values once you press the "Apply" button. However, if you want to change only one or two of
the fields shown in the Set Cars window, select the ignore checkbox for the fields you don't
want changed by the "Apply" button. Only the fields that don't have the "ignore" selected
will change. For example, in the "Set Cars" image above, all the cars selected will have
their return when empty set to "Bakersfield" track "#68 Heritage Furn" with a load of "E".
After making your changes, be sure to press "Save" in the Cars window if you want to
keep your changes.
[Click to go back to TOC]
Locomotives
The locomotives window allows you to edit your locomotive roster. You can enter a locomotive's
number, road (reporting mark),
model, type, and length. You
can optionally add the locomotive's built date and owner. If you want a group of locomotives
to be assigned as a unit, you can create a
consist. The
locomotive type is used by the program to determine where locomotives are picked up and or
stored at the various locations on your layout. Some of default locomotive types are electric,
diesel, gas turbine, and steam.
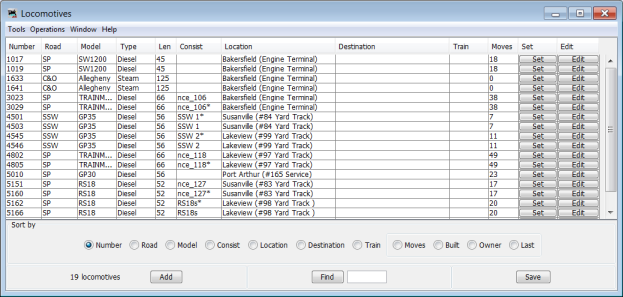
If the Enable ID Tag option has been selected,
a check box for "RFID" will appear in the bottom box on this page. If that is checked,
additional columns for "Reported Location", "Reported Date", and "RFID" will be displayed.
Import Locomotives
If you already have a list of locomotives in your JMRI roster or in a database, you can import
the locomotives into the program.
Import Locomotives from the JMRI Roster
The program will only import locomotives from your JMRI roster that have a road and number. To
get your locomotives from your JMRI roster, select "Import from JMRI roster" from the
Tools⇒Operations⇒Locomotives⇒Tools⇒Locomotive Roster menu. Only
locomotives that don't exist will be added to the programs locomotive roster. This way you can
use this tool any time you add locomotives to your JMRI locomotive roster. The JMRI locomotive
roster doesn't have the length field, so a default length is entered for you. You should
correct the locomotive length if you want the program to correctly calculate your train
lengths. If your JMRI roster doesn't provide the locomotive's model, you will have to enter
one before saving your files.
Import Locomotives from a File
The import from file function requires an ACSII text file, with one line for each locomotive.
The locomotive import requires four attributes and order is locomotive number, road (reporting
mark), model, and length. All four attributes are required for the import to work correctly.
The following shows two examples of the correct format:
236 UP RS4 40
5578 SP SW1200 42
Each line can start with a space and multiple spaces between fields is okay. Optionally
you can include additional attributes in the following order; owner name, date built, and
location. The location can have two fields, the location name followed by the location's
spur or yard name separated by a hyphen. The following shows two examples of the correct
format:
236 UP RS4 40 AT 1930 Home Town USA - Engine Terminal
5578 SP SW1200 42 DB
1934 York - York Engine Yard
If you prefer to use comma delimiters instead of spaces, use a file with a .csv
extension or place the word "comma" at the start of your import file and use commas instead
of spaces. The following are two examples of importing locomotives with comma delimiters.
comma
236,UP,RS 4,40,AT,1930,Home Town USA,-,Engine Terminal
5578,SP,SW
1200,42,DB,1934,Town of York,-,York Engine Yard
When importing a comma separated values (.csv) file, the program will delete leading
and trailing spaces if they exist between the commas.
To import a file, use the "Tools" menu in the upper left hand corner of the Locomotives
window. Select "Tools⇒Locomotive Roster⇒Import from file. Note that the program
will only add locomotives that don't exist in the program's locomotive roster. If the
locomotive already exists, it will be skipped by the program.
After importing your locomotives, you must save them if you want to keep them as part
of your roster. Press the "Save" button located at the bottom of the Locomotives window, or
select any locomotive by pressing the edit button and then press the "Save" button that can
be found at the bottom right of the "Edit Locomotive" window.
Adding Locomotives to your Roster
To manually add a locomotive to your roster, press the "Add" button located at the bottom of
the "Locomotives" window. Then select the road (reporting mark) for the locomotive. If the
desired road doesn't exist, press the "Edit" button across from the road select menu box. This
will allow you to add a new road or delete any that you don't need. Now enter the locomotive's
number, model, type, length and horsepower.
Now set the locomotive's location on the layout. If the locomotive is off the layout,
set the location to none (blank space). You can also enter the built date, owner and a
comment for this locomotive. The built date can be in the format of a two or four digit
year, or month-year (mm-yy), where a two digit year will be converted to a loco built in the
1900s.
Locomotive HP and Tractive Effort
The locomotive's horsepower, the train's weight, and track grade is used by the program to
calculate how many locomotives are required when using the
Auto and
Auto HPT features when building trains. Stream engines use tractive effort rather than
horsepower to describe their potential for pulling trains. Enter the tractive effort in lbf
(pounds force) and the program will convert it to the approximate horsepower at 25 MPH and 60%
efficiency when you press the Save button.
Locomotive Models
OperationsPro™ allows you organize your locomotives by model. Each model can only have
one locomotive type, length, weight and horsepower rating associated with it. For example, if
you assign the model name "RS11" to a set of locomotives, when you change the length of one of
the "RS11"s, the length will also change for the others. Also associated with a locomotive
model is whether the engine is to be used as a "B" or booster unit. "B" units are never
assigned to a train that requires only one locomotive, and they are never assigned by the
program as the lead engine in a consist. One useful trick is to assign the "B" unit
designation to non-sound units to prevent them from becoming the lead engine when building a
consist.
Locomotive Consists
If wish this locomotive to be part of a consist assigned by you, press the "Edit" button
across from "Consist" in the "Edit Locomotive" window. Now enter a consist name and press
"Add" in the "Edit Locomotive Consist" window. Finally select the consist name from the menu
box in the "Edit Locomotive" window and press save.
Consists are shown on Manifests and switch lists in the order they are entered, with the
lead locomotive being the first one entered. The lead locomotive in a consist will have an
asterisk appended to the consist name in the Locomotives window.
The alternative to assigning locomotives manually to a consist, is to allow the program to build loco consist from single locos.
Id Tag [only if Enable ID Tag option has been
selected]
The Id Tag dropdown allows you to associate a
IdTag
with this piece of rolling stock. If any of the locations have an associated
Id Tag Reader at Location and the Id Tag associated with this
locomotive is read by that Reporter, then the location will be updated. See
Options
to enable this feature.
Save
Press "Save" to store the locomotive's settings. The program will create a file named
"OperationsEngineRoster.xml". You can find this file in JMRI⇒ "profile name" ⇒
operations. A backup file "OperationsEngineRoster.xml.bak" with the last settings for all of
your locomotives is also created each time the "Save" button is pressed.
The locomotives window "Tools" menu allows you to perform some useful functions to your
locomotive roster.
Locomotive Roster
The "Locomotive Roster" has a sub-menu that allows you to import and export locomotives,
delete locomotives, reset locomotive move counts, and print or preview your locomotive roster.
Locomotive Roster⇒Import Locomotives from the JMRI Roster
See
Import Locomotives from the JMRI Roster.
Locomotive Roster⇒Import from file
See
Importing Locomotives from a File.
Locomotive Roster⇒Export to file
In addition to
Import from file feature described earlier,
you can also export your locomotives to a comma separated values file. The "Export to file"
function creates a file named "ExportOperationsLocomotiveRoster.csv" in the operations
directory.
Locomotive Roster⇒Delete all locomotives
You can remove all of the locomotives in your roster by using the "Delete all locomotives"
option.
Locomotive Roster⇒Reset move count all locomotives
The "Reset move count all locomotives" will zero out all of the locomotive move counts. In
normal use you should never reset the locomotive move counts. The program uses the move counts
to determine which locomotives have difficulty finding valid destination tracks. Locomotives
with low move counts eventually get higher priority over locomotives with larger move counts.
By servicing the lower move count locomotives first, the difficult locomotive moves eventually
get made by the program. Reseting locomotive moves foils this algorithm. The only valid time
for reseting the move counts is when you add new locomotives to your roster and you don't want
your new locomotives to have priority over your old locomotives. However in most cases, folks
do want to see the new locomotives riding the first train out of town, so don't reset the
locomotive moves if you want to put your new additions immediately to work!
Locomotive Roster⇒Print and Preview
You can also preview and print your locomotive roster. The preview and print features use the
same "Sort by" radio buttons as the locomotives window. One of the more useful sorts is by
"Location", this allows you to quickly verify your locomotive locations before or after an
operations session.
Set Locomotives (Modify Multiple Locos)
If you want to change the status, location, consist, destinations or train assignment for a
group of locomotives use the "Set Locomotives" tool found under "Tools" in the
Locomotives window. The tool works the same way as the
Set Locomotive as described below, except that multiple
locomotives are modified. Select the locomotives you want to change in the table by
highlighting them, and then select "Set Locomotives" from the Tools menu. Note that you can use
the "Control" or "Ctrl" key on your keyboard to select individual locomotives in the table,
and the "Shift" key allows you to select a range of locomotives. Use "Ctrl A" to select all of
the locomotives in the table. The first locomotive in the table becomes the default, and when
you press the "Apply" button, all of the other selected locomotives will have the same
settings as the default locomotive.
When using the "Set Locomotives" tool, all locomotives selected in the Locomotives
window will have the same values once you press the "Apply" button. However, if you want to
change only one or two of the fields shown in the Set Locomotives window, select the ignore
checkbox for the fields you don't want changed by the "Apply" button. Only the fields that
don't have the "ignore" selected will change.
After making your changes, be sure to press "Save" in the Locomotives window if you
want to keep your changes.
Synchronize with NCE Consists
If you are using NCE as your DCC command station, you can have the program synchronize your
consist numbers with your locomotives. The program will read all of the consists out of the
NCE system and then will search for matching locomotives in your operations roster. The
program will assign the consist name
nce_xxx
where xxx is the consist number. To synchronize your Consists, select "Synchronize with NCE
Consists" under the "Tools" from the "Locomotives" menu.
Set Locomotive
After creating a locomotive, you can set the locomotive's location, consist, and optionally
the locomotive's destination and train. Normally the locomotive's destination and assigned
train are generated by the program, but you can use these fields to force a locomotive to a
specific location using a specified train.
[Click to go back to TOC]
Routes
A route is a list of locations (stations) that a train will visit. Later you can decide if the
train stops at a location for work. Routes can be point to point or out and back. A route that
returns to its origin is often referred to as a "turn". To build a route, select
"Tools⇒Operations⇒Routes".

The "Routes" window shows for every route created the id, name, comment, the shortest train
length between any two locations, the longest train length between any two locations, and
status of the route. If there's a problem with the route, the status will be reported as
"Error". If the route hasn't been assigned to a train, the status for the route is reported
as "Orphan". If a route has been assigned to a train or trains, and one of the trains is
built, the status becomes "Train Built". You can not modify a route that is assigned to a
built train. Reset or terminate a
built train if you want to modify the route. Use the "Edit" button to modify a route.
Add Route
Press the "Add" button located at the bottom of the
Routes window to
create a new route for your trains.

Enter the route name and an optional comment. This comment is shown in the Routes
window, and optionally on your Manifests. Each route must
have unique name. Then press the "Add Route" button located at the bottom of the window. Now
select the location the train will depart by selecting the location in the menu box located
at the left bottom side of the window. Press "Add Location". You should now see the train's
departure location in the table along with the train's departure direction, the requested
number of car moves, whether car set outs or pick ups are allowed, the train's travel time,
the maximum train length departing the location, and the track grade between this location
and the next location in the train's route. The X and Y values are where to place the train icon on a panel. The Edit
Route below provides additional details about a location in a route.
Now select the correct departure direction for your train when using this route, along with
the number of moves you wish, and the train's maximum length. In the simple case, a move at
the departure location would equal a car in the train. So if you want 10 cars in your train
when it departs, enter 10 moves. Later if you create kernels or allow
local moves at the departure location, the number of moves could mean something slightly
different. A local move is the act of moving a car from one track to another at the same
location, the car isn't added to the train, but moving the car is part of the train's work
at that location. Double click on the cell in the table to change the car moves or train
length. The program remembers the last train direction, car moves, and maximum train length
when adding new locations to your train's route. Now build your route by selecting the next
location the train will visit and again adjust the number of cars your train will work by
changing the move count for that location. Continue building the train's route by entering
all locations that the train will pass through even if the train will not work the location.
This way your train's engineer will know when reading his Manifest the towns he will be
traveling through. Each time you add a location to the route, the table shows the order in
which the train will visit. You can move a location up or down in the sequence if needed.
Edit Route
You can modify any location in a train's route by selecting an item in one of the menu boxes
or by doubling clicking one of the cells and entering a new value. Press "Save Route" to
complete your change.
Each route location has the train's departure direction, number of desired car moves,
and whether car pick ups and or car set outs are allowed at that location.
Train Direction
Select the direction the train departs each location in the route. If the train reverses
direction see
Train Turn Route below.
Moves
A car move can be a car pick up or car set out at that location. For example, 5 moves can be 5
pick ups, or 5 set outs, or any combination of 5 pick ups or set outs. Picking up or dropping
off a
kernel (group of cars) represents one move. Moving a car or kernel
from one track to another at the same location also represents one move. The program doesn't
normally create local car moves, however you can use
schedules or
divisions to change the program's behavior. To modify the
number of moves for a location, double click directly on the cell in the route table. When
entering the desired number of car moves, enter reasonable numbers that reflect what you want
the program to do for you. For example, if you want your train to depart with approximately 15
cars, then 15 is the correct value for your moves at the start of the route. At the end of the
route, if you want close to 12 cars in the train when it terminates, then 12 is the right
value for the move count for the last location in your train's route. Entering "0" moves means
no car pick ups or set outs at the location.
You can use the route location move counts to control how many cars are set out or
picked up along your train's route. If you want more cars to be set out at the middle
locations, decrease the move count for the last location (terminal) in the train's route,
and if needed increase the move count for the departure location. Conversely, if you want to
pick up more cars along the train's route, increase the move count for the last location,
and decrease the move count for the departure location.
Random Moves
You can also request that the program randomly reduce the number of desired car moves
for a location. Use this feature if you find that the program is consistently generating the
same amount of work for your train, and you want some variety. It is recommend that not use
this feature until you find that is is needed. The "Random" column allows you to select a
value between 10 and 100 and has a default of "Off" which disables this feature. The value
is the percentage you want the move count reduced. For example, if you requested 20 moves
for a location, and selected a random value of 10%, the program could reduce the desired
move count by 2, which works out to desired car moves of 18, 19 or 20. A random value of 50%
would reduce the moves by up to 10, or 10 to 20 desired car moves, and a value of 100% would
generate desired car moves between 0 and 20. Note that small car moves need large random
values to work properly. For example a desired car move of 1 will always be 1 unless you
select 100% in the random column. A desired move count of 2 needs a random value equal or
greater than 50% to reduce the move count by one, and 100% if you wanted the move count to
be reduced by 2.
Pick ups? Set outs? and Local moves?
If the train is allowed to pull cars from the location select "Yes" under "Pick ups?",
otherwise select "No". Same goes for "Set outs?", select "Yes" if the train is allowed to
spot cars at the location, and "No" if set outs aren't allowed. Selecting "Yes" for both
pick ups and set outs allows the train to do both. Selecting "Yes" for "Local moves?" allows
local moves to be performed by the train. A local move is when a car is pulled and spotted
at the same location. The "Local Moves?" control is only for cars with a custom load, final destination
or railroad division. You can also prevent local moves for
the entire route using one of the train build options, see Allow
local moves when a car has a custom load or FD. The table below provides a summary.
| Pick up? |
Set outs? |
Local moves? |
Operation |
| Yes |
Yes |
Yes |
Pick ups, set outs, and local moves for cars with final destinations, custom loads, or divisions |
| Yes |
Yes |
No |
Pick ups, set outs, and no local moves for any car |
| No |
No |
Yes |
No Pick ups or set outs, and only local moves for cars with a final destination |
| Yes |
No |
Yes |
Pick ups, no set outs, and only local moves for cars with a final destination, custom load, or division |
A local switcher uses only the "Pick up?" and "Set outs?"
options and ignores the "Local moves?" option when dealing with cars that have the default
load names, and no final destination, or railroad division. If you want your local switcher
to only move cars with a local final destination, select "No" for both "Pick up?" and "Set
outs?" and "Yes" for "Local moves?". If you want your local switcher to also consider making
local moves for cars with custom loads and railroad divisions, select "No" for "Set outs?"
and "Yes" for "Pick up?" and "Local moves?" The table below provides a summary.
| Pick up? |
Set outs? |
Local moves? |
Operation |
| Yes |
Yes |
Yes |
Local move all cars |
| Yes |
Yes |
No |
Local move cars without a final destination, custom load, or division |
| No |
No |
Yes |
Local move cars with a final destination |
| Yes |
No |
Yes |
Local move cars with a final destination, custom load, or division |
Travel and Departure Times
The "Switch Time" and "Travel Time" found on the Settings page
determines the time it takes for your train to service a location and travel to the next. If
you want to adjust the train's travel time, enter the number of minutes desired in the
"Travel" cell. Another choice is to specify the train's departure time from a location by
selecting the "Departure Time" radio button in the lower right hand corner of the Edit Route window. Note that when the first location of a route has a
departure time that it disables the ability to adjust the Train's
Departure Time.
Maximum Train Length
You can also adjust the maximum train length using (feet or meters) that can depart each location. For example, if
you limited the train's departure length to 500 feet, then approximately 10 cars would
depart in the train from that location. When first starting out, it is recommended that you
leave the departure train lengths to the maximum and adjust the number of cars in the train
by changing the car move counts in the train's route. Later if you find that your train is
too long, you should first reduce the car move counts and then the maximum train lengths to
get your trains to build to your liking.
Grade
The grade is optional and is used to determine how many locomotives the train will require
for that segment when using the train Auto locomotive
assignment feature. Enter the maximum grade that the train will encounter between the two
locations. The program when determining the required horsepower per ton (HPT) for a grade
uses the prototypical formula "HPT = Speed x % Grade / 12". The speed when determining the
HPT is set to 36 MPH, which means that a 1% grade will require 3 HPT.
Train Icon Coordinates
The X and Y are the coordinates on your dispatcher's panel for the optional train icon. You can set the coordinates directly in the
table by double clicking on the X or Y cells, or use the Set
Train Icon Coordinates tool if you want to change all of your routes at once, or use the
"Set Train Icon Coordinates for this Route" tool if you only want to adjust one route, or
use the "SetX&Y" train icon pop-up menu to teach
the program where you want the train icon placed when the train is at the specified
location. Leave the X and Y coordinates at zero if you want to manually move the icon or
you're not using the icon feature.
Each location in the route can also have an optional comment that will appear in the
train's Manifests. Press the "Add" button under the table heading "Comment" to add a comment
to a location.
Save Route
Press "Save Route" to save your route. The program will create a file named
"OperationsRouteRoster.xml". You can find this file in JMRI⇒ "profile name" ⇒
operations. A backup file "OperationsRouteRoster.xml.bak" with the last settings for all of
your routes is also created each time the "Save Route" button is pressed.
Train Turn Route
A train that returns to its departure location is normally referred to as a "turn". The image
below shows a route for a train that departs "Bakersfield", works "Port Arthur" and
"Danville", reverses direction in "Hillsboro" and returns to "Bakersfield". For trains
departing and returning to staging there's the option
Allow
cars to return to staging that will cause cars to ride the train if needed.

Notice that "Hillsboro" appears twice in the route. The first "Hillsboro" provides the
arrival direction for the train, and the amount of work for tracks that can only be accessed
by an Eastbound train. The second "Hillsboro" provides the departure direction for the
train, and the amount of work for tracks that can only be access by a Westbound train. Even
though "Hillsboro" appears twice in the route, it will only appear once on your Manifests
and switch lists. Also when you enter a location twice in a row in the route with a change
in direction, the location's switch list will add a note that the train's departure
direction has changed.
Passenger Train Route
Normally passenger trains run on a schedule based on departure times. If you want your
Manifests to show the departure times for your train, create a route in which you specify the
departure time at each location. In the lower right hand corner of the
Edit
Route window, select "Departure Time" in the Display box. Now select the departure time for
each location in the train's route. The Manifest statement "No work at xxx" isn't appropriate
for a passenger train. To eliminate this statement, simply add a comment to each location in
the train's route. Use the
Edit Route window, and for each location,
you can add a comment or edit an existing one.
Departing Staging Route
The program gives you several route options with regards to trains that depart from staging.
You can control which trains in staging have the proper length or number of cars by adjusting
the route's maximum train length and requested car moves. For example, if you set the route's
departure staging location maximum length train length to 800 feet, the program will ignore
when building the train all staging tracks that have more than 800 feet of rolling stock. And
if you set the car moves for the departure staging location to 15, the program will ignore all
staging tracks that have more than 15 cars. However, if you set the route's staging departure
car moves count to "0", the program will select a staging track that doesn't have any cars, as
long as the train doesn't require a caboose or car with FRED. The staging track can have
locomotives.
There are also several Train Build Options available when
departing staging.
Route Features
One very powerful feature of routes is the ability to specify the same location more than
once. When the same location name is used back to back, the train's Manifest will print as
though the train only arrived and departed once. Note that names "Danville", "Danville-1", and
"Danville-(example)" are all the same with regards to the Manifest and switch list printouts,
but the program deals with them as though they were different locations.
For example, you can control if there are set outs or pick ups at any location in the
route. Therefore if you wanted to only set out 3 cars, you could specify only set outs and 3
moves. But what if you wanted to set out 3 cars and pick up 7 cars. If you specify 10 moves
for a location it can be any combination of 10 pick ups and set outs. Using "Danville" as
our location, we can in our route specify "Danville" twice, back to back. In the first
"Danville" we can specify 7 pick ups only. In the second "Danville" we can specify 3 set
outs only. Now the program will "try" and meet your request by picking up to 7 cars and
dropping off up to 3 cars.
Another example, the program will not allow you to have staging tracks and other types
of tracks (spurs, yards, interchanges) at the same location. But using the names above, we
could assign yard and spur tracks to "Danville", and then as long as "Danville-1" (staging)
was the last or first location in a route, assign staging tracks to "Danville-1". Now when
the train terminates at Danville, the yard and spur tracks are serviced, and then the train
terminates into staging at "Danville-1".
Another example. Let's say we have a mainline train that will service Danville. At
Danville we have a yard and several spurs. We want the mainline train to service Danville's
yard, but not the spurs. We don't want to use a switcher to service the spurs at Danville.
However, we do want locals to service them! We need to tell the program which tracks in
Danville are service by which trains.
Solution, we create a yard in "Danville", and create spurs in "Danville-1". The mainline
train has "Danville" in its route. The locals will service "Danville" and "Danville-1". Now
the dilemma, do the locals service "Danville-1" or "Danville" first? Not an issue, we create
a route for the locals that services "Danville-1", then "Danville", and then "Danville-1".
At the first "Danville-1" we request only pick ups at the spurs, at "Danville" we specify
both pick ups and set outs to the yard, and at the second "Danville-1" we specify only set
outs. Another solution is to simply use the spur's ability to select which trains can
service the track. See Restricting Track to
Certain Trains or Routes.
Blocking Order
The program when creating a
Manifest normally blocks cars in
the train by their destination. Cars for the first destination in a train's route are placed
immediately after the locomotives, followed by the next location's set of cars, continuing
until the last set of cars which can be found at the end of the Manifest's for the train's
departure location. But with this tool, you can have a different blocking order. For example,
you might want to have the cars for a location placed at the end of the train to facilitate a
facing point set out. If you want to change the blocking order for a train, you can use this
tool to modify how the program blocks the cars for a location. Use the "Up" or "Down" buttons
to change the blocking order, and press the "Save" button to complete the change. Use the
reset button to restore the blocking order. You can find this tool in the
Edit
Route window.
You can also modify the order cars are set out for a location, see Track Blocking Order.
Copy Route
You can copy an existing route using this tool that can be found under "Tools" in both the
Routes window and
Edit Route window. Enter the
name of the new route and select the route that you want to copy. If you want to reverse the
order of your route, select the "Invert" checkbox before pressing the "Copy" button.
Set Train Icon Coordinates
Use this tool to set the default X and Y coordinates of your train icons for each location.
The tool allows you to specify the icon coordinates based on the train's direction. You can
also update all of your existing routes and locations with these new coordinates. As an
alternative, you can use a route's "Tools⇒Set Train Icon Coordinates for this Route" in
the
Edit Route window to create coordinates unique to a specific
route. Enter the name of the
panel you wish to use in
the Settings window.
Export Routes
The "Export Routes" tool produces a comma separated values (.csv) file called
"ExportOperationsRoutes.csv" containing details of the existing routes.
Import Routes
The "Import Routes" tool reads a comma separated values (.csv) file that you can select. Use
the "Export Routes" tool to see the proper formating. The import tool will not replace an
existing route. To modify an existing route, delete or change the route's name before doing
the import.
[Click to go back to TOC]
Trains
Now that we've created our
Routes we need trains to move cars! Create a
train by selecting "Tools⇒Operations⇒Trains" from the top level menu. Press the
Add Train button in the lower left corner to create a new train.

The Trains window shows all of your trains. For each train, there's a checkbox in the
"Build" column used to select which trains to build, print, and terminate. The middle
buttons on the bottom of the page will build, preview/print or terminate the trains
selected. You can adjust which trains to build using the Train
Schedules tool. You can if you wish build each train independently by pressing the "Build"
button under the "Function" column for a train. After a train is built the button becomes
"Print" or "Preview" depending on the function "Preview" checkbox located at the bottom of
the Trains window.
You can modify an existing train using the "Edit" button for that train. For each train
there's also an action button. You can select one of four actions for your train using the
radio buttons. The 'Move" action causes a built train to depart its current location and
move to the next location in the train's route. The "Conductor" action opens a window that
provides the train's Manifest for each location in the train's route. The last two actions
are Terminate and "Reset", pressing "Terminate" moves a built
train to the last location in the train's route, and completes the work assigned to the
train. Reset is used to release all cars assigned to a built
train. You can only reset a train that hasn't moved.
There are several checkboxes along the bottom of the Trains window. The "Show All" when
selected shows all trains in your roster. When unselected, only trains that have the "Build"
checkbox selected are shown.
The function "Preview" checkbox when selected, allows you to preview rather than printing
your train's Manifest or build report.
The "Messages" checkbox when selected will present a dialog box whenever a train build
failure occurs explaining why the train didn't build.
The "Build Report" checkbox when selected provides a Build
Report detailing how the train was built by the program. Use the "Print" or "Preview"
button for a built train to see the train Manifest and optional build
report. The program always provides a "Report" button under the "Action" column for a
train that fails to build.
If you select the "Generate CSV Manifest" from the Options
window found under "Tools" in the Settings or Trains
window, two additional checkboxes will appear labeled "Open" and "Run". If the "Open"
checkbox is selected the function button for a built train will become "Open" rather than
"Print" or "Preview". Pressing a train's "Open" button will allow you to examine the train's
comma separated values file. If you select the "Run" checkbox, the function button for a
built train becomes "Run". Pressing a train's "Run" button will start the Excel program
configured by the Setup Excel Program (Manifest Creator)
window found in the Trains "Tools" menu .
One of the most important buttons is the "Save Builds" button. When pressed, the program
saves all the files that have been modified by building and moving your trains. Pressing
this button allows you to shut down the program and resume exactly where you left the
program. If you attempt to close the Trains window before pressing the
"Save Builds" button, a warning will pop up asking you to save your files. Note that if you
enabled Auto Save no warning will appear and the program will
automatically save your files.
Add or Edit Train
Press the "Add Train" button at the bottom left of the
Trains window to
create a new train. Use the "Edit" button in the
Trains window table to
modify an existing train.

Enter the train's name and optional description, and then press the "Add Train" button. Both
will show up in the train's Manifest. The train's name will also appear on the train icon, so short names work best. If you want the
train's lead locomotive number and departure direction as part of the train's description
when printing, enter {0} and {1} respectively for the number and direction. This allows you
to create a train description like "Extra 1234 East" for your Manifests and switch lists.
You can also include the locomotive's reporting mark (road) by entering {2} in the
description.
Next select the route that this train will travel. There's an "Edit" button to the
right of the route that allows you to directly edit the selected route. If you haven't
created a route for your train, select a blank route and then press the "Edit" button to
create a new route. Once a route is selected a list of locations that the train will visit
should appear. You can deselect any location that you don't want the train to work. The
build report and train tools will refer to unselected locations as being skipped.
Train Departure Time
Select the time that this train will depart the first location in its route. You can use the
departure time to sort your trains in the order that you want them built when using the
Build button at the bottom of the Trains window. Note that if the
train's route has a departure time for the first location, the route's departure time is used
and the train departure time selection is disabled.
Train Rolling Stock
You can decide what type of cars and locomotives the train will service. Select the rolling
stock the train will carry by clicking on the appropriate checkboxes. A checked box means the
train will service this type of rolling stock. If you wanted certain cars to be only serviced
by a single train or trains, you can
create unique car types. For
example if you had a set of boxcars that you only want one train to carry, you could create a
new boxcar type "Boxcar-special" and assign that type to the set of boxcars, and only allow
the train or trains to service that type of car. Your Manifest would in this case only print
"Boxcar" for the special cars. You can use this feature to control any type of car including
Cabooses, Passenger, Buffer and MOW cars.
Optional locomotive requirements
You can control the number of locomotives that will be assigned to this train, and optionally,
the locomotive's model and road. If you don't want the program assigning locomotives to your
train, select 0 as the number of locos required. When departing staging, selecting 0 locos
allows the program to use a departure track with any number of of locos, including none. If
you want two or more locomotives assigned to a train, the locomotives must be part of a
consist or you can select the option to build a consist from
single locos. See
Build loco consist from single locos under
the
Train Build Options for more information.
The maximum number of locomotives that the program can assign to a train is controlled by
the Settings window Maximum Number
of Locomotives.
The Train Road Options can be used to limit which locomotive
roads a train is allowed to use.
Auto and Auto HPT
There are two other options available when requesting locomotives, "Auto" and "Auto HPT".
"Auto" calculates the maximum number of cars that could be assigned to a train, and does a
simple locomotive consist assignment based on the maximum number cars and the route grades.
The assignment is done before building the train, so the number of locomotives assigned has
nothing to do with engine HP or the train's tonnage. A better setup is to also use the
Build loco consist from single locos, that option determines
the number of locomotives to assign to a train by tonnage and route grades.
"Auto HPT" is useful when you want to assign a locomotive or consist to a train based on the
train's tonnage, route grades, and locomotive/consist horsepower. You can if you wish use
this option along with the Build loco consist from single
locos option. The program will first assign a locomotive or consist at the start of the
train build process, and at the end of the build, determine if the assigned locomotive or
consist has the appropriate HP for the train's tonnage and grades. If a locomotive or
consist can't be found that meets the HP requirements, the build will fail. You can if you
wish also select the option to Build loco consist from
single locos which could allow the train to build correctly. The feature "Auto HPT" isn't
available for a train departing staging.
Optional last car in train requirements
You can also require a
caboose or car with FRED (Flashing
Rear End Device) as the last car in the train when it departs. You can also optionally
specify the road for the caboose or car with FRED. If you leave the road blank, the program
will try and find a caboose with the same road as the locomotive. Normally the caboose or car
with FRED stays with the train until the last location in the train's route. You can add or
remove a caboose anywhere in the train's route, see
Optional
Train Requirements (Locomotive or Caboose Changes en Route) under
Train Build Options for more info.
The Train Road Options can be used to limit which caboose
roads a train is allowed to use.
Train Comment
You can enter an optional comment for your train that will appear on your Manifests.
Reset Train
The "Reset Train" button allows you to remove locomotives and cars that have been assigned to
a train. Useful when you want to try various build options and don't what to physically move
locomotives and cars on the railroad. Note that you can only reset a built train that hasn't
been moved. You can also reset a train from the
Trains window.
There are many counters used when building a train and they are NOT restored when using the
train reset feature. This includes track use counts, schedules, and
car wait values. Therefore new train builds can be different after using the train reset
function.
Save Train
Press "Save Train" to save your train. The program will create a file named
"OperationsTrainRoster.xml". You can find this file in JMRI⇒ "profile name" ⇒
operations. A backup file "OperationsTrainRoster.xml.bak" with the last settings for all of
your trains is also created each time the "Save Train" button is pressed.

In the upper left side of each "Edit Train" window is the "Tools" menu for that train.
Train Build Options
In the edit train window menu under "Tools⇒Train Build Options" are additional options
for building a train. You can control which car owners, and built dates the train will
service, and have up two locomotive and caboose changes in the train's route. You can also add
a request for helper locomotives. Press the "Save Train" button after you've completed your
changes.

Options
Use normal mode when building this train
You can request that the program use normal mode when building the train. This is useful when
a train departs staging. In normal mode, all of the cars in staging are set out first, where
in aggressive mode, the cars in staging are set out last. Selecting this option when you have
build failures out of staging, it could fix the failure.
You can also configure the program to always try building a train in normal mode when
there's a build failure in a aggressive mode when departing staging. See Try Normal Mode if Build Failure from Staging.
Send all car pick ups to terminal
You can also request that all car pick ups along the train's route are sent to the last
location in the train's route (terminal). Useful if you don't want your cars picked up and set
out at various locations in your train's route.
Allow cars to return to staging
When a train departs and returns to the same staging location, it is regarded as a turn by the
program. A turn normally takes cars from staging, sets them out on the layout, picks up new
cars and returns to staging with those cars. Normally the program doesn't allow the same cars
to depart and return to staging. However, it may be desirable to allow the train carry the
cars rather than having the program report that cars in staging couldn't be delivered to
destinations on the layout. Selecting this option allows a turn to transport cars from and to
the same staging location. Note that when this options is selected, that the program will only
return cars to staging when destinations are not available on the layout. Although not
recommended, you can also set this option for all turns, see
Staging Options.
You have the option of either leaving the cars in staging or having the cars ride the train
and return to the same staging location. If you want the cars to remain in staging, in the
train's route at the departure location allow set outs. If you want
the cars to ride the train, disable set outs at the departure route location.
Note that when this option is enabled, the program may have difficulties swapping cars
from staging and the layout as the program must assume that all cars in staging could return
to staging. When this option is disabled (recommended), the program can ignore the cars in
staging and can send cars from the layout to staging without regard to the cars sitting
there since the expectation is that all cars in staging will be sent to the layout. The
recommendation is to leave this option disabled unless you need your train to carry cars
from and to the same staging location.
There are several Staging Options available with regards to
trains, including returning to the same departure track, prompting for the departure or
arrival staging track, along with locomotive, car type, road, and load restrictions into
staging.
Allow local moves when a car has a custom load or FD
The program when generating car movement normally doesn't create local moves. A local move is
a pick up and then a set out of a car at the same location. When you use custom loads, the
program can create local moves based on the car's
custom load. So if you had a car sitting on a track with a custom
load, and you also had a spur with a schedule at the same location requesting that load, the
train's Manifest could show the pull and spot as a local move. The same goes for a car with a
final destination that's at the car's current location. A car
that has been assigned a
railroad division can also require a local move, for example a
return to a yard track at the same location. So if you don't want your train to perform local
moves when a car has a custom load, a local final destination, or railroad division, deselect
this option. You can also control which locations in a train's route are allowed to perform
local moves, see
Pick ups? Set outs? and Local moves? for more information.
Allow cars to travel from origin to terminal
Normally the program allows cars to travel from the train's departure location (origin) to its
last location (terminal). Deselect this option if you don't want the train to carry cars from
the train's origin to the terminal. For example, say the train departs Boston (origin), and
services Worcester, Springfield, and terminates in New York (terminal). If the option is
selected, then the cars could travel from Boston to Worcester, Springfield, or New York. If
not selected, then cars from Boston can only travel to Worcester or Springfield, and cars from
Worcester or Springfield could go to New York. But through cars from Boston to New York are
not allowed.
Service all cars with a final destination
This option when selected tells the program to pull cars with a final destination even if the
train being built doesn't provide the most efficient route for the car. Useful if you want the
train being built to move cars "closer" to their final destination, even if other trains could
do it more efficiently. The term "closer" has to be taken with a grain of salt, as the program
doesn't really understand distances, only the number of trains needed to move a car. So there
will be cases where the train pulls the car, and it will in fact be physically farther from
the car's final destination. This option does two things, it will add cars to the train being
built that wouldn't normally travel on the train, thus freeing up track space. And second
creates more work for your crew as this option can and will increase the number of trains
needed to move the car to its final destination.
Send cars with custom loads to staging
When the "Send cars with custom loads to staging" is selected, the program will attempt to
send a car with a custom load, but without a final destination, to staging when the program
finds all of the spurs with schedules full. The program will also send a car to staging if it
finds the
routes servicing the spurs with schedules have
interim yard or C/I tracks that are also full. This option
tends to increase car movement to staging by ignoring the
Hold cars
with custom loads when spurs are full feature for a spur where the program would normally
hold a car at its current location when all spurs with schedules are full.
Build loco consist from single locos
This option when selected will dynamically build a locomotive consist for you using locos that
aren't in a consist. For example, say you request a consist of three locomotives in the edit
train window's
Optional locomotive requirements. The program when
building a train, will first search for a consist of three locos that meet the type, model and
road requirements for the train. If the program can't find a three loco consist, it will
attempt to find three non-consisted locos that meet the train's requirements. For some
operators, they only want certain locomotive models consisted together. To meet this goal, use
the "Type" feature for a locomotive, and create types of locomotives that you want consisted.
Then assign these types to the locos that you want the program to consider when creating a
consist. You would then restrict your train to only service the locomotive type that you
wanted for that particular train.
If you want the program to also consider the required horsepower per ton (HPT) along with
the train's grades when determining the number of locomotives to assign to a consist, enter
a non-zero value in the Settings window under Horsepower per Ton. A value of "1" HPT is prototypical and
increasing the value will cause the program to assign more locomotives to the consist based
on the tonnage of the train. If you've entered grades in your train's route, the program
also considers the HPT needed for the grade. However, if you assign helpers to the train,
the HPT for that part of the route is ignored. The program when determining the required HPT
for a grade uses the prototypical formula "HPT = Speed x % Grade / 12". The speed when
determining the HPT is set to 36 MPH, which means that a 1% grade will require 3 HPT. If you
find that the program isn't assigning the "right" number of locos based on grade, simply
increase or decrease the grade entered as it isn't shown on the train's Manifest, it is only
used for calculating the HPT.
When using this feature, you should enter the minimum number of locos that you want the
train to depart with in the option train requirements section of the edit train window. This
will cause the program the assign the locos to the train at the start of the build process.
This helps keep the train length in check as the HPT calculation is done at the end of the
build process, and ignores the route's length restrictions. So it is best if the HPT
adjustment adds only one or two locos to your train, thus keeping the train length close to
the maximums you specified in the route. You could of course reduce the train lengths in
your route if you find that the program is consistently adding one or two locos to the
train, and also exceeding the maximum train lengths.
Note that the program will attempt to assign locos to your train if this option is enabled,
and the HPT value is greater than zero, even if the requested number of locos in the Edit Train window is also zero.
Train Owners
You can decide which rolling stock the train will service by owner name. Select which owners
names you want the train to carry. The control is similar to
Train
Road Options, see below.
Train Built Dates
You can control which rolling stock the train will service by their built date. If you want
only locomotives and cars built after a certain year, select the "After" radio button and
enter a four digit year in the text box. If you only want locomotives and cars built before a
certain year, select the "Before" radio button and enter a four digit year in the text box.
And if you want to specify a period, select the "Range" radio button and enter the after and
before years you want the train to service.
Optional Train Requirements (Locomotive or Caboose
Changes en Route)
You can have up to two locomotive changes while the train is en route. Select "Locomotive
change" and where you want the change to happen in your route, along with the number of new
locomotives that should be assigned to the train. You can optionally select the new
locomotives model and road. At the locomotive change location, the previously assigned
locomotives will be removed from the train.
There's also the option to add or remove locomotives in the train's route. Select "Add
Locomotives" if you want to add locomotives to your train. Select "Remove Locomotives" if
you want to remove locomotives from your train. Select the location and number of
locomotives you want added or removed, and optionally the model and road. The program will
add locomotives at the location selected. When using the "Remove Locomotives" option, the
program will assign additional locomotives at the start of the train's route and drop them
off at the selected location. The "Remove Locomotives" option isn't available when the train
departs staging.
OperationsPro™ also gives you three options with regards to the train's caboose.
The first option, "Remove caboose", will set out the caboose if one was assigned to the
train. The train will then depart the specified location without a caboose. The second
option, "No caboose change", either keeps the caboose if one was assigned to the train, or
departs without a caboose if there wasn't one assigned to the train. The third option,
"Change caboose", will set out the caboose if one was assigned to the train, and then add a
new one to the train. This last option becomes "Add caboose" if the train was traveling
without a caboose.
You can also request helper locomotives for those long up hill battles that your train
might experience. The current code only adds a comment to the Manifest requesting helper
service starting at the location you select, and removes the helper service at the second
location specified by you.
Train Load Options
You can decide which car loads the train will service. Select under the "Edit
Train⇒Tools⇒Train Load Options". This will bring up a new window with several
options.
If the train will service all load names, select the "Accept all" radio button. If you
want the train to service only some load names, select "Accept only" radio button. To build
a list of load names that the train will not service, select the "Exclude" radio button.
There are two pull down menus, the first one is the type of car, and the second the
type of load serviced by the car type selected. Use the "Add Load" button to build a list of
loads that the train will either service or exclude. The "Delete All" button will remove all
loads from the list. You can also associate a load with a particular car type, select the
"Use car type and load" checkbox if you want this feature.
Train Road Options
You can control the car, caboose, and locomotive roads that the train will service. Select
under the "Edit Train⇒Tools⇒Train Road Options". This will bring up a new window
with several options.

If the train will service all road names, select the "Accept all" radio button. If you want
to accept only some roads, select "Accept only" radio button. Then use the menu of roads and
"Add Road" button to make a list of roads that the train will service. To remove a road from
your list, select the road from the menu and use the "Delete Road" button.
To build a list of roads that the train will not service, select the "Exclude" radio
button. Then use the menu of roads and the "Add Road" button to build a list of roads that
this train will not service.
You can use the "hyphen" feature to create unique road names. For example, say you
wanted a certain SP boxcars to only ride this train. You could create a new road name, for
example "SP-special", assign that road name to the boxcars, and exclude the road name from
the other trains. Your Manifest would continue to show the boxcar road name as "SP".
Train Manifest Options
You can optionally have a unique railroad name and logo for each train in your roster. You can
also decide if your Manifests show the train's arrival and departure times. Use the "Edit
Train⇒Tools⇒Manifest Options" to set these options.
Copy Train
Use this tool to make a copy of an existing train. You will need to enter a name for the new
train.
Scripts
If you want to run a
script when a
train is built, moves or terminates, select under the "Edit Train⇒Tools⇒Scripts".
This will bring up a new window with several script options.
Included in the jython directory are
several examples of operation oriented scripts. These scripts are included in the JMRI
download and can be found in the jmri⇒jython⇒operations directory.
Train Conductor
The train conductor window provides a train manifest for each location that the train visits.
This real time window allows you to see the work needed at a location for a built train, and
once the work is completed by selected all of the work checkboxes, allows you to move the
train to the next location in the train's route.
Show Cars in Train
There are two tools available in the conductor window, "Show Cars in Train" and "Show full
hyphened location name". The "Show Cars in Train" is used to see the correct blocking order in
a train along with set outs and pick ups at each location in the train's route. The "Show full
hyphened location name" tool will toggle the display of location names showing the full name
of the location when using the
hyphen feature.
Modifying a built train
You can also modify the train's manifest by pressing the "Modify" button in the Conductor or
Yardmaster window. The modify button once pressed will ask you if you
want to add cars to the train. If you answer yes a "Cars" window will appear for the location
being serviced. Press the "Set" button for the car you want to add, and in the "Set Car"
window under the section "Optional -- Normally Set by Program" enter a destination,
destination track, and train for that car. Note that by default, a car's destination and track
is disabled, but you can enable it under the "Tools" menu in the set car window. Pressing
"Save" should cause the program to ask you if you want to add the car to the train.
To remove a car from the train, press the "Set" button, and the "Set Car" window should
appear. Pressing the set car "Save" button will ask you if you really want to remove the car
from the train.
Show Car Types Serviced
See
Show Car Types Serviced train tool below for more
information.
Print or Preview
There are many print and preview options available for each train.

In the upper left side of the Trains window is the "Tools" menu. The
first three items; Options, Manifest
Print Options, and Build Report Options can also be
accessed from the Settings Tools menu.
Modify Trains by Car Type
The ability to modify the car types that your trains will service can be found under
Trains⇒Tools⇒Modify Trains by Car Type or Cars⇒Tools⇒Modify Trains by Car
Type. Very useful when adding a new car type to your roster.

First select the car type you wish to modify using the left menu. The window will then
show which trains can service that car type. Select or deselect the trains you want to
service, and press the "Save" button to modify your trains. You can also copy how an
existing car is serviced by your trains and apply those rules to another car. To make a car
type behave like another, select the car type you would like to copy using the right side
"Copy Type" menu. Then select the "Copy" checkbox, and press "Save" to have both car types
serviced by the same trains.
Change Train Departure Times
Use this window to change all of your train departure times by certain number of hours. It can
be found under Trains⇒Tools. Useful if you're trying to match the train departure times
to a real or fast clock. You also have the option to change the departure times in your
routes.
Train Schedules
The Train Schedules window allows you to define which trains will run on any given day, and
can be found under the Trains⇒Tools. For each day of the week, select which trains you
want to build. Then select which day you want by selecting the appropriate radio button. Then
press the "Apply" button to update the
Trains "Build" checkboxes. Use
the "Save" button to store any changes you made to the train schedules.

To change which day of the week is active, select the appropriate radio button and then
press the "Activate" button. The day selected is then used by your schedules (Delivery and
Pickup) when building trains. For each day of the week, you can add a comment. Enter the
comment, then press the "Save" button. You can also add or change the days of the week by
using the "Edit Train Schedule" window found under "Tools". You can change the order by
dragging the column with your mouse pointer. Press the "Save" button to complete your
changes.
When the "None" radio button is selected, cars with a scheduled pick up day will not be
serviced. The "Any" radio button allows you to service all cars, even ones those that have a
scheduled pick up day.
There are four buttons labeled "Build", "Print/Preview", "Print Switch Lists/Update Switch
Lists", and "Terminate". These buttons facilitate the building of trains, printing the
Manifests and switch lists, and terminating the selected trains. Very useful if you're
running the program in Consolation mode.
If you've selected the "Preview" checkbox in the Trains window, the
"Print/Preview" button becomes "Preview" which allows to you review your train Manifest and
switch lists before printing them. The "Print Switch Lists/Update Switch Lists" button
becomes "Update Switch Lists" when you deselect the "Real Time" checkbox in the Switch Lists by Location window.
Train Row Color
OperationsPro™ gives you two options for color coding the rows in the
Trains
window. You can manually color code your trains, or you can have the program automatically set
a train's row color based on the status of the train. For example you could tell the program
you want the row colored red if a train fails to build. You can also when using the "Auto"
option define a unique color for each train when they are
reset.
Before switching to "Auto", select the reset row colors for your various trains. You can find
this feature under "Tools" in the
Trains window.
Copy Train
This tool allows you to copy an existing train. Enter a new name for the train you wish to
copy, then select the train you want to copy, then press the "Copy" button.
Train Scripts
You can run a script when starting and / or shutting down OperationsPro. Use the "Add Script"
buttons to select the scripts you want to run.
Automation
This tool allows you to automate the building, moving, and termination of trains. It can also
automate the printing of Manifests and switch lists. This is an advanced feature for
operations and is recommended for users that have some experience with the program. If you're
new to the program it is recommended that you skip this section.
To create an new automation select "Automation" from the Trains
Tools menu, and then press the "Add Automation" button at the bottom of the automations
page. This will open a new window called "Add Automation". Give the automation a name and an
optional comment, and then press the "Add Automation" button to create the automation. Each
automation must have a unique name.
To add your first action to the table, press the "Add" button in the lower left part of
the window in a section labeled "Add Item". This should add a line to the table, with four
pull down menus labeled "Action", "Train", "Route Location", and "Automation / Other". The
three pull down menus after "Action" are enabled if the action selected requires them. For
example to build a train, you need to select under the "Action" column "Build Train" and
under the "Train" column which train you want to build. If the desired action is to wait for
a train to arrive at a certain location in the train's route, you would select the action
"Wait for Train", then the name of the train from the "Train" menu, and then finally the
location in the train's route from the "Route Location" menu.
In addition to the four pull down menus, there's a checkbox under the column called
"HIAF" (Halt If Action Fails) and a button labeled "Add" under the column called "Messages".
The "Add" button allows you to enter a message that will pop up when the action is
completed. Some actions have two messages, one will show when the action succeeds and
another when it fails. Once you enter text into the message areas and press "OK", the "Add"
button for that action becomes "Edit". If it's possible for an action to fail, in addition
to the extra failure message text area, there's a checkbox labeled "Halt if action fails".
When selected the automation will halt in the event that the action fails to complete. The
"Create Default Messages" button will automatically create a success and failure message for
you if the text window is empty.
The messages can be useful when debugging your automation, or if you need to pause the
automation as it will wait until you press either the "Halt" or "OK" button. If you press
the "Halt" button, you can continue from where you were in the automation by pressing the
"Resume Automation" button.
If you want more than one action for your automation, press the "Add" button in the
"Add Item" area for each action you want to perform. The automation action sequence is from
top to bottom. You can if you wish add actions to the middle or end of your sequence by
selecting the "Middle or Before Selected Row" or "End" radio buttons respectively. If you
select the "Middle or Before Selected Row" radio button you can add an action to the middle
of the table, or above a row you've selected in the automation table. You can adjust the
order the actions run by using the "Up" or "Down" buttons available for each action. The
"Delete" button will remove that action from the automation.
Once you've entered all of the actions you want, you can either step through your
actions one at a time using the "Step Automation" button, or run through the entire action
sequence using the "Run Automation" button. To stop the action or sequence of actions, you
can press the "Stop Automation" button. The "Current" column shows where in the sequence the
automation is executing. Pressing the "Resume Automation" button continues running the
actions from where the current pointer is. The "Run Automation" button always restarts the
automation at the top of the table. If you want to manually reset the current pointer to the
start of the table, find under "Tools" "Reset Automation". Useful if you're stepping through
the various actions and want to begin at the start of the table. You can also move the
current pointer to any action by double clicking the "Current" cell for that action followed
by the enter key.
And finally press the "Save Automation" button to make your menu selections valid and
save your automation to the OperationsTrainRoster.xml file. The next section provides the
details for some of the available actions.
Do Nothing
This action can display a message when executed. Use the "Add" button under the "Messages"
column to add a message. This can be helpful when debugging an automation by displaying
messages when appropriate. Also useful if you need to communicate a manual step in your
automation. If you do create a message, you have the options of either continuing with the
automation by pressing the "OK" button, or stopping the automation by pressing the "Halt"
button. Without a message the action does nothing, or for programmers a NOP or no operation.
Build Train
This action will build the train selected in the "Train" menu adjacent to the "Build Train"
column. This action will report "Failed" if the train fails to build or if you haven't
selected a train.
Build Train if Selected
This action will build a train if the "Build" checkbox in the
Trains
window is selected for the train. You must choose a train using the "Train" menu. This action
will report "Failed" if you haven't selected a train, or if the "Build" checkbox isn't
selected for the train in the
Trains window or if the train fails to
build.
Preview or Print Train Manifest
This action's name and function depends on the "Preview" checkbox in the
Trains
window. If the "Preview" checkbox is selected, then the action becomes "Preview Train
Manifest". If the checkbox is not selected, then the action becomes "Print Train Manifest".
You must choose a train using the "Train" menu. This action will report "Failed" if a train
isn't selected from the "Train" menu, or the train isn't built.
Preview or Print Train Manifest if Selected
This action's name and function depends on the "Preview" checkbox in the
Trains
window. If the "Preview" checkbox is selected, then the action becomes "Preview Train Manifest
if Selected". If the checkbox is not selected, then the action becomes "Print Train Manifest
if Selected". You must choose a train using the "Train" menu. This action will report "Failed"
if a train isn't selected from the "Train" menu, the train isn't built, or the "Build"
checkbox isn't selected for the train in the
Trains window.
Preview or Print Train Build Report
This action's name and function depends on the "Preview" checkbox in the
Trains
window, and the "Always use Preview for Build Reports" checkbox in the
Build Report Options window. If either checkbox is selected,
then the action becomes "Preview Train Build Report". If both checkboxes are not selected,
then the action becomes "Print Train Build Report". You must choose a train using the "Train"
menu. This action will report "Failed" if a train isn't selected from the "Train" menu, or the
train isn't built.
Run Excel for Train
This action will cause an external Excel program to run for the selected train. See
Setup Excel Program (Manifest Creator) for more information.
You must choose a train using the "Train" menu. This action will fail if a train isn't
selected from the "Train" menu, of if there isn't an Excel program configured and enabled.
Failure info messages are sent to the system console.
Move Train
This action will move the selected train to the next location in a train's route, or terminate
a train that has arrived at its terminal. If a "Route Location" is selected the program will
move the train to the location selected in the train's route. The action will fail if a train
isn't selected, or if the train isn't built, or if the train has already passed the location
chosen.
Is Train En-Route?
Used to determine if a train is en-route to the selected "Route Location". Reports "Success"
if the train is built and hasn't arrived at the location selected in the train's route.
Reports "Failed" if the train isn't built, has arrived at the selected location, or has
departed the selected location.
Wait for Train
This action will wait for a train to build or move before executing the next action in the
table. If a location is selected from the "Route Location" menu, the program will wait until
the train arrives at the location selected. Note that if the train is already at the location
chosen, that the program will wait until the next time the train arrives at that location. You
must choose a train using the "Train" menu. If the "Build" checkbox for the train being waited
on is manually changed from selected to unselected while the "Wait for Train" action is
running, the program will cancel the wait and move to the next action in the table.
The program also allows you to wait for more than one train. Just enter each of the
trains you want to wait for in consecutive rows. The program will then continue when all of
the trains either move or arrive at the selected locations.
Wait for Train to Terminate
This action will wait for a train to terminate before executing the next action in the table.
Note that if the train is already terminated, that the program will wait until the next time
the train is terminated. You must choose a train using the "Train" menu. If the "Build"
checkbox for the train being waited on is manually changed from selected to deselected while
the wait is running, the program will cancel the wait and move to the next action in the
table. You can wait for more than one train to terminate by entering each train you want to
wait for in consecutive rows.
Activate Train Schedule
This action will activate the selected day in the "Automation / Other" column. Works the same
as the "Activate" button in the
Train Schedules window.
Apply Train Schedule
This action will select trains using the checkboxes in the "Build" column from the
Trains window based on which day is active, see "Activate Train
Schedules" above to select which day is active. Works the same as the "Apply" button in the
Train Schedules window. There must be an active day for this
action to work.
Select Train (Build)
Selects the "Build" checkbox for the specified train in the
Trains
window. One use is to control which trains are displayed in the "Trains" window. See the "Show
All" checkbox in the
Trains window. You must choose a train using the
"Train" menu.
Deselect Train (Build)
Deselect the "Build" checkbox for the specified train in the
Trains
window.
Preview Switch List or Print Switch List
This action can preview or print switch lists for your locations depending on the "Preview"
checkbox in the
Trains window. Switch lists are created for the
locations selected in the
Switch Lists by Location window.
Preview Switch List Changes, Print Switch List Changes, or Update Switch Lists
This action can either preview switch list changes, print switch list changes, or update your
switch lists depending on the "Preview" checkbox in the
Trains window,
and the "Real Time" checkbox in the
Switch Lists by
Location window. If the "Real Time" checkbox isn't selected, the program is running in
consolidation mode which allows you to build a switch list by
building and terminating multiple trains. When the action "Update Switch List" runs, switch
lists are updated with the work created by building new trains. The other two actions are
"Preview Switch Lists Changes" and "Print Switch Lists Changes" and these are available when
running the program in real time, and allows you to preview or print switch lists that have
new work since the last time they were printed. Switch lists are previewed, printed, or
updated depending on the locations selected in the
Switch
Lists by Location window.
Wait for Switch List Change
This action will wait for new work for locations created by train builds. The locations
monitored are selected in the
Switch Lists by Location
window.
Generate Switch List
This action works like the "Generate CSV Switch List" button in the
Switch Lists by Location window. It will create CSV files
for each of the locations selected in the window.
Generate Switch List Changes
This action works like the "Generate CVS Switch List Changes" button in the
Switch Lists by Location window. There has to be new work
at one of the locations selected in the
Switch Lists by
Location window for this action to succeed.
Reset Switch Lists
This action works like the "Reset Switch Lists" button in the
Switch
Lists by Location window. The "Reset Switch Lists" action removes terminated and reset
trains from your switch lists, and restores all switch lists for trains that are built. Useful
when running switch lists in
consolidation mode.
Run Excel Switch List
This action works like the "Run" button in the
Switch
Lists by Location window. It will create CSV files for each of the locations selected in the
window, and then run the configured Excel program to generate custom printouts. See
Setup Excel Program (Manifest Creator) for more information.
Run Excel Switch List Changes
This action works like the "Run Changes" button in the
Switch
Lists by Location window. There has to be new work at one of the locations selected in the
Switch Lists by Location window for this action to succeed.
Run Automation
This action can start an automation from the beginning. You must select an automation from the
"Automation" menu.
Resume Automation
This action can resume an automation that has been stopped or halted. The current pointer for
the selected automation determines where the program resumes execution. You must select an
automation from the "Automation" menu.
Stop Automation
This action can stop an automation that is running. You must select an automation from the
"Automation" menu.
Counter
This action will increment a count starting from zero. The counter isn't saved when
OperationsPro is shutdown, and will restart at zero the next time the program is run. To reset
the count to zero without restarting OperationsPro, reselect the action "Counter".
Message Yes or No
This action can be used to ask a question to which the answer is Yes or No. Use the "If
Success GOTO" action to branch if the answer is Yes. Use the "If failure GOTO" action to
branch if the answer is No.
GOTO
This action allows you to jump to any action in the table. You must select the action id you
want to goto from the "Automation" menu.
If Success GOTO
This action will cause the automation to jump to the action id selected from the "Automation"
menu when the previous action was successful. If the previous action failed, the automation
continues to the next action in the table.
If Failure GOTO
This action will cause the automation to jump to the action id selected from the "Automation"
menu when the previous action has failed. If the previous action was successful, the
automation continues to the next action in the table.
Halt
This action stops the execution of the automation. You can use the "Step Automation" or
"Resume Automation" button to continue the automation by running the next action in the list.
Automation Tools
Reset Automation
This tool will stop a running automation, reset the current pointer to the start of the table,
and clear the status for all of the actions.
Copy Automation
This tool will allow you to make a copy of an automation. Enter a name for the new automation
and select which automation you want to copy. Then press "Copy" and that should open a new
automation window with a copy of the automation you selected.
Resume Automations
This tool will restart all automations that were running when the operation files were last
saved. The function is the same as pressing the "Resume" button for each automation in the Run
column of the main automation window. Note that for the program to detect that an automation
was running when the files were saved, the current action pointer must not be at the first
action in the automation, therefore it is recommended that you not use any of the "Wait for"
actions as the very first line item of an automation, instead use "Do Nothing" action followed
by the needed "Wait for" action.
Select Start Automation
This tool will allow you to select an automation to run when OperationsPro™ starts.
This is the end of the automation section.
Setup Excel Program (Manifest Creator)
The ability to configure an Excel program to create custom manifests can be found under Trains
⇒ Tools. Dan Foltz who is a JMRI user/programmer wrote the "Manifest Creator" and "Switch
List Creator". You can find a copies of the programs at
Manifest Creator - Add on to JMRI. Place the
program "MC4JMRI.xls" or "SWC4JMRI.xlsm" along with any other files needed in the
JMRI/Your_Profile_Name.jmri/operations/csvManifest directory. You can of course create your
own program and also install it in the csvManifest directory.
You can enable the creation of the comma separated values (.csv) files needed for an
external Excel program from the Train's "Tools" menu "Setup Excel Program" or from the Options "Generate CSV Manifests".
You can also create custom switch lists. Place the programs in the
JMRI/Your_Profile_Name.jmri/operations/csvSwitchList directory. You can configure the name
of the Excel program by opening the "Switch List by Location" window using the "Switch
Lists" button at the bottom of the Trains window. Then under "Tools"
in the "Switch List by Location" window, select "Setup Java or Excel Program (Manifest
Creator)". You must also enable the creation of CSV switch list files, see Options "Generate CSV Switch Lists" for more information.
Export Trains
The export trains tool produces a comma separated values (.csv) file for the trains selected
in the "Build" column. The file "ExportOperationsTrainRoster.csv" can be found in the
"operations" directory.
The export Timetable tool produces a comma separated values (.csv) file for the Timetable
application. You can also use the "Import from OperationsPro..." found in the Timetable
application to create and import in one step. The OperationsPro™ export creates a
"Segment" called "Locations" based on an alphabetical list of location names, or if you create
a route named "Timetable", produces a segment of locations based on the route's location
order.
During the export, the program will calculate the maximum work times at each train's
location based on the move counts in the train's route for trains that aren't built, and the
actual work time for built trains. The work time is referred to as "Duration" in the
Timetable application stop sequence.
Only trains that are selected in the build column are exported. Each export will create a
new schedule based on the date of the export. The export works best if the travel time in
the Settings window is between 1 and 4 minutes.
Export Train Lineups
The export Trains Lineups tool produces a comma separated values (.csv) file for built trains
that are also selected in the "Build" column.
Show Car Types Serviced
This diagnostic tool can help you determine why a train will not service a particular car
type. You can select a car type and see how the train will service that car type. You can also
select a specific car to see how that car would be serviced.

The window shows the train's route along with every location and track that can be
serviced by the train. To the right of each track is the current status for the car type
currently selected in the drop down menu. If the status is "OK" then this train can pick up
and set out this type of car to that specific track. If the status is "Pick Up Only" or "Set
Out Only" then the train can only pick up or set out cars to that particular track. A status
that begins with an "X" means that the train will not service the track. The following table
provides a summary of the various statuses.
| Status |
Description |
| OK |
Selected car type can be picked up or set out |
| Pick Up Only |
Selected car type can only be picked up from this track
|
| Set Out Only |
Selected car type can only be set out to this track
|
| X (Train Type) |
Selected car type is not serviced by this train
|
| X (Train Built) |
Selected car's built date is not serviced by
this train
|
| X (Train Load) |
Selected car's load is not serviced by this train
|
| X (Train Owner) |
Selected car's owner is not serviced by this
train
|
| X (Train Road) |
Selected car's road is not serviced by this train
|
| X (Train Skips) |
The train doesn't service this location
|
| X (Train Pick up) |
The train can't pick up cars from this track
|
| X (Train Set out) |
The train can't set out cars to this track
|
| X (Train Local Move) |
The train option to allow local moves for cars
with custom loads or FD is disabled
|
| X (Local Move) |
The train won't perform a local move for cars with a default load |
| X (Route) |
The route doesn't allow pick ups or set outs for this
location
|
| X (Route Moves) |
The number of requested car moves for this location is
zero
|
| X (Location Type) |
The location doesn't service the selected car type
|
| X (Track Type) |
The track doesn't service the selected car type
|
| X (Track Load) |
The track doesn't service the selected car's load
|
| X (Track Road) |
The track doesn't service the selected car's road
|
| X (Track Train) |
The track doesn't service this
train
|
| X (Track Route) |
The track doesn't service the
train's route
|
| X (Track Destination) |
The track doesn't service the car's final
destination
|
| X (Track Custom Load) |
The track can't service a car with a custom load (FD can
override)
|
| X (Dir Loc) |
Based on the train's departure direction, the location doesn't allow set outs or pick ups
|
| X (Dir Trk) |
Based on the train's departure direction, the track doesn't allow set outs or pick ups
|
| X (Train Schedule) |
The spur's schedule train schedule selection prevents
the car from being serviced.
|
| X (Schedule Type) |
The spur's schedule does not allow the car's type to be
serviced.
|
| X (Schedule Load) |
The spur's schedule does not allow the car's load to be
serviced.
|
| X (Schedule Road) |
The spur's schedule does not allow the car's road to be
serviced.
|
| X (Schedule) |
The spur's schedule does not allow the combination of
the car's type, load, and road.
|
| X (Division) |
The car's division and load will not allow set
outs.
|
FD = Final Destination
Print or Preview Saved Train Manifests
If you've selected the
Save Train Manifests option, you can print or
preview a train Manifest that was previously created by the program and saved.
Print or Preview Saved Train Build Reports
If you've selected the
Save Train Build Reports option, you can print
or preview a train build report that was previously created by the program and saved.
[Click to go back to TOC]
Switcher Service (Local)
Many operators assign a locomotive to a location to do the local switching. Using the
location's switch list allows the person assigned to the location to service all trains that
stop at that location. However, there can be locations that don't get enough work servicing
through trains and it would be nice to create some additional work for the crew member
assigned to that location. To create a local "switcher" job, create a route with just one
location, the location that the switcher will service, and assign that route to a train. The
"train" now becomes a switcher that will only service that location. Adjust the "Move" count
in the route to control how many cars the switcher will service.
Since a local switcher only services a single location, the program ignores the train
direction control in the switcher's route, and therefore the location and track service
direction controls for a train are also ignored by the program. If you only want a track to
be serviced by a switcher, deselect all the train direction controls for that track. Only a
switcher will service a track that doesn't have any direction boxes selected.
The switcher's route has controls for car pick ups, set outs, and local moves. See Pick ups? Set outs? and Local moves? for more information.
Switcher Restrictions
OperationsPro™ when generating a Manifest for a switcher (a train with a single location
in its route) will by default never move a car from a spur to a spur or yard to a yard, only
yard to spur or spur to yard. This rule also applies to interchanges. This restriction helps
prevent unrealistic car movements between spurs (industries). However, if you want a spur to
spur move, use a
Schedule to create the car move. You can also
disable this restriction see
Options.
[Click to go back to TOC]
Building Trains
To build one train, press the "Build" button in the row for the desired train in the
Trains window. The button will become "Print" or "Preview" after the
train is built depending on the state of the "Preview" checkbox located at the bottom of the
Trains window. If you want to review how the train was built, select the
"Build Reports" checkbox before pressing the "Print" or "Preview" button for the desired
train. If the "Preview" checkbox is selected, the program will generate the
Build Report and Manifest and present them in preview windows. If
you want to build several trains without having to press individual buttons for each train,
select the trains that you want built and press the "Build" button found at the bottom of the
trains window. The program will then build Manifests for all of the selected trains.
If a train fails to build, the "Action" button will change its text to "Report". Pressing
"Report" will print or preview the build report for this train.
Whenever a train fails to build, a build failure message will appear. If you want to disable
this feature deselect the checkbox "Build Messages".
You can manually remove or add cars to a built train, see Set Car.
You can also control which trains are shown in the Trains window. When the "Show All"
checkbox is deselected, only trains that have the "Build" checkbox selected are shown.
[Click to go back to TOC]
Train Status
After pressing the "Build" button for a train, the train's status will become "Built",
"Partial X/Y", or "Build Failed". A "Built" train status means that the program was able to
provide exact number of car moves requested by the train's route. A train status of "Partial
X/Y" means that the program was only able to provide "X" cars out of the "Y" requested by the
train's route. For example let's say you wanted a total of 23 cars moved as defined by the
train's route, and the program could only provide 19, the status would be "Partial 19/23". As
long as the number of cars found by the program is reasonably close to the requested, then the
program was able to build the train to your expectations. "19/23" or 19 cars out of 23 cars
would be considered by most as reasonable.
When a train fails to build the status becomes "Build Failed" see Build
Reports to understand how to troubleshoot a build failure.
After successfully building a train, you can have the train depart and travel to the
first location in your train's route by pressing the "Move" button. The train's status would
then become "en route", and the status will also show the number of cars in the train, along
with the train's current length and weight. Once the train reaches the last location in the
train's route, pressing the "Move" button again causes the program to terminate the train,
and the train's status becomes "Terminated" along with the date and time of when the train
was terminated.
[Click to go back to TOC]
Build Reports
If you want to examine how a train was built, you can select the "Build Reports" checkbox at
the bottom of the train window, and then press the "Print" or "Preview" button for that train.
The program will then provide the train Manifest and build report for your viewing. You can
also access a train build report from the Edit Trains window under Tools.
You can also find a copy of the train build report file in the "operations" directory in a
subdirectory called "buildstatus". Each train build report has its own file with the .txt
extension and the name of the train as part of the file name. You can if you wish use a text editor to view the train build report file.
When a train build fails for any reason, the train action button becomes "Report" which
allows you to access the build report for that train. The program will send the report to
your printer if the "Preview" isn't selected, or to a preview window or text editor if the
"Preview" is selected. The build report can print out different levels of detail, from
minimal to very detailed. See the Settings section Build
Report Options for more information on how to change the build report detail level.
[Click to go back to TOC]
Problems Building Trains How to Fix
The most common reason for a build failure is requesting a caboose or car with FRED and the
program can't find a caboose or car with FRED at the start of the train's route. The program
must also find a track at the train's destination that can service the caboose or car with
FRED. Note that you must select the "Caboose"
checkbox to
make a car a caboose, the type name "Caboose" doesn't make a car a caboose, as you can name
your "crummy" or "hack" anything you want.
The next common reason for a build failure is requesting a certain number of locomotives for
the train, and the locos aren't at the start of the train's route. If you request more than
2 locos for a train, they must be part of a consist, or you've selected the option for the program to build a consist from individual
locomotives. Again, the program must find the requested number of locomotives at the start
of the route, and must also find track that can service the locos at the end of the train's
route.
The third most experienced reason for a build failure is when a train is departing
staging and the program can't find destinations for the cars. It is a requirement that a
train must depart with all cars on the staging track, no cars can be left behind in staging.
A build failure will occur if the program can't find destinations for all of the cars
departing staging.
Reading the build report can detail exactly why the train failed to build allowing you to
correct the problem. When reading the build report, use the "Very Detailed" option as it provides the most information with regards to
how the program works and why the failure occurred.

Reading the Build Report
OperationsPro™ when building a train creates a
Build Report
and saves it to a file. Normally you would access the build report from the
Trains window or from the edit train "Tools" menu. The train
build report text files can be found in the operations⇒buildstatus directory. The build
report shows the steps the operations program goes through while building a train. The first
page provides the route the train will travel and the number of car moves requested for each
location. The report then shows the car type and locomotive types that the train will service.
By reading the various messages in the report you can get an idea of steps the operations
program goes through to build a train. When there's an issue that the operation's build can't
resolve, the build will fail. To understand why a build failed, go to the last page of the
build report and by working backwards from the last line, you should be able to understand why
a train failed to build.
You can if you wish use a text editor instead of the print preview window. A text editor
allows you to search the report for a specific car or issue. You can select this option from
the Build Report Options under "Tools" in the Setup or
Trains window.
Build Report Details
For those who want to understand how OperationsPro™ builds trains here's the overview.
The program can create car movement in one of two ways, "random" and "routing". Cars that
haven't been assigned a division, or don't have a final destination or custom load
are found destinations using the random method. Cars assigned to a division, or with a final
destination or a custom load are routed. The term "random" is used
to describe car movement from session to session, as using this method causes cars to move
but not in a deterministic way. Whereas cars that are "routed" are moved from session to
session in a predictable way, closer to their final destination.
The random method uses a series of counters to determine which cars should travel to
which tracks. These counters and the restrictions you place on the trains and tracks
determine the possibilities that the program can choose from. Each time a locomotive or car
is assigned to a train during the build process, a count associated with them is
incremented. The program uses this count, called "Moves" in the "Cars" and "Locomotives"
windows, to determine which rolling stock hasn't moved recently and tries to place rolling
stock with the least number of moves first when building new trains. Each time a car or
locomotive is sent to a track, the program increments a count associated with that track.
The program tries to move cars and locos to tracks that have experienced the least use.
The routing method also uses the car's move count to determine which cars to look at first.
A car needs to be routed when it has a final
destination (think ship to address). The program will try and route the car to its final
destination using up to seven trains. If the car has a custom load and no final destination,
the program will search for a spur with a schedule that is demanding that car's load, and
then will then give the car a final destination that is the spur, and then route the car to
that spur.
Cars assigned to a division are always routed. Divisional cars
are assigned a final destination when the program determines
that the car is needed by a industry (spur), or if the car is empty and
needs to return to its division's home yard.
Cars that are routed move with a purpose, they will travel from location to location using
the most efficient route the program can find. Most of the time cars are routed though classification or interchange (C/I) tracks, but the program can optionally use yard tracks if needed.
More details
At the beginning of the train build process, if the train requires a locomotive or several
locomotives, the program will look for locomotives at the start of the route and then
determines if the termination location will accept them. Note that if two or more locomotives
are required for the train that the locomotives must be in a
consist,
or the option to
build loco consist from single locos must be
enabled.
When building a train only rolling stock at locations that are part of the train's
route are used. Rolling stock already assigned to trains are ignored when building new
trains. With regards to cars, in addition to the number of moves a car has experienced, the
car's load priority is also considered. The program will try and find destinations for cars
with higher priority loads before low priority loads.
The next step in the build process is to optionally assign a caboose
or car with FRED to the train. If the program finds the
required caboose or car with FRED at the start of the route, the program tries to find a
track at the termination location that will accept it. If successful, all other cabooses and
cars with FRED are removed from the available car list.
Next the program will assign cars to the train starting from the departure location.
Each car goes through the process of searching for a track at each location along the
train's route that will accept the car. Another count assigned to a track is used to
determine if the track has been serviced recently. Tracks with the least amount of service
get priority. Once the program finds a track at a location, the search continues until all
locations in the train's route are checked. If the program finds more than one location for
the car, it will use the number of moves requested in the train's route and the number of
cars already assigned to a location to determine which destination is the most appropriate.
The process continues until the number of car moves requested by a location is met, or the
available cars being processed by the program is used up. Once the car moves requested for a
location is met, the next location in the route is examined. This continues until all
locations in a train's route have been processed.
The program can build trains in one of two modes, Normal or
Aggressive. In normal mode, the program sends cars to tracks that have physical space for
the new cars. In aggressive, the program can send cars to tracks that are full as long as
one or more of the cars on that track is scheduled to be picked up. A car can be scheduled
to be picked up by a previously built train, or by the one being built.
In aggressive mode , the program when figuring out
destinations for cars, will perform multiple passes when determining where to place cars.
Using the default value of two passes, the first pass uses 50% of the available moves for
each location when determining the number of cars to pick up, and the second pass does the
remainder. By doing multiple passes, the program can "free" up some tracks that already have
cars there, thus increasing the number of cars that the train can service. Once a car has
been scheduled for a pick up by a train in aggressive mode, the car's current track space is
available for other trains to use.
There is an exception when departing staging in aggressive mode, the program will skip
searching for destinations for cars out of staging on the first pass unless the Use normal mode when building this train is selected. The
thinking is that car pick ups along the train's route will free up space which should
provide more possibilities for cars out of staging. However, if you have tight train length
restrictions along the train's route, the program might not find destinations for cars out
of staging while keeping the train length in check. If you find in the build report that the
train length is an issue for cars out of staging, try building the train using the "Use
normal mode when building this train" found under Train
Build Options in the "Tools" menu under Edit Train.
When a car has a final destination which can be set by a schedule
or manually using the Set Car window, the program will try and route the car to that destination. If the program can't find a
train or series of trains that can deliver the car to the destination, it will try and move
the car in an attempt to find a way to get the car to the destination.
If a car has a custom load without a destination, the program
will search for a spur with a schedule demanding that car type and
load, the program will then route the car to that destination. The
program will use up to seven trains to route a car to a destination. The program when
determining how many cars an industry can serve considers the length of the spur serving the
industry, and the length of the alternate track if one is specified. If the car is departing
staging with a custom load, the "Percentage of custom loads generated by staging" is used to
determine if the car should be sent to that industry. See Schedules
for more details.
Sometimes reading the build report can get tedious. A text editor allows you to search the
report, you can select this option from the Build Report
Options under "Tools" in the Setup or Trains window.
Printing Manifests
After building a train, the "Build" button will become "Print" or "Preview" depending on the
state of the checkbox called "Preview" located in the lower part of the Trains window.
Pressing the "Print" button will print the Manifest for that train. Pressing the "Preview"
button will produce a window in which you can review the Manifest. If you want to print
Manifests for several trains, select the trains you want in the build column and then press
the "Print" or "Preview" button found at the bottom of the trains window. The program will
then print or preview Manifests for all of the selected trains. You can modify the look of
your Manifests from the
Manifest Print Options window. Some
printers need the JMRI locale set to English (United Stated) to use paper size "Letter". See
Orientation and Paper Size for more details.
You can also access a train's Manifest and Build Report from the
"Tools" menu in the edit train window. The "Tools" menu option allows you to recover the
Manifest and build report for a train that has been terminated. Useful if you've
accidentally terminated a train before printing out the train's Manifest.
Below is a train Manifest using the "Standard" format, with blue text for car pick ups,
and red text for car set outs.

Below is a train Manifest using the "Two Column (Track)" format, "Tabular" and "Print
Headers" selected, along with changes to the Manifest header and Manifest text fields. We've
seen cases where the text and the column lines don't line up properly when using the "Two
Column" formats. To fix this issue, you might have to play with the Manifest font type and
size to get the text to line up properly. The page below was created with "Courier New" and
a font size of 10.

An alternative to using the Manifests provided by OperationsPro™ is to create a custom Manifest. Shown below is a train Manifest (LS) and
switch list for locations Lakeview and Bakersfield using Dan Foltz's Switch List Creator
version 1.2 (SLC4JMRI.xlsm). This and other versions may be found at www.ManifestCreator.Weebly.Com. This
particular custom format allows you to use a half sheet of paper for your crew. Note that
the Car Types was changed in the Settings
window from "Descriptive" to "AAR Codes" before using Dan's Excel program.


There's also a Java based program written by Tim Mann called Model
Railroad Switch List and Manifest Formatter that will create custom Manifests and switch
lists for you using the CSV files.
Switch Lists
A switch list shows the work required to service all of the trains visiting that location.
Normally a switch list is given to the person in charge of a yard or a location with many
spurs or industries. You can modify the look of your switch lists from the
Manifest Print Options window. Below is a switch list using the
"Standard" format and "Tabular" selected, along with "Print Headers", and changes to the
header text fields.

Press the "Switch Lists" button found at the bottom of the Trains
window if you want a switch list for a given location. A menu will appear that allows you to
select which locations to preview or print. Once you've determined which locations you want
to print or preview, press the "Save" button to keep your selections.

The "Print Switch List Changes" button will become active after you've printed out your
switch lists, and a change occurs to one of your locations due to building a new train.
Pressing this button will send only new switch lists for a location to your printer.
The switch list menu also lets you add a comment to the switch list for a location and
select which printer to use when printing out the switch list. Note that the program when
printing out Manifests will also use the printer associated with the train's departure
location.
You can also get a paperless version of a switch list by activating the appropriate Yardmaster window for a location.
Switch List Options
There are three options for adjusting the switch lists to your liking. The first checkbox
option "All Trains" when selected tells the program to print all trains that visit a location,
even if the train doesn't have any work. If you deselect this option, then the program only
prints out trains that have work at that location.
The next option, "Page Format", controls how much paper is used when printing out
switch lists. The "Normal" mode uses the least amount of paper, and will list the trains
servicing the location one after another. The "Page per Train" option when selected causes
the program to print a train's switch list on a new page for each train. This way your crew
when completing the work for a train, can simply discard the paperwork for that train. This
mode is also useful if you have more than one crew member working a location, this way they
can easily hand out the work by train. The final option is "Page per Visit", this option
prints a new page each time a train visits the location. Useful if you don't want multiple
visits by a train to be on the same set of pages.
Real Time or Consolidation
The last option "Real Time" is whether you want your switch lists in real time or
consolidation mode. Normally you would generate your switch lists in real time. In this mode
the switch list for a location shows the work planned for trains that are built and not yet
terminated.
If you only want to print out work for new trains, then deselect the real time option.
Once you've printed out the switch list for a location, when new work is created by building
trains, the old work for older trains is deleted. Note that you can use preview to see what
work a location has, but until you print it, new work will be added to whatever work is
currently scheduled. So please understand that preview and print work differently in
consolidation mode.
Another use for consolidation mode is to create large switch lists for a location by
building and terminating several trains. For example, if you have a small layout, you might
have to build and terminate quite a few trains in order to generate enough work for your
crew. If you use switch lists in real time you have to print them out before you terminate
your trains. Now if there isn't much work your switch list is going to be pretty short. By
deselecting the "Real Time" checkbox you can consolidate several small switch lists in to
one larger one. Use this mode if you want to save paper, otherwise don't bother, as it can
be difficult to use. It's a bit complicated, so here's the order you need to do things:
- Press the "Switch Lists" button found at the bottom the Trains
window.
- Select which locations you want switch lists for in the "Switch Lists by Location"
window.
- Deselect the "Real Time" checkbox and press "Save".
- Now build the trains you want consolidated switch lists for.
- Press the "Switch Lists" button again if you've closed the Switch List window.
- Then press the "Preview Switch Lists" or "Update Switch Lists" button.
- Now print out your train Manifests and terminate the trains you want terminated.
- Continue building, updating switch lists, and terminating trains until your happy
with the amount of work generated.
- Finally, print out your switch lists.
Printing out the switch list for a location tells the program that you're done
consolidating your trains for this location. The program will clear the switch list when the
next change occurs to that location. If there are no changes to a location, then the switch
list is a copy of the last one printed. This allows you to print more than one copy of the
switch list if needed.
The Train Schedules window has buttons along the bottom of the
window that simplify the building of train Manifests and consolidating train switch lists.
If you select or deselect any of the switch list options, you will need to press the
"Save" button to activate them.
Consolidation Mode Buttons (Not Real Time)
When you deselect the "Real Time" checkbox, two new buttons will appear, "Update Switch Lists"
and "Reset Switch Lists". The "Update Switch Lists" is used to append new train builds to the
existing switch lists for each of the locations selected. The "Reset Switch Lists" removes
terminated and reset trains from your switch lists, and restores all switch lists for trains
that are built.
Custom Switch Lists
You can if you wish create custom switch lists using an Excel or Java program. You can
configure where to find the Excel program for custom switch lists from the "Switch Lists by
Location" window "Tools" menu. Or go to
Options and select the
"Generate CSV Switch List" to enable this feature. For more information see
Setup Excel Program (Manifest Creator).
When the feature to generate CSV Switch Lists is enabled, the program will create a
comma separated values file for each of the selected locations. You can find the CSV files
in the csvSwitchList directory.
Two new buttons will appear at the bottom of the "Switch Lists by Location" window,
"Run", and "Run Changes". The "Run" button is used to create custom switch lists for all of
the selected locations by executing an Excel or Java program. The "Run" button will if
needed, create the CSV files needed before asking the Excel or Java program to create and
print a custom switch list. The "Run Changes" will only create new switch lists for
locations that have new work.
When using a Java program like Model Railroad Switch List
and Manifest Formatter to create a custom switch list, you must delete the Excel switch
list file name and then press "Save".
Moving Trains
After providing your crew with a printed Manifest or location switch list, you must keep the
program database synchronized with the actual movement of trains on your layout. This is done
by the train "Move" buttons located on the right side of the
Trains
window. Pressing the "Move" button will cause the train to depart its current location move to
the next location in the route. The locomotives and cars assigned to the train will travel to
the next location on the railroad. At each location, cars can be picked up or set out. You can
also move a train by selecting the train's
icon and
selecting "Move" from the icon's pop-up menu. Each press of the "Move" button moves the train
closer to its terminal location. When the train arrives at the last location in the route, the
last press of the "Move" button will terminate the train. Once a train is terminated, you can
build it again.
Terminate Train
When you terminate a train, you are asking the program to move the train from its current
location to its final destination. The cars and locomotives associated with the train will be
picked up and delivered to the locations shown in the train Manifest. After terminating a
train the locomotives and cars associated with that train become available for other trains.
Therefore you should terminate a train only after it actually arrives at the final destination
in the train's route. To terminate several trains, select the trains you wish to terminate in
the build column and press the "Terminate" button at the bottom of the Trains window.
Save Builds
Pressing the "Save Builds" button causes the program to update the train, car, locomotive, and
location xml files. Any time you "Move" a train the operations program will make changes to
the train, car, locomotive, and location databases. The data must be saved before you shut
down JMRI, otherwise you will lose all of the changes that the operations program made to move
a train to the next location. Pressing the "Save Builds" button before quitting JMRI allows
the operations program to resume exactly at the point where you pressed the "Save Builds"
button. If you attempt to close the
Trains window before pressing the "Save Builds" button, a warning will
pop up asking you to save your files. Note that if you enabled
Auto Save no warning will appear and the program will automatically
save your files.
[Click to go back to TOC]
Building Multiple Trains for a Session
Most operating sessions require more than one train to keep your crew busy. The correct way to
do this is to build and print all of the trains needed before terminating them. So if you need
a dozen trains for a session, you must build twelve trains before you terminate any one train.
Terminating a train tells the program that the locomotives and cars in that particular train
have been delivered to their final locations and can be used again when building new trains.
So always build all, print all, THEN terminate each train after completing its run! It is okay
to build all trains, print all trains, and then use the "Save Builds" button and shut down the
program. Later you can restart the program and terminate the trains that completed their runs.
The correct time to terminate a train is when the train
actually arrives at its destination. Terminating a train before it completes it run means
that the operation program incorrectly believes that the locomotives and cars have been
delivered. It is better to build and print twelve trains and then later find out that only
nine trains completed their runs. You would then terminate nine trains, and leave the other
three for next time. Or if you wish you could reset any trains
that didn't depart from their terminal. Reseting trains really isn't necessary, the trains
that didn't run during this session could run the during the next session.
An alternate method is to build, print, and use the "Move" button for each train to
track the actual movement of the trains during your session. As long as the trains on your
layout match the locations in the program you can build a new train.
[Click to go back to TOC]
Operations Windows
All of the Operations windows can be resized and placed to your liking. You can also adjust
the table columns widths and the order the columns are displayed. When you close the window,
the size and window location on your screen is saved.
[Click to go back to TOC]
Operations Web Access
You can also access some of the OperationPro™ windows from a browser. For more
information see
JMRI Web Access.

By enabling frames found in
Preferences
Web Server, you can access OperationPro™ windows like the
Yardmaster
which shows the work for a location.

End of OperationsPro™ help.